TECHIE NEWS

Remote Desktop Error – An Authentication error has occurred – CredSSP encryption oracle remediation – SOLUTION

CredSSP encryption oracle remediation

CredSSP encryption oracle remediation

Error


We recently had an issue with remote desktop connection to a Windows 2012 server from a Windows 10 Pro client computer that was recently updated.

An Authentication error has occurred.
The function requested is not supported.
Remote computer: <servername>
This could be due to CredSSP encryption oracle remediation

CredSSP updates for CVE-2018-0886

Solution


We had to create a registry key HKLM\Software\Microsoft\Windows\CurrentVersion\Policies\System\CredSSP\Parameters; both the CredSSP and Parameters keys had to be created, and then create the AllowEncryptionOracle DWORD and give it a value of 2, worked for me on both Windows 7 and Windows 10 Pro computers. A reboot was not needed.
Registry path: HKLM\Software\Microsoft\Windows\CurrentVersion\Policies\System\CredSSP\Parameters
Value: AllowEncryptionOracle
Data type: DWORD

Have Questions?


Leave us a comment or visit: https://southjerseytechies.net/

South Jersey Techies, LLC is a full Managed Web and Technology Services Company providing IT Services, Website Design Services, Server Support, Network Consulting, Internet Phones, Cloud Solutions Provider and much more. Contact for More Information.

To read this article in its entirety click here.

Replicated Folder Offline in DFSR

We recently had an issue with and Active Directory DFSR – The replicated folder has been offline for too long at Site error for a Windows Server Standard 2016 single Domain Controller environment.

Event ID 4012 – DFSR – The DFS Replication service stopped replication on the folder with the following local path: C:\Windows\SYSVOL\domain. This server has been disconnected from other partners for 149 days, which is longer than the time allowed by the MaxOfflineTimeInDays parameter (###). DFS Replication considers the data in this folder to be stale, and this server will not replicate the folder until this error is corrected.

To resume replication of this folder, use the DFS Management snap-in to remove this server from the replication group, and then add it back to the group. This causes the server to perform an initial synchronization task, which replaces the stale data with fresh data from other members of the replication group. .

Summary


Consider the following scenario:

You want to force the non-authoritative synchronization of SYSVOL on a domain controller. In the File Replication Service (FRS), this was controlled through the D2 and D4 data values for the Burflags registry values, but these values do not exist for the Distributed File System Replication (DFSR) service. You cannot use the DFS Management snap-in (Dfsmgmt.msc) or the Dfsradmin.exe command-line tool to achieve this. Unlike custom DFSR replicated folders, SYSVOL is intentionally protected from any editing through its management interfaces to prevent accidents.

How to perform a non-authoritative synchronization of DFSR-replicated SYSVOL (like “D2” for FRS)

  1. In the ADSIEDIT.MSC tool modify the following distinguished name (DN) value and attribute on each of the domain controllers that you want to make non-authoritative:CN=SYSVOL Subscription,CN=Domain System Volume,CN=DFSR-LocalSettings,CN=<the server name>,OU=Domain Controllers,DC=<domain>msDFSR-Enabled=FALSE
  2. Force Active Directory replication throughout the domain.
  3. Run the following command from an elevated command prompt on the same servers that you set as non-authoritative:DFSRDIAG POLLAD
  4. You will see Event ID 4114 in the DFSR event log indicating SYSVOL is no longer being replicated.
  5. On the same DN from Step 1, set:msDFSR-Enabled=TRUE
  6. Force Active Directory replication throughout the domain.
  7. Run the following command from an elevated command prompt on the same servers that you set as non-authoritative:DFSRDIAG POLLAD
  8. You will see Event ID 4614 and 4604 in the DFSR event log indicating SYSVOL has been initialized. That domain controller has now done a “D2” of SYSVOL.

More Information


If setting the authoritative flag on one DC, you must non-authoritatively synchronizeall other DCs in the domain. Otherwise you will see conflicts on DCs, originating from any DCs where you did not set auth/non-auth and restarted the DFSR service.For example, if all logon scripts were accidentally deleted and a manual copy of them was placed back on the PDC Emulator role holder, making that server authoritative and all other servers non-authoritative would guarantee success and prevent conflicts.

If making any DC authoritative, the PDC Emulator as authoritative is preferable, since its SYSVOL contents are usually most up to date.

The use of the authoritative flag is only necessary if you need to force synchronization of all DCs. If only repairing one DC, simply make it non-authoritative and do not touch other servers.

This article is designed with a 2-DC environment in mind, for simplicity of description. If you had more than one affected DC, expand the steps to includeALL of those as well. It also assumes you have the ability to restore data that was deleted, overwritten, damaged, etc. previously if this is a disaster recovery scenario on all DCs in the domain.

Have any questions?

Call us at: 856-745-9990 or visit: https://southjerseytechies.net/

South Jersey Techies, LLC is a full Managed Web and Technology Services Company providing IT Services, Website Design Services, Server Support, Network Consulting, Internet Phones, Cloud Solutions Provider and much more. Contact for More Information.

To read this article in its entirety click here.

RingCentral Mobile Users Without A Digital Line

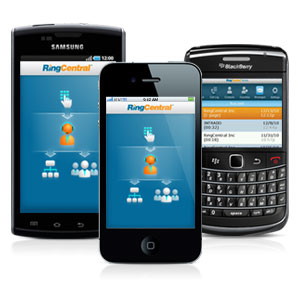
Ring Central allows your employees to communicate anywhere, anytime on any device. In the past, Ring Central has not been enforcing licenses for employees that are using the system on mobile devices without a digital line. That is about to change. 


RingCentral Mobile Users FAQ


Why are you now charging for Mobile Users without a digital line?
Mobile Users without a digital line can make and receive calls and have access to many of the same capabilities as users with digital lines. These include RingCentral Glip, RingCentral Meetings, integrations and more. With this advanced functionality, these users have begun using the product the same way they would a digital line.

Consequently, Mobile Users using the system without a digital line will now be considered part of the total licensed users and will be charged based on their account’s current cost per digital line.

Will I be charged for using the Mobile App?
No. Mobile Users with a digital line are not affected, and can continue to use the Mobile App for no additional charge. This change only affects Mobile Only Users without a digital line.

When does this take effect?
Please refer to the email notification for the timing of this change for your account.

What will be the cost?
The cost for each Mobile User without a digital line will be the same as users who have a digital line. If you want to add digital lines for your Mobile Users at no additional cost (excluding taxes and fees), please contact your RingCentral account manager.

What are the benefits to Mobile Users of adding a digital line?
By adding a digital line, the Mobile User will get full access to RingCentral’s softphone (inbound and outbound) and the ability to use a desk phone if needed. If you are interested, please contact your account manager by calling  800-591-7973.

How do I know which Mobile Users without a digital line will be billed at any given time?
System administrators can log into their RingCentral account and see this information under the billing tab. See more details here. If a mobile user without a digital line is inactive or is only used for internal company calls, within a given month, there will be no charge.


KB4090913: Windows 10 Device Fix

We have had a number of users that were unable to use their keyboard or mouse on their Windows 10 computer. Microsoft released an update that addresses the issue yesterday.

Addresses an issue in which some USB devices and onboard devices, such as a built-in laptop camera, keyboard, or mouse, stop working. This may occur when the Windows Update servicing stack incorrectly skips installing the newer version of some critical drivers in the cumulative update and uninstalls the currently active drivers during maintenance.

Known issues in this update


Symptom

Workaround

Windows Update History reports that KB4054517 failed to install because of error 0x80070643.

Even though the update was successfully installed, Windows Update incorrectly reports that the update failed to install. Select Check for Updates to verify that there are no additional updates available. You can also type About your PC in the search box on the taskbar to verify that your device is using the expected OS build. Microsoft is working on a resolution and will provide an update in an upcoming release.

Because of an issue that affects some versions of antivirus software, this fix applies only to computers on which the antivirus ISV updated the ALLOW REGKEY.

Contact your antivirus manufacturer to verify that their software is compatible and that they have set the following REGKEY on the computer: Key=”HKEY_LOCAL_MACHINE”Subkey=”SOFTWARE\Microsoft\Windows\CurrentVersion\QualityCompat” Value Name=”cadca5fe-87d3-4b96-b7fb-a231484277cc” Type=”REG_DWORD” Data=”0x00000000″

After installing this update, some devices may fail to start, and return INACCESSIBLE_BOOT_DEVICE. This issue occurs when the windows update servicing stack incorrectly skips installing the newer version of some critical drivers in the cumulative update and uninstalls the currently active drivers during maintenance.

Microsoft is working on a resolution and will provide an update in an upcoming release. Workaround steps are available in KB4075150.

Because of an AD FS server issue that causes the WID AD FS database to become unusable after a restart, the AD FS service may fail to start.

There is no way to undo the database corruption. To return your AD FS server to a functional state, you must restore it from a backup.

How to get this update


This update will be downloaded and installed automatically from Windows Update. To get the stand-alone package for this update, go to the Microsoft Update Catalog website.

File information

For a list of the files that are provided in this update, download the file information for cumulative update 4090913.

Have any questions?

Call us at: 856-745-9990 or visit: https://southjerseytechies.net/

South Jersey Techies, LLC is a full Managed Web and Technology Services Company providing IT Services, Website Design Services, Server Support, Network Consulting, Internet Phones, Cloud Solutions Provider and much more. Contact for More Information.

To read this article in its entirety click here.

Windows 10 SSTP VPN Manual Setup Tutorial

Manual Setup

Step 1

Go to your start menu, and type in “network”.  In the search results click on “Network and Sharing Center”

Step 2

Select Connect to a workplace and click Next

Step 3

Click on Use My Internet Conection (VPN)

Step 4

Enter in the internet address (provided by your IT Professional), Name then Create

Step 5

Network and Sharing Center window should still be opened.  Click on Change Adapter Settings

Step 6

Right Click on the new connection you made, then go to Properties

Step 7

Go to the Security Tab, and change your properties to be the same as the below image. Press OK once done.

Step 8

Right Click the Connection and choose “Connect” option.

Step 9

You will be prompted for your username and password for your VPN. (provided by your IT Professional). Enter them as provided. ex. DOMAIN\username and password.

After a few seconds it will connect and show you “Connected” status.

Step 10

You can also check the VPN status in the Network applet (the icon in your system tray at the bottom right).

Connecting the SSTP on Windows 10

Find the network connections icon in the bottom right corner of the screen (near the clock). The icon can be in the shape of computer display or wireless signal meter (you can see it on Step 10). Click on that icon. In the appeared list click on any network connection.
After that you will see another window with the connection list, click on theVPN connection (the connection name can be different, you have set it up on Step 5).
Click the “Connect” button under the connection name.

Disconnecting the SSTP on Windows 10

Find the network connections icon in the bottom right corner of the screen (near the clock). The icon can be in the shape of computer display or wireless signal meter (you can see it on Step 10). Click on that icon. In the appeared list click on any network connection.
After that you will see another window with the connection list, click on theVPN connection (the connection name can be different, you have set it up on Step 5).
Click the “Disconnect” button under the connection name.

Have questions?

Get answers from Microsofts Cloud Solutions Partner!
Call us at: 856-745-9990 or visit: https://southjerseytechies.net/

South Jersey Techies, LL C is a full Managed Web and Technology Services Company providing IT Services, Website Design Services, Server Support, Network Consulting, Internet Phones, Cloud Solutions Provider and much more. Contact for More Information.

How to leave a Google review for South Jersey Techies, LLC

Google lets you write a review or describe a place

On Google Maps, you can write reviews for South Jersey Techies. Your reviews are public, so anyone can see what you write. You can’t add an anonymous review.

To leave us a review click here

Note: Google has a zero tolerance policy for fake reviews. Google reserves the right to take down any review that they deem to be fake or which doesn’t comply with their user content and conduct policies.

Why we want you to leave a review on Google?


At South Jersey Techies, we recognize the challenges businesses face and can help you improve your technology with affordable professional Managed IT Services and Website Maintenance Plans.We’ll help your company save time and money while giving you excellent service and tech support. In return we would like to know if we are doing our optimum best to help you and your business thrive

Here are some other things that others will be able to see:

> Your name that appears on your About me page
> Other reviews you’ve written on Google Maps
> Photos you’ve added to Google Maps

Tip: If you like adding place information or writing reviews, join the Local Guides community. By contributing to Google Maps, you can earn points and get a special badge next to your reviews. For more info and answers to your other questions, check out the Local Guides forum.

[tabby title=”Computer”]

Find other people’s ratings or reviews

  1. On your computer, open Google Maps.
  2. Search for a place.
  3. Below the search box, you’ll see a rating.
  4. To read all the reviews for the place, to the right of the rating, click on the total number of reviews.

Tip: If you want to see a translated review in another language, go to your languages and then on the right, click Edit Edit and then choose a language.

Add a rating or review

  1. On your computer, open Google Maps and make sure you’re signed in.
  2. Search for a place.
  3. Click Write a review.
  4. In the window that appears, click the stars to score the place. If you want, you can also write a review.


[tabby title=”Android”]

Find or share other people’s ratings or reviews

  1. On your Android phone or tablet, open the Google Maps app Google Maps.
  2. Search for a place or tap it on the map
  3. At the bottom, tap the place’s name or address.
  4. At the top, tap Reviews.
  5. To share a review, go to the bottom of the review and tap Share Share.

Tips:

> To find high-quality reviews, look for Local Guides . A star means a Local Guide wrote the review.

> If you want to see a translated review in another language, go to your languages and then on the right, click Edit Edit and then choose a language.

Add a rating or review

  1. On your Android phone or tablet, open the Google Maps app Google Maps.
  2. Search for a place or tap it on the map.
  3. At the bottom, tap the place’s name or address.
  4. At the top, tap Reviews and then scroll down until you see 5 empty stars.
  5. Tap the stars to score a place or write a review.

[tabby title=”iPhone & iPad”]

Find or share other people’s ratings or reviews

  1. On your iPhone or iPad, open the Google Maps app Google Maps.
  2. Search for a place or tap it on the map.
  3. At the bottom, tap the place’s name or address.
  4. Scroll down until you see reviews.
  5. To share a review, go to the bottom of the review and tap Share .

Tips:

> To find high-quality reviews, look for Local Guide  . A star means the review was written by a Local Guide.

> If you want to see a translated review in another language, go to your languages and then on the right, click Edit Edit and then choose a language.

Add a rating or review

  1. On your iPhone or iPad, open the Google Maps app Google Maps.
  2. Search for a place or tap it on the map.
  3. At the bottom, tap the place’s name or address.
  4. Scroll down until you see 5 empty stars.
  5. Tap the stars to score a place or write a review.

[tabbyending]

[tabby title=”See Review”]

If you have Location History turned on, you can see a list of places you’ve visited or places that you might want to review.

  1. On your iPhone or iPad, open the Google Maps app Google Maps.
  2. In the top left, tap the Menu Menu and then Your contributions.
    • To see places that you’ve already reviewed, choose Reviews.
    • To see places you might want review, choose Contribute.

[tabby title=”Share/Edit/Delete Review”]

  1. On your iPhone or iPad, open the Google Maps app Google Maps.
  2. In the top left, tap the Menu Menu and then Your contributions and then Reviews.
  3. Find the review you want to share, edit, or delete.
    • Share your review: Tap on your review and then scroll down until you see your review and then at the bottom of your review, tap Share .
    • Edit your review: Tap More More and then Edit review.
    • Delete your review: Tap More More and then Delete review.

[tabby title=”Report a Review”]

  1. On your iPhone or iPad, open the Google Maps app Google Maps.
  2. Find the review that violates Google’s review policies.
  3. Next to the review, tap More More and then Report review.

[tabbyending]

Have questions?

Get answers from Microsofts Cloud Solutions Partner!
Call us at: 856-745-9990 or visit: https://southjerseytechies.net/

South Jersey Techies, LL C is a full Managed Web and Technology Services Company providing IT Services, Website Design Services, Server Support, Network Consulting, Internet Phones, Cloud Solutions Provider and much more. Contact for More Information.

CALL US NOW!