Back to Top

Tech, Web, Cloud & Cabling Services

Category: Windows 8.1

How to install and activate Windows 10 using your Windows 7 or Windows 8 product key

windowsproductkey

Summary

Microsoft recently announced the first major update to Windows 10 which includes numerous improvements for end users and businesses. One of the welcome improvements is the compliance check when qualifying for the Windows 10 upgrade. Previously, Windows 7, Windows 8.0 and Windows 8.1 users needed to have either of those versions Windows installed and activated in order to qualify for the free upgrade offer. For persons who needed to perform a clean install of Windows 10 from the outset, it was a two step process of first validating the machine through the upgrade routine, ensure the Windows 10 Upgrade was activated, then proceed to perform a Reset. With the latest November Update (1511), users no longer have to go through this process. In this article, we take a look at how to install and activate Windows 10 using your Windows 7 or Windows 8 product key.

Details

For the purposes of this article, We are using a Windows 7 license to perform clean install using Windows 10.

Please note: The copy of Windows 10 you download must correspond with the edition of Windows you are licensed for:

  • Windows 7 Starter, Home Basic, Home Premium, Windows 8.0 Core, Windows 8.1 Core must use a Windows 10 Home ISO
  • Windows 7 Professional, Windows 7 Ultimate, Windows 8.0 Pro, Windows 8.1 Pro must use a Windows 10 Pro ISO
  • If you are using Windows 7 Enterprise, Windows 8.0 Enterprise, Windows 8.1 Enterprise editions you won’t be able to use the free upgrade offer.

Review complete instructions how to download the Windows 10 ISO in the following article:

How to download official Windows 10 ISO files

Review instructions here how to start a clean install if you desire, if you want to perform an upgrade, clickhere.

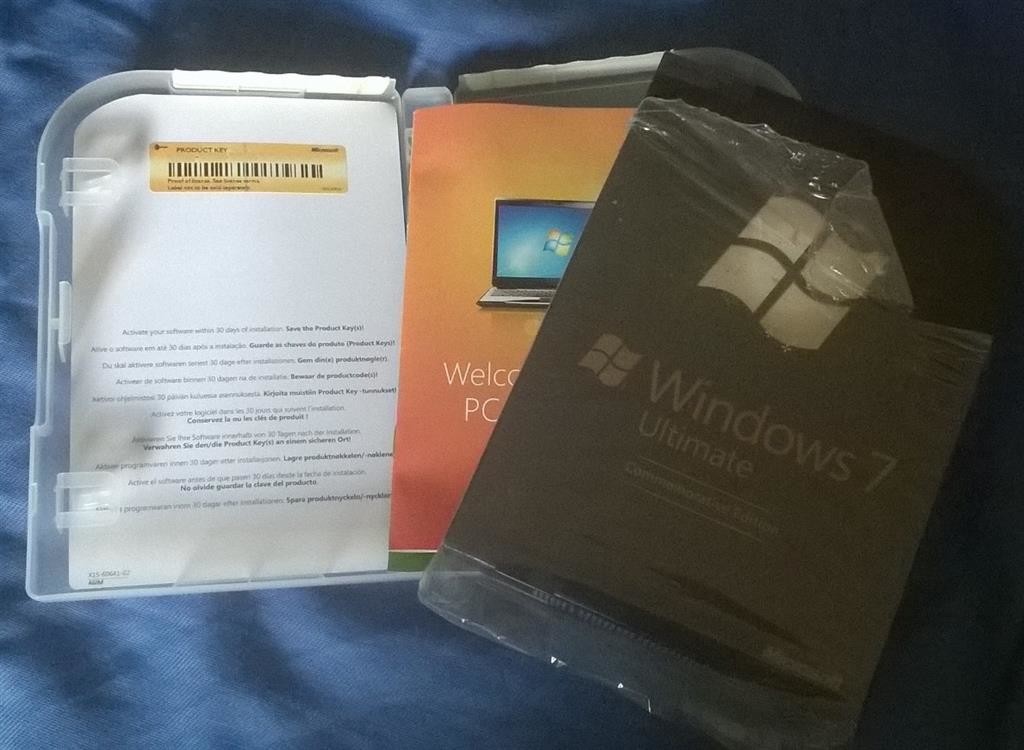
Have your Windows 7 or 8/8.1 product key ready. If you purchased a retail license, you can find the product key within the product box. The Windows 7 product key is normally found on an orange sticker attached to a pamphlet inside the box. The Windows 8/8.1 product key is found on a small business size card. See examples below. Please note, you can also use your OEM product key too if Windows came preinstalled on your computer.

Retail:

retail

Windows 8/8.1

windows-8

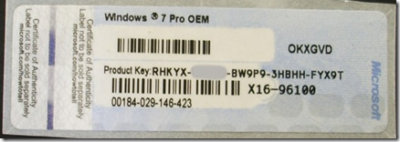
If your computer came preinstalled with an OEM version of Windows 7, look for the Certificate of Authenticity sticker attached to the chassis of your computer. Normally this can be at the side or top of the system unit. For laptops, look at the bottom of the chassis or inside the battery or memory compartment. It looks like the following:

productkey

If you are running an OEM preinstalled Windows 8/8.1 license, Windows 10 setup should automatically detect the product key and install it automatically.

With Windows 8, Microsoft had changed from stickers that have the product key that the user has to type in when installing the operating system to new BIOS embedded product keys. The idea is that by eliminating the sticker, you eliminate one of the easier ways for nefarious users to get a legitimate product key. Eliminating the product key sticker also removes any worry that the sticker might get damaged while at the same time eliminating the long and irritating process of typing in various letters and numbers when installing the operating system.

If the user has to reinstall the operating system on a machine that came with Windows 8, the installation process automatically grabs the software product key from the motherboard BIOS with no input from the user. This means that those familiar Windows product key stickers will no longer appear on the Windows 8 computers.

If you have lost your Windows product key, Microsoft recommends you purchase a new one. 

http://windows.microsoft.com/en-gb/windows/where-find-windows-product-key#where-find-windows-product-key=windows-7

You might be lucky by contacting Microsoft Support who might be sympathetic to your situation:
http://support2.microsoft.com/kb/326246/en-us

Contact the Microsoft store:
US: http://www.store.microsoft.com/Help/Contact-Us
1-877-696-77861-877-696-7786 FREE
Canada: https://www.microsoftstore.ca/shop/en-CA/Contact-Us

Microsoft Support Contact Information:
http://support.microsoft.com/contactus/?ws=support

General Microsoft contact site: http://support.microsoft.com/contactus#tab0

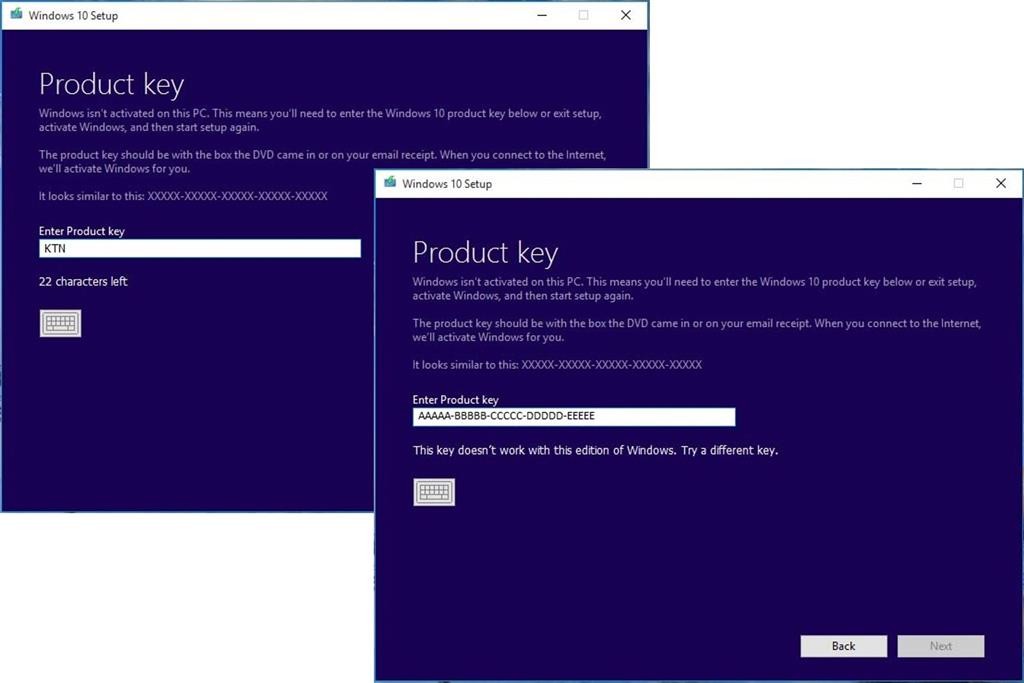
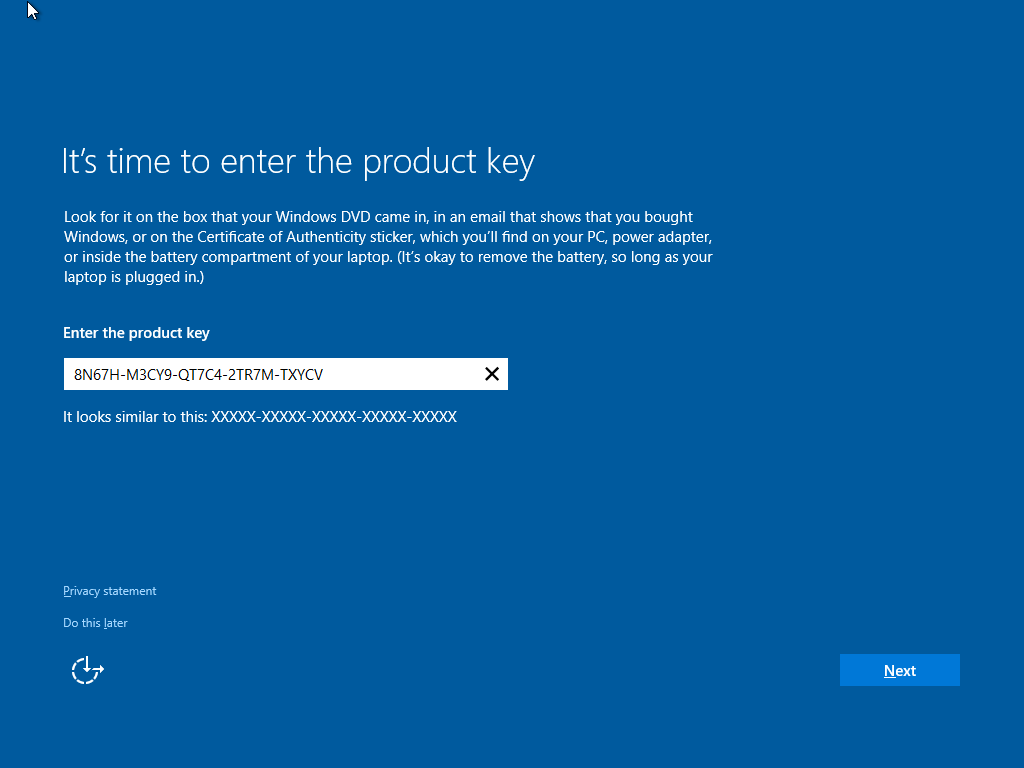
If you are prompted to enter a product key during Windows 10 setup (November Update aka 1511) from within a running version of Windows, your Windows 7 or Windows 8/8.1 product key will not work. Instead, you should activate your Windows 7 or Windows 8/8.1 first, then re-run Windows 10 setup. You will not be prompted to enter a product key.

windows10productkey

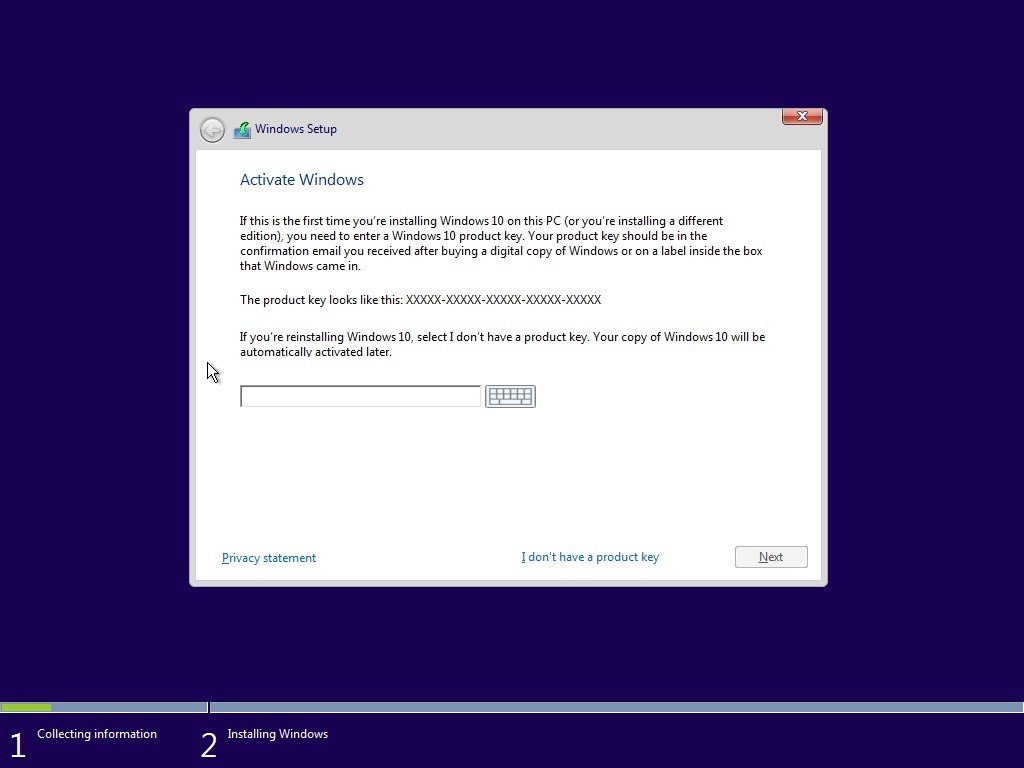
During Setup: If you are prompted to enter a product key when you boot from the Windows 10 setup installation media, click the option ‘I don’t have a product key’. Select the appropriate edition you are licensed for.

Windows 7 Starter, Home Basic, Home Premium, Windows 8.0 Core, Windows 8.1 Core will install Windows 10 Home ISO

  • Windows 7 Professional, Windows 7 Ultimate, Windows 8.0 Pro, Windows 8.1 Pro will installWindows 10 Pro ISO

setup

  • Out of Box Experience, if you are prompted for a product key, Click Do this Later.Complete the installationReview instructions how to activateHow to troubleshoot Product Activation in Windows 10windowstroubleshootSuppose you decide to reinstall Windows 7 or Windows 8?You can reinstall or restore a system image of your previous version of Windows and continue using it, this will not affect the validity of the license.

    If you continue to experience problems entering your product key:

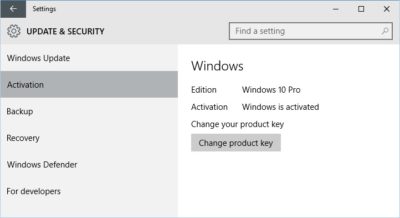
    Click Start > Settings (press Windows key + i) > Update & security > Activation then click Change product key

    windowsupdatekey

    OR

    Press Windows key + X

    Click Command Prompt (Admin)

    At the command prompt, type the following commands:

    slmgr.vbs -ipk xxxx-xxxx-xxxx-xxxx (allows you to replace the current product key with the specified)

    xxxx-xxxx-xxxx-xxxx – represents your product key

    Hit Enter on your keyboard

    Exit the command prompt

    Restart your computer

    Wait a while and it should activate, if not, give it a few days.

Have questions?

Get answers from Microsofts Cloud Solutions Partner!
Call us at: 856-745-9990 or visit: https://southjerseytechies.net/

South Jersey Techies, LL C is a full Managed Web and Technology Services Company providing IT Services, Website Design ServicesServer SupportNetwork ConsultingInternet PhonesCloud Solutions Provider and much more. Contact for More Information.

To read this article in its entirety click here.

Windows 10 will be available via USB flash drive or DVD

USB flash drives

There is a possibility that microsoft will be selling Windows 10 on USB flash drives.

As you may know, installing an operating system from a USB flash drive is easier and faster than installing it from an optical disc. A USB flash drive is not as bulky as an optical disc and doesn’t require an external case. You just take it out of your pocket, pull off the cap, and insert it into your computer’s USB port. USB flash drives are faster than optical drives too. USB flash drives have read and write speeds that measure in 10x megabytes per second (MB/s), while optical disc read and write speeds measure in 1x MB/s.

With that in mind, it’s no surprise that there are a multitude of articles on the web that describe how to create a Windows installation package on a USB flash drive. Microsoft even provides a tool that facilitates the procedure.

With Windows 10 on the horizon, there have been rumors floating around the web that in addition to making the upgrade available as a download, Microsoft will also be selling the retail copies of the new operating system on both DVD and USB flash drive.

As a regular follower of the German website WinFuture, I recently encountered an article that indicates that Microsoft will indeed be selling the 32-bit and 64-bit versions of Windows 10 Home and Pro on USB flash drives in addition to the DVD option. Having a USB flash drive option makes sense, because tablets don’t come with optical disc drives.

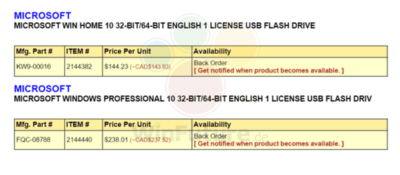
The WinFuture article contained a screen shot (Figure A) showing catalog details of the USB offerings. As you can see, it appears that the USB flash drive will contain both the 32-bit and 64-bit versions. Presumably, the USB flash drives will sell for the same price as the DVDs.

Figure Afigurea

Windows 10 Home and Pro will be sold on USB flash drives.

You can find a number of software reseller sites (mostly Canadian) with advertisements for the USB flash drive offerings of Windows 10 by Googling the part numbers shown in the screenshot: FQC-08788 for the Pro edition and KW9-00016 for the Home edition. However, keep in mind that we’ll have a clearer vision of the USB flash drive offerings once we get closer to the Windows 10 launch date of July 29th.

Have questions?

Get help from Microsofts Cloud Solutions Partner!
Call us at: 856-745-9990 or Visit: https://southjerseytechies.net/

South Jersey Techies, LLC is a full Managed Web and Technology Services Company providing IT Services, Website Design ServicesServer SupportNetwork ConsultingInternet PhonesCloud Solutions Provider and much more. Contact for More Information.

To read thsi article in its entirety click here.

Can’t Change Windows 7 Theme?

Can’t change the Windows 7 theme? Is your Windows 7 theme stuck on “classic”? If it is stuck, then you can try to apply a few fixes and see if if you can unstuck it! Often it is stuck, because your PC is configured to be optimized for best performance, rather than best appearance!


Windows

Overview

Configure PC for better Appearance
Start Windows 7 Themes Service
Problem: Themes Service Cannot Be Started

Use Visual Styles on Windows and Buttons

Often the reason why your Windows 7 theme could be stuck on classic is that your PC is configured to be optimized for better performance. I could imagine that some laptops are even pre-configured that way. Actually, it’s a good setting, but if you want a better appearance I can understand that it’s annoying to be stuck on “classic” theme. So, if you can’t change your Windows 7 theme, you might want to check your PC configuration first:

1. StepOpen the Control Panel

Control Panel


2.
Click on “System and Security”:

3. Step Click on “System”.

4. Step In the sidebar, click on “Advanced System Settings”:

5. Go to the tab “Advanced” and click on “Settings”:

System and Security


6. Step Scroll down the list, at the bottom double-check that the item “Use Visual Styles on Windows and Buttons” is checked. If this is not checked, your Windows 7 theme will be stuck on “classic” for a long time, because this completely disables your fancy visual Aero appearance.

Windows 7 Themes

This is also often the problem why people can’t seem to be able to active the Windows 7 Aero theme, because their PC is configured to be optimized for the best performance and not the best appearance.

Themes service is not started

If your Windows 7 themes service is not started your Windows 7 theme will be stuck on “classic”. You can’t change your Windows 7 theme when the theme service is disabled. So, let’s check if your themes service is up and running.

1. Step Click on “Start” and enter “services.msc” into the search field. Click on the item that appears.

2. Step Scroll down the list until you find the item “Themes” (or enter Themes while one item is selected)

3. StepYou will now see if the Themes service is running currently and what mode it is in (Automatic, Disabled, Manual):

If it’s currently “Disabled” or in “Manual” mode and not started, you have to start it manually and change the mode to “Automatic”.

4. StepDouble-click on “Themes” and from the dropdown select “Automatic”, click on “Start” and then on “Apply”.

Themes Properties

Have questions?

Microsoft’s Cloud Solutions Partner are here to help.
Call us at: 856-745-9990 or visit: http://southjerseytechies.net/

South Jersey Techies, LLC is a full Managed Web and Technology Services Company providing IT Services, Website Design ServicesServer SupportNetwork ConsultingInternet PhonesCloud Solutions Provider and much more. Contact for More Information.

To read this article in its entirety click here.


Surface Book pre-orders sold out at Microsoft’s online store

If you were still thinking about placing an order for a new Microsoft Surface Book, then you will have to look somewhere other than the Microsoft store.

surfacebook

While there doesn’t seem to be a massive supply issue with the new Apple iPhone 6s smartphone, in the past we have seen Apple products sell out quickly and deliveries move from days, to weeks, to months. It seems that Microsoft’s new Surface Book may be generating more interest than planned.

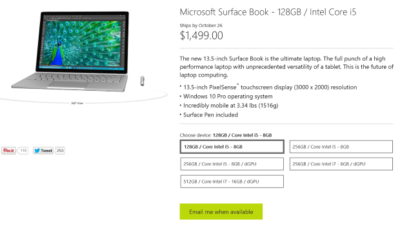
Last night I went to the online Microsoft Store to place an order for a base model Surface Book. I found that the only available status when choosing that model was, “Email me when available.” I jumped through the other four models and discovered the same thing. It seems Microsoft is sold out of pre-order stock for all models at its online store.

We reached out to Microsoft to try to find out more about stock status and when buyers could expect to place pre-orders. I also asked if there will be units in Microsoft retail stores on launch day, 26 October. Given that units are sold out online, we may even see people queue up for possible stock in stores.

A Microsoft spokesperson provided the following statement, “We’ve seen strong demand for Surface Book and have sold out of pre-order supply for October 26 availability. We will have limited quantities of Surface Book available in store on October 26 and will be updating online availability with new product ship dates soon.”

UPDATE: Microsoft updated its store and is no allowing customers to pre-order the five Surface Book variations. What you will find instead of an email me when available button is updated delivery expectations, ranging from five to six weeks for three models and seven to eight weeks for two models.

While I was disappointed that I couldn’t purchase a Surface Book through Microsoft directly, I found that Best Buy and Amazon will also be selling this new computer. Best Buy did not appear to be taking pre-orders, but I was able to purchase the Intel Core i5, 8GB, 128GB model from Amazon for $1,499.

The Amazon website does not appear to carry the 256GB i5 without dGPU or 256GB i7 models. The 256GB i5 with dGPU looks to be the only other model available for pre-order. The 512GB i7 model is on the site as an option, but redirects you to the Microsoft Store for purchase and it’s not avaialable there.

Have questions?

Get help from IT Experts/Microsofts Cloud Solutions Partner
Call us at: 856-745-9990 or visit: https://southjerseytechies.net/

South Jersey Techies, LLC is a full Managed Web and Technology Services Company providing IT Services, Website Design ServicesServer SupportNetwork ConsultingInternet PhonesCloud Solutions Provider and much more. Contact for More Information.

To read this article in its entirety click here.

Killer keyboard shortcuts to help you master Windows

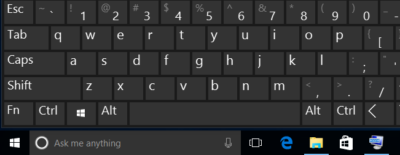
These Windows keyboard shortcuts help you navigate your PC faster, master documents, wrangle various virtual desktops, and shut down and secure a computer, using just a few keys.windows-keyboardDespite notable advancements in speech-recognition technology and voice input, and the popularity of tablets, the humble PC continues to be the workhorse device of choice for many workers around the world. And whether you’re an office-bound professional slouched behind a desktop PC, or a globetrotting executives armed with the latest ultrabook, the “physical” hardware keyboard continues to play a crucial role in productivity.The last thing you want in the heat of the moment is to fumble around for a mouse or have to take multiple steps to complete a task that could be done with a quick keyboard shortcut. Of course, learning and remembering such shortcuts can be hard work, and you’ll need to take some time to find the appropriate shortcuts for you.We’re here to assist. This list of valuable Windows keyboard shortcuts will help you work smarter and faster.

Keyboard shortcuts for the Windows surfer

windows-surfer

If you hope to master Windows keyboard shortcuts, you should start with the Windows desktop. The following shortcuts let you toggle between app windows and quickly resize them without having to reach for a mouse or align your apps.

  • Windows key (a.k.a., “Winkey“) + D.  Minimize all app windows and jump straight to the desktop. Hit the shortcut again to bring all apps back to the foreground.
  • Winkey + Comma. Take a quick peek at your desktop, and then release the keys to snap all apps back to the foreground.
  • Winkey + Left Arrow, or Winkey + Right Arrow. Dock your app windows to the left or right of the screen.
  • Winkey + Down Arrow, or Winkey + Up Arrow. Maximize or minimize a selected app. Or dock your app windows to the top or bottom of your display, when app windows are already docked to the left or right.
  • F11 – Toggle an active window in and out of full screen mode.
  • Ctrl + Esc – Bring up your Start menu. (This is particularly helpful if you use a keyboard that doesn’t have a Winkey.)

Windows keyboard shortcuts for the Kung Fu typer

These useful shortcuts help zoom the cursor around your page much quicker than if you use a mouse or trackpad.

  • Ctrl + Right Arrow, or Ctrl + Left Arrow. Move the cursor one word to the right or left.
  • Ctrl + Down Arrow, or Ctrl + Up Arrow. Move the cursor to the start or end of the next or previous paragraph.
  • Ctrl + Z, or Ctrl + Y. Undo or redo almost any action, as long as the app supports the feature.

Windows keyboard shortcuts for virtual desktop Jujutsu

Long a staple feature in Linux and the Mac, Microsoft finally officially incorporated virtual desktops into its Windows 10 OS. The indispensable feature lets you create additional desktops to better manage multiple app windows.

  • Winkey + Ctrl + D, or Winkey + Ctrl + F4. Create or close a virtual desktop.
  • Winkey + Ctrl + Left Arrow, or Winkey + Ctrl +Right Arrow. Toggle through your virtual desktops.
  • Winkey + Tab. Display the “Task View” interface for an overview of all virtual desktops. You can use the Arrow keys to toggle through desktops if you also hit Tab when in this mode. Hit Enter to jump to a selected desktop.

Windows keyboard shortcuts for the browser ninja

You’ve probably used a web browser for as long as you’ve had a computer, but do you take full advantage of keyboard shortcuts for browser navigation? These browser shortcuts all work the in latest versions of Internet Explorer, Microsoft Edge, Mozilla Firefox and Google Chrome.

  • Alt + D. Put the cursor into the browser’s address bar.
  • Ctrl + W, or Ctrl + T. Close or open a new browser tab.
  • Ctrl + Shift + T. Reopen the last browser tab you closed. (This comes in handy when if you hit Ctrl + W too quickly.)
  • Ctrl + Plus sign, or Ctrl + Minus sign. Zoom in and out on a web page. Reset the zoom level with Ctrl + 0.
  • Ctrl + Tab, or Ctrl + Shift + Tab. Toggle to the next browser tab from left to right, or from right to left.
  • Alt + Right Arrow, or Alt + Left Arrow. Browse forward or backward through recently visited websites. These shortcuts perform the same function as a browser’sForward and Back buttons.

Windows keyboard shortcuts for locking up and shutting down

This guide wouldn’t be complete without some shortcuts that help you shut down your PC and then lock things up.

  • Winkey + L. Immediately lock your PC.
  • Ctrl + Shift + Esc. Open the Task Manager to monitor app or forcibly shut down frozen programs.
  • Alt + F4. Close an active app. Using this shortcut key when your desktop is at the forefront invokes the “Shut Down Windows” prompt.

Have questions?

Get answers from Microsofts Cloud Solutions Partner!
Call us at: 856-745-9990 or visit: https://southjerseytechies.net/

South Jersey Techies, LL C is a full Managed Web and Technology Services Company providing IT Services, Website Design ServicesServer SupportNetwork ConsultingInternet PhonesCloud Solutions Provider and much more. Contact for More Information.

To read this article in its entirety click here.

Pro tip: Sort table data in a Word document

sort word

Microsoft Word


Sorting data in a Word document isn’t something you routinely do. On the other hand, presenting list and table data is, so the potential exists that one day you’ll want to sort something. The good news is that it’s easy to sort data in a table or a list. In this article, I’ll show you how to do just that. We’ll work through a few simple sorting examples. You can use most any table, or you can download the example .docx or .doc file.

Behind the scenes

Word relies on paragraphs when sorting, which seems a bit odd within the context of a table (or list). The paragraph formatting mark determines where one paragraph ends and the next starts. As you can see in Figure A, there’s no paragraph mark in a table. The end-of-cell markers denote the end of each cell’s content. The similar marker at the end of each row (outside the right border) is an end-of-row marker. These markers also contain cell and row formatting. When sorting a table, Word relies on the end-of-row marker to identify where one row ends and the next begins, the same way the paragraph mark does. (To see a document’s formatting symbols, click Show/Hide in the Paragraph group on the Home tab.)

Figure A

Table end-of-row markers are similar to paragraph markers.

Sort by the first column

We’ll start with the simplest sort possible; we’ll sort a table by the values in the first column. To do so, select, the table by clicking its move handle (the small square in the top-left corner). If you don’t see this handle, check the view. It’s available only in Print Layout and Web Layout. With the entire table selected, do the following:

  1. Click the contextual Layout tab. In the Data group, click Sort — or click Sort in the Paragraph group on the Home tab. In Word 2003, choose Sort from the Table menu.
  2. The resulting dialog does a good job of anticipating the sort. Notice that the Header Row option (at the bottom) is selected. As a result, the Sort By field is set to Species — the label in the first column’s header (Figure B).
    Figure B

  3. This is exactly what we want, so click OK. Figure C shows the sorted table.
    Figure C

Before we move on, let’s discuss the Type and Using options to the right. We didn’t need to change either, but sometimes you will. The Type options are Text, Number, and Date. Word usually defaults to the appropriate data type. You can force a specific type by choosing a different option other than the one Word assumes (but you’ll rarely have reason to do so). The Using options defaults to Paragraph — we talked about that earlier.

Sort by the second column

That first exercise was easy. Let’s complicate things a bit by sorting by the second column. Fortunately, it’s just as easy as the first. Repeat steps 1 and 2 from the first exercise. Then, do the following:

  1. In the resulting dialog, click the Sort By drop-down.
  2. Choose Common Name, the header label for the second column.
  3. Click OK. Figure D shows the results of sorting by the second column.
    Figure D

That wasn’t any more difficult that the first sort. Tell Word which column contains the values you want to sort by and click OK — that’s it!

Sort by multiple columns

With only two sort tasks under your belt, you’re beginning to see how simple the sorting process in Word can be. Let’s complicate things a bit so you can see how flexible this feature truly is. Let’s sort by the Class column and then sort the bird and mammal groups in a secondary sort. Repeat steps 1 and 2 from the first two exercises. Then, do the following:

  1. To sort by the Class, choose Class from the Sort By drop-down.
  2. To further sort each class group, click Common Name from the Then by drop-down (Figure E). You could add a third column to the sort if the results warranted the additional grouping.
    Figure E

  3. Click OK to see the results shown in Figure F.
    Figure F

What about lists?

You might be wondering how to sort the same data in list form. Word handles the list sort the same way — the exact same way. Highlight the list and click Sort in the Paragraph group on the Home tab. In the resulting dialog, check the header option and set appropriately (if necessary). Then, determine the sort order by choosing the fields (columns), appropriately.Figure G shows the result of sorting the same data in list form.

Figure G

Sort a columnar list the same way you sort a table.


Seven ways to sort and view Outlook email by accounts

Outlook


Most users manage more than one e-mail account. Outlook 2010 and 2013 automatically create individual folders for each account. If you’re still using Outlook 2007 or earlier, you can simulate this convenience, but you’ll have to set it up yourself. In this article, I’ll show you seven ways to sort or view email messages by their accounts. I’ll include instructions for 2010 and 2013; even if you need to sort by accounts, you might want to use these methods to sort by other criteria.

1. Create account-specific folders

You can simulate the account-specific Inbox configuration in Outlook 2010 and 2013 by creating new download folders for each account. Doing so is easy, and it’s probably the best way to manage multiple accounts in Outlook 2007 and earlier. You’ll create an account-specific folder as follows:

  1. Choose Account Settings from the Tools menu in Outlook 2007. (In Outlook 2010 and 2013, Account Settings are on the File tab.)
  2. Select the POP3 account you want to reconfigure.
  3. Click the Change Folder button. (This button isn’t available for IMAP accounts.)
  4. Use the resulting dialog to identify the folder you want to download your POP3 account mail to (Figure A) or create a new folder if it doesn’t already exist.
    Figure A

    Figure A
  5. Click OK and then Close.

After making this change, Outlook will download that account’s mail into the specified folder. You can create specific folders for every POP3 account you have.

Unlike the 2010/2013 configuration, all of your messages download into the same .pst file. In addition, Outlook will save copies of all sent messages in the default account, not in the account-specific folder.

2. Use a rule

Rules have been around for a long time. They’re commonly used to manipulate mail as it arrives. You can also use a rule to manipulate mail received from a specific account as follows:

  1. Select the Inbox.
  2. In Outlook 2003 and 2007, choose Rules and Alerts from the Tools menu. In Outlook 2010 and 2013, click the File tab and click Manage Rules & Alerts in the Account Information section. (Outlook 2010 and 2013 users won’t need this rule unless they choose to combine all accounts into the same Inbox. Although this is unlikely, I’m including the instructions to be as comprehensive as possible.)
  3. Click New Rule on the E-Mail Rules tab.
  4. In Outlook 2003 and 2007, use Check messages when they arrive. Outlook 2010 and 2013 users, select Apply rule on message I receive.
  5. Click Next.
  6. Check the through the specified account option.
  7. Click the specified link in the bottom pane (Figure B).
    Figure B

    Figure B
  8. Choose the account from the resulting drop-down, click OK, and then click Next.
  9. Check move it to the specified folder.
  10. Click the specified folder link in the bottom pane. Then, identify the folder to which you want to download mail from the specified account (Figure C), and click OK. You can create a folder at this point, if necessary.
    Figure C

    Figure C
  11. Click Next twice (you won’t want to include any exceptions to the rule most likely).
  12. Give the rule a name. I recommend a name that includes the account’s name, such as “Move message for account name.”
  13. Turn the message on if necessary.
  14. Select Run this rule now on messages already in “Inbox” (Figure D) if you want Outlook to move existing messages into the folder. Doing so can save a lot of time.
    Figure D

    Figure D
  15. Click Finish, and then click OK.

This rule works similarly to the account-specific folder tip in #1. If you’re not familiar with rules, take a minute to review the many conditions and actions; you can do a lot with rules.

3. Use the Account view option

You can use a view property to sort message by their accounts. In Outlook 2003 and 2007, choose Arrange By from the View menu and then select E-mail Account. The change is immediate, but its helpfulness in a busy Inbox is limited. You’ll probably find it more useful to combine this setting with other sorting methods, such as search folders and filters. After creating the main sort, apply this setting to further define the results by account. In addition, you can quickly apply this setting to all folders by modifying the default Messages view and then copying it. (For more complete instructions on applying this setting to all folders, read “Pro tip: Use standard and custom views to personalize an Outlook folder.”)

In Outlook 2010 and 2013, you can combine individual .pst files into one and download all mail into the same Inbox. You’ll find this setting in the Arrangement gallery on the View tab. (Click the More button to see all of the settings.)

4. Sort by the E-mail Account column

Similar to changing a view’s configuration, you can sort multi-account folders by accounts. You might find this alternative easier or preferable to creating or modifying a view. To add this column, do the following:

  1. Right-click the title bar (in the Mail window).
  2. Select Field Chooser from the resulting dialog.
  3. Choose All Mail Fields from the drop-down.
  4. Drag E-mail Account to the title bar (Figure E) and release it. If it’s not where you want it, drag it accordingly.
    Figure E

After adding the E-mail Account column, you can click it to sort all mail in the folder by their accounts.

5. Use a view

Both the Account view and adding the E-mail Account column will sort messages by accounts, but you’ll still see mail for all of your accounts. If you want to view mail from a single account, create a view. Then you can apply views to filter messages accordingly. To view messages from a single account using a filtered view, do the following:

  1. In Outlook 2003, choose Arrange By from the View menu. In Outlook 2007, choose Current View from the View menu. In Outlook 2010 and 2013, click the View tab and choose Manage Views from the Change View drop-down in the Current View group.
  2. Click New.
  3. Give the view a name. I recommend naming the view for the account.
  4. Select Table and All Mail and Post Folders (the default).
  5. Click OK.
  6. Click Filter.
  7. Click the Advanced tab in the resulting dialog.
  8. Choose All Mail fields from the Field drop-down, and then choose E-mail Account (Figure F).
    Figure F

  9. Choose is (exactly) from the Condition drop-down.
  10. Set the Value using the account’s name (Figure G).
    Figure G

  11. Click Add to List.
  12. Press OK twice.
  13. Click OK to close the Manage All Views dialog and return to the Mail window.

Repeat the above steps to create a custom view for each account. To view all the messages for only one account, choose the appropriate view from the Change View drop-down (in the Current View group).

6. Sort into search folders       billionphotos-1647683

Similar to filtering with a view, you can display account-specific mail in a search folder. The difference, of course, is the difference between a view and a folder. The view merely filters mail to determine what you see, but all of the messages are still there. A search folder contains links to only those messages that meet the folder’s search criteria. To create a search folder for this purpose, do the following:

  1. In Outlook 2003 and Outlook 2007, choose New from the File menu, and then select Search folder. In Outlook 2010 and 2013, click the Folder tab and then click New Search Folder in the New group.
  2. In the resulting dialog, choose Create a custom Search Folder (in the Custom section at the bottom of the list).
  3. Click Choose, and then name the new folder. I recommend that you name the folder for the account.
  4. Click Browse, exclude folders and subfolders you don’t want to search, and click OK. Doing so will speed up your search.
  5. Click Criteria, and then click the Advanced tab.
  6. Choose All Mail Fields from the Field drop-down and then choose E-mail Account.
  7. Choose is (exactly) from the Condition drop-down.
  8. Set the Value using the account’s name.
  9. Click Add to List.
  10. Click OK four times.

Create a folder for each of your accounts. To read the mail for an account, open that account’s search folder.

7. Format by account

Sometimes, a visual clue is all you need. When this is the case, apply a format to distinguish accounts as follows:

  1. In Outlook 2003 and 2007, choose Arrange By from the View menu. Choose Custom, and then select Automatic Formatting. In Outlook 2010 and Outlook 2013, click the View tab. Then, click View Settings in the Current View group. In the resulting dialog, click Conditional Formatting.
  2. Click Add and name the new View. I recommend that you name the view after the account.
  3. Click Condition.
  4. Click the Advanced tab.
  5. Choose All Mail Fields from the Field drop-down and then choose E-mail Account.
  6. Choose is (exactly) from the Condition drop-down.
  7. Set the Value using the account’s name.
  8. Click Add to List, and then click OK.
  9. In the Conditional Formatting dialog, click Font and change the formats accordingly. Changing the font’s color is a common choice.
  10. Click OK three times to return to the Mail window.

Outlook will update the folder immediately by applying the formats for the specified account.

About the .pst files

It might never matter to you, but should .pst management become an issue, keep the following in mind:

  • Outlook 2010 and 2013 download POP3 mail into separate (dedicated) .pst files. For each account, you’ll have a dedicated Inbox.
  • Outlook 2007 and earlier download all mail into the same .pst file, regardless of the changes you make for viewing the mail via the interface.

sjt


Have questions?

Our small business team is here to help.
Call us at: 856-745-9990

South Jersey Techies, LL C is a full Managed Web and Technology Services Company providing IT Services, Website Design ServicesServer SupportNetwork ConsultingInternet PhonesCloud Solutions Provider and much more. Contact for More Information.

 To read this article in its entirety click here.

Windows 10: The end of computing as we know it

IT leaders considering a Windows 10 migration as a cornerstone initiative risk having a focus that is a decade behind.windows 10

Microsoft and I have been “partners” in computing since my father brought home a strange beige box with MS-DOS 2.11 installed. I remember a few years later shuffling through a half-dozen 3.5-inch floppy disks and watching in amazement as my C:\> prompt was replaced with the seemingly magical Windows 3.0 user interface, kicking off years of computing bliss (and occasional frustration) with the famed Wintel alliance at my side.

Much as my early days of computing were defined by Microsoft, CIOs, and even average computer-using “civilians,” hung on the company’s every announcement. A Service Pack release, let alone a new version of Windows, was a cornerstone item in most IT project portfolios. In the past few years, a confluence of developments brought us to today, where Windows 10 — Microsoft’s soon to be latest and greatest OS update — barely registers on most CIOs’ radars.

The end of desktop dominance

Sales of traditional desktops and laptops, and now even tablet computers, have been fading for several years. Perhaps the greatest contributor to this trend is the rise of hosted applications, whether they’re public web apps like Gmail, heavy-duty enterprise applications accessed through a browser, or cloud offerings. Increasingly, Windows is merely a portal to get to the web-based tools we need to get our jobs done.

Even the web browser, once the subject of complex anti-trust lawsuits and one of the greatest “battles” in technology history, has become largely irrelevant. Whether Chrome, Firefox, IE, or Safari is the “weapon of choice,” they’re now about as relevant to how we consume computing services as a Samsung TV vs. a Sony TV is to experiencing the latest episode of Game of Thrones.

The failed “Windows Everywhere” gambit

Microsoft did something bold with Windows 8 by attempting to create an OS that transparently adapted to the user’s device. Dock your tablet, and the OS would theoretically adapt to a keyboard and mouse-centric computing experience. For developers, write a single “Modern” app and easily run it on a variety of Microsoft products from Xboxes to phones.

Unfortunately, the gamble failed. Windows 8 was panned by enterprise customers, most of whom migrated from XP to Windows 7 as support for XP ended, even though Windows 8 was an available option. Consumers were confused by the new user interface, and developers opted to follow the money to the Android and iOS platforms.

Windows 10 promises to rectify many of the failures of Windows 8, much as Windows 7 helped the company regain its footing after stumbling with Vista. However, we’re in a very different place than the summer of 2009, when the iPhone was still largely scoffed at as a “serious” enterprise device, and most corporate software still ran on fat clients that necessitated a capable desktop. The world was clamoring for a better Windows; now, most of that excitement is reserved for the latest Android device or iPhone.

Freeing Windows

Microsoft seems to have recognized this trend, and has made upgrades to its desktop OS free for consumers and made its crown jewel, Microsoft Office, available on platforms ranging from Android phones, to Mac desktops, to web browsers. Rather than a destination in itself, the desktop is now a gateway to a company’s cloud offerings like iTunes, Azure, Siri, and Cortana. Even Google is in on this game, offering its own platform with just enough muscle to get a user online and connected to Google’s portfolio of services.

The bottom line for IT leaders

Even though Windows 10 may be relevant to your organization, it doesn’t mean you should let Microsoft define your enterprise computing strategy. It seems even the vaunted company realizes that Windows is little more than a gateway to higher value services. As IT leaders, we need to make sure we’ve acknowledged the same trend.

Have questions?

Get help from Microsoft’s Cloud Solutions Partner.
Call us at: 856-745-9990 or visit: https://southjerseytechies.net/

South Jersey Techies, LLC is a full Managed Web and Technology Services Company providing IT Services, Website Design ServicesServer SupportNetwork ConsultingInternet PhonesCloud Solutions Provider and much more. Contact for More Information.

To read this article in its entirety click here.

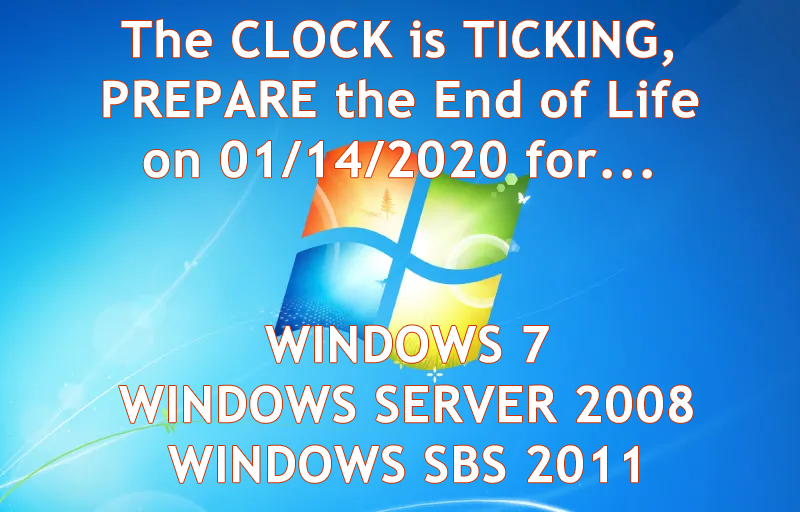
End of Life Windows 7, Server 2008 R2, & Small Business Server 2011

The End of Life for Windows 7, Server 2008 R2, & Small Business Server 2008 + 2011

End of Life Windows 7, Server 2008 R2, & Small Business Server 2011
[wpdevart_countdown text_for_day=”Days” text_for_hour=”Hours” text_for_minut=”Minutes” text_for_second=”Seconds” countdown_end_type=”date” end_date=”13-01-2020 23:59″ start_time=”1556805309″ end_time=”0,1,1″ action_end_time=”hide” content_position=”center” top_ditance=”10″ bottom_distance=”10″ countdown_type=”button” font_color=”#000000″ button_bg_color=”#3DA8CC” circle_size=”130″ circle_border=”5″ border_radius=”8″ font_size=”30″ countdown_font_famaly=”monospace” animation_type=””][/wpdevart_countdown]

Microsoft has announced that its support for Windows 7, Windows Server 2008 R2, and Small Business Server (SBS) 2011 will be coming to an end on January 14, 2020.

What does that mean for you? First, security patches and updates will no longer be implemented, leaving Windows 7 workstations and servers susceptible to security breaches. On January 13, 2015, Microsoft ended mainstream support for Windows 7, but now extended support is ending as well. Extended support is still safe to use until 2020 currently. Normally Microsoft would add new features during the mainstream support phase, but they will not be being doing this anymore. They will however, continue to patch any security treats. South Jersey Techie’s strongly recommends upgrading your business’s servers and workstations before the January 2020 deadline- and to start planning now to avoid the urgency of the deadline. Businesses in the healthcare industry will be impacted by the changes in relation to HIPPA violations if their server isn’t updated before the deadline. The deadline will be here before you know it and updating an IT infrastructure is a large task and shouldn’t be put off until the last minute.

What are the next steps for your business? Many of our clients are starting to upgrade now or are planning to include the upgrades in their 2019 budget. Send us an email or give us a call and we will evaluate your line of business software for Windows 10 and upgraded server compatibility. If your company decides to upgrade its old server and workstations to meet the January 2020 deadline, South Jersey Techie’s has the reliable solutions and experienced technicians you need for managing the data migration and even the retired hardware. You can have peace of mind knowing your old data will be securely erased and destroyed.

Unsure if this deadline will affect your business? South Jersey Techie’s can review your server for you and determine its end of life date or if it will be affected by the 2020 end of support date. If you have any questions or concerns about your office and the 2020 end of support date, please give us a call today: (856)745-9990.

GET STARTED WITH A NEW WINDOWS 10 PC

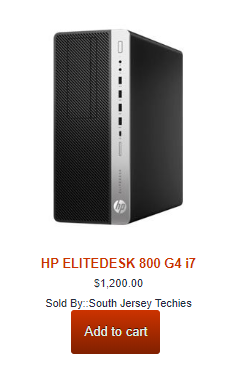
HP ELITEDESK 800 G4 – SFF – CORE I7
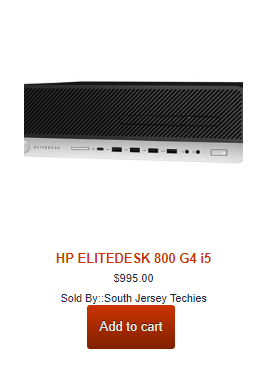
HP ELITEDESK 800 G4 – SFF – CORE I5
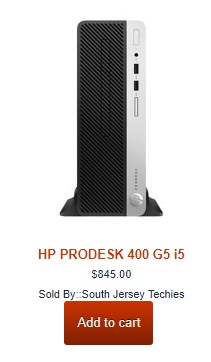
HP ProDesk 400 G5 – SFF – Core i5 8500

Can’t Find What You’re Looking For?

Whether you are upgrading an existing device, buying a new one, or just need support deploying, we have the help you need.


How to take control of your privacy in Windows 10

Where do you draw the line on personal privacy? The right options are different for everyone. This guide shows the privacy settings that will help you to create the right balance of privacy and convenience in Windows 10.

windows-10-privacy-blinds

Over the past year, We’ve read countless “privacy guides” for Windows 10. Most are well-intentioned, but they invariably take a simplistic approach to privacy: Just turn off every switch in the Privacy section of the Settings app.

If you do that, you’re not understanding the privacy landscape, which encompasses far more than just those settings. You’re also missing some important additional steps.

Windows 10 is a mix of software and services. With every session, a Windows 10 device exchanges a great deal of information with Microsoft’s servers. That’s neither unusual nor alarming. Microsoft’s chief rivals, Google and Apple, are also blending services into their software, with the goal of making your life easier and making that software more reliable.

So are other tech companies that you don’t think of as software companies: Amazon, with the Echo. Tesla, with its self-updating, software-driven cars. Your thermostat and your home security system.

There’s something profoundly satisfying about a service that anticipates your every move, reminding you when to leave for an appointment to arrive on time, or to pick up flowers for your anniversary tomorrow. Your digital personal assistant, whether it’s Siri or Cortana or Alexa or Google, needs to be able to see your calendar and contacts to make that magic happen.

But when that sort of personal attention goes too far, it “crosses the creepy line,” to use a phrase that Eric Schmidt probably regrets uttering when he was Google’s CEO.

The thing about that line is that it’s drawn in a different place for everyone. There are people who are thrilled at the idea that their PC or mobile device is so familiar with their actions that it can anticipate what they’ll do next. I know others who would like to build a virtual Faraday cage around their computing hardware so that none of their personal details can escape.

Both of those viewpoints, and everything in between, are perfectly valid. That’s why the software and services we use are loaded with switches and dials designed to help you take control of their potential privacy impact.

In this post, We’ll walk you through the big privacy questions for Windows 10, with enough context to help you decide which settings are right for you.

Note that this guide assumes you are using Windows 10 on a personal PC or one in your small business. If you are in an enterprise setting, or if you are in a regulated industry, you should seek professional assistance to ensure that you’re meeting proper standards.

Let’s start with the part of your PC that has the biggest impact on your personal privacy.

THE NETWORK

No one knows more about your online identity than your Internet service provider. Every packet you send or receive from anywhere online goes through their servers. When you travel and connect to Wi-Fi networks that are under the control of others, the owners of those networks can see every connection you make and can intercept their contents.

Regardless of the platform you use, that’s why it’s important you use encrypted connections for any kind of sensitive communications. Using a virtual private network whenever possible is an excellent best practice.

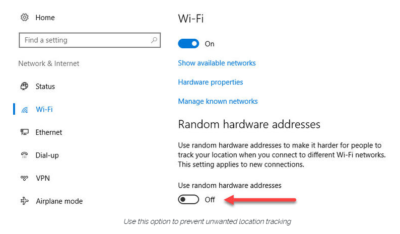
Windows 10 does offer one obscure option that can help protect third parties from tracking your movements based on your connections to Wi-Fi networks. (Note that this feature requires support from your Wi-Fi adapter, so if you don’t see this option, the most likely explanation is that your hardware doesn’t support it.) Under Settings > Network & Internet > Wi-Fi, turn the Use random hardware addresses setting to On.
windowsprivacy02

That step keeps third parties from matching your Wi-Fi adapter’s hardware address with your personal information, making it more difficult to track your location.

THE BROWSER

Countless third-party ad networks and analytics companies use cookies and other tracking technology to record your movements around the web and to correlate your online activities with your offline identity.

The result is a digital fingerprint that can be extraordinarily detailed and, unfortunately, outside of your ability to change.

To limit the amount of information that those ad and analytics companies know about you from your web browsing, consider third-party anti-tracking software such as Abine’s Blur, which is available for every web browser except Microsoft Edge. (That lack of solid support for add-ons is one reason I can’t yet recommend Edge as a full-time browser for most Windows 10 users.)

Another privacy product worth considering is Ghostery, although some are suspicious of this browser extension because of its uncomfortably close ties to the online advertising industry.

Ad-blocking software can also provide some privacy protection as a side-effect of performing its basic function. Here, too, watch out for close ties between some ad-blocking add-ins and the third-party trackers they supposedly protect you from.

Note that none of these steps is unique to Windows 10. Anti-tracking software is typically a browser add-in and works with most popular browsers.

THE OPERATING SYSTEM

With those two big, platform-independent factors out of the way, we can now turn to Windows 10 itself. When you use a Windows 10 device, it is capable of sharing the following types of information with Microsoft’s servers:

Your location

Windows 10 can determine your location to help with actions like automatically setting your current time zone. It can also record a location history on a per-device basis. Go to Settings > Privacy > Location to control the following:

  • Location on/off?Use the master switch at the top of this page to disable all location features for all users of the current device.
  • Location service on/off?If location is on for Windows, you can still turn it off for your user account here.
  • General location?This allows you to set a city, zip code, or region so that apps can deliver relevant content.
  • Default location?Click Set default to open the Maps app and specify the location you want Windows to use when a more precise location is not available.
  • Location history?Click Clear to erase the saved history for a Windows 10 device.

If location is on, a list at the bottom of the Settings > Privacy > Location page allows you to disable access to that data on a per-app basis.

Your input

If you enable Cortana, Windows 10 uploads some info from your devices, such as your calendar, contacts, and location and browsing history, so that Cortana can make personalized recommendations. If you don’t want any accounts on your PC to use Cortana, follow the steps in this article to disable the feature completely: Turn off Cortana completely.

Windows 10 uses some feedback from the way you type, write, and speak to improve performance for you and as a way to improve the overall platform. This isn’t keystroke logging; rather, the operating system uses a very small amount of information. A separate feature uses your speech and writing history to make better suggestions in Windows and Cortana.

You can control this collection with two sets of controls:

Under Settings > Privacy > General, click Info about how I write and turn it off so that your typos aren’t used to improve things like the built-in spell checker.

Under Settings > Privacy > Speech, inking, & typing, under the Getting to know you heading, click Stop getting to know me to turn off personalization.

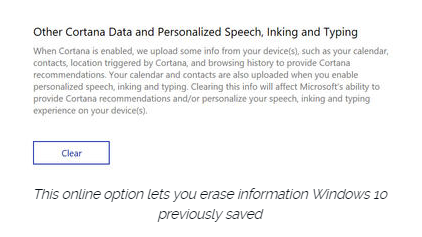
To clear previously saved information associated with your Microsoft account, click the first link under the Manage cloud info heading. That takes you to this Bing Personalization page, which includes this prominent button:
windows-privacy01

Click Clear to remove that saved information from the cloud.

Files and settings

When you sign in with a Microsoft account, you have the option to save files to the cloud using OneDrive. Windows 10 also syncs some settings to OneDrive, allowing you to have the same desktop background, saved passwords, and other personalized settings when you sign in with that account on multiple PCs.

If you use a local account, of course, none of your settings are synced. If you use a Microsoft account, you can turn off syncing completely or remove certain settings from the sync list by going to Settings > Accounts > Sync Your Settings.

OneDrive is an opt-in service. If you don’t sign in, it does nothing. You can’t save files to OneDrive accidentally, and no files are uploaded without your explicit permission, which you can revoke any time. To disable OneDrive for all users on your PC, follow these instructions: Shut down OneDrive completely.

Telemetry

Microsoft, like all modern software companies, uses feedback from its installed base to identify problems and improve performance. In Windows 10, this feedback mechanism produces diagnostics data (aka telemetry) that is uploaded to Microsoft at regular intervals. The data is anonymized and is not used to create a profile of you.

The default telemetry setting for all consumer and small business versions of Windows 10 is Full, which means that the uploaded data also includes details (also anonymized) about app usage. If you are concerned about possible inadvertent leakage of personal information, I recommend that you go to Settings > Privacy > Feedback & diagnostics and change the Diagnostic and usage data setting to Basic.

THE APPS

Although the number of subcategories under the Privacy heading in Settings seems daunting, most of them govern access to your information by Windows Store apps. That set of apps includes those that are preinstalled (Mail, Calendar, Groove Music, Photos, and so on) as well as those you acquire from the Store.

Most of the categories offer a single on-off switch at the top, which you can use to disable all access to that feature by all apps. If you leave the feature enabled, you can use a list of apps at the bottom of the page to enable or disable access on a per-app basis.

This capability works the same with the following categories: Camera, Microphone, Notifications, Account Info, Call History, and Radios. The Other Devices category lets apps automatically share and sync info with wireless devices that aren’t explicitly paired with your PC. Use the Background Apps category to specify which apps are allowed to work in the background.

If Location is enabled, you have the option to disable location access on a per-app basis and to disable Geofencing.

The Contacts, Calendar, Email, and Messaging categories allow you to control which apps can have access to these features. If you want to share content from an app using email or messaging, this option has to be on for that app. Note that Mail and Calendar, People, and Phone always have access to your contacts; Mail and Calendar are always allowed to access and send email and always have access to your calendar.

Finally, one horribly misunderstood setting is available under Settings > Privacy > General. Advertising ID controls whether Microsoft serves personalized ads to ad-supported apps. If you turn this option off, you still get ads, but they’re not personalized. In any case, your information is not shared with advertisers.

Have questions?

Get answers from Microsofts Cloud Solutions Partner!
Call us at: 856-745-9990 or visit: https://southjerseytechies.net/

South Jersey Techies, LL C is a full Managed Web and Technology Services Company providing IT Services, Website Design ServicesServer SupportNetwork ConsultingInternet PhonesCloud Solutions Provider and much more. Contact for More Information.

To read this article in its entirety click here.
CALL US NOW!