Back to Top

Tech, Web, Cloud & Cabling Services

Category: Tips & Info

Tips & Info Category

Did you know? Mac Office 2011 support conks out on Oct. 10

End of support is sneaking up on enterprise employees running Office on a Mac

Companies that have employees running Office for Mac 2011 have just over 100 days to replace the suite’s applications with those from last year’s upgrade, Office for Mac 2016.

Support ends for Office for Mac 2011 on Oct. 10, a date that Microsoft first stamped on the calendar two years ago, but has not widely publicized since. As of that date, the Redmond, Wash., developer will cease supplying patches for security vulnerabilities or fixes for other bugs.

The individual applications — Excel, PowerPoint, Outlook and Word — will continue to operate after support ends, but companies will be taking a risk, however small, that malware exploiting an unpatched flaw will surface and compromise systems.

To receive security and non-security updates after Oct. 10, IT administrators must deploy Office for Mac 2016 or instruct workers covered by Office 365 to download and install the newer suite’s applications from the subscription service’s portal.

Office for Mac 2011’s end-of-support deadline was originally slated for January 2016, approximately five years after the productivity package’s release. But in the summer of 2015, when it was clear that 2011’s successor would not be ready by early 2016, Microsoft extended its lifespan by 21 months. At the time, Microsoft cited the long-standing policy of supporting a to-be-retired product for “2 years after the successor product is released” when it added time to 2011.

Mac users: Steerage Class

The impending cutoff for Office for Mac 2011 is an issue only because Microsoft shortchanges Office for Mac users. Unlike the Windows version of Office, which receives 10 years of security support, those that run on macOS are allotted half that. Microsoft has repeatedly classified Office for Mac as a consumer product to justify the half-measure, even for the edition labeled “Home and Business.”

Nor does Microsoft update and service Office for Mac for corporate customers as it does the far more popular Windows SKU (stock-keeping unit). The latter will be upgraded with new features, Microsoft said in April, twice each year for enterprise subscribers to Office 365 ProPlus, with each release supported for 18 months before giving way to a pair of successors.

Mac editions, however, are refreshed with new tools at irregular intervals, often long after the same feature debuts in the same Windows application. (Recently, for example, Microsoft added a delivery-and/or-read receipt option to the Mac version of Outlook; that functionality has been in Outlook on Windows since 2013.) And because there are no regular, large-scale feature upgrades to Office for Mac, support is not curtailed by the release schedule as with Windows.

The difference between Offices — the behemoth Windows on one side, the niche Mac on the other — has been put into even starker relief recently: Microsoft has adopted March and September dates for launching new upgrades to Windows 10, Office 365 ProPlus, and last week, Windows Server, but made no similar promises for Office for Mac 2016.

It’s clearly the odd app out.

Have questions?

Get answers from Microsofts Cloud Solutions Partner!
Call us at: 856-745-9990 or visit: https://southjerseytechies.net/

South Jersey Techies, LL C is a full Managed Web and Technology Services Company providing IT Services, Website Design ServicesServer SupportNetwork ConsultingInternet PhonesCloud Solutions Provider and much more. Contact for More Information.

To read this article in its entirety click here.

Atari’s Ataribox console will run Linux

Cost $250-$300, if it ever materializes

Now it just needs an E.T. game.

Atari announced in June that it was getting back into the hardware business, with plans for an upcoming “Ataribox” console. Of course, it didn’t release any actual details at the time—only a slick-looking render of a retro-styled box, complete with real wood paneling. Oh, plus a promise to crowdfund the upcoming console.

If alarm bells just started ringing in your head, visions of another Ouya-style disaster, well we can’t say those fears are unfounded. This week Atari further detailed the Ataribox to GamesBeat, and the plan seems even weirder than before.

According to Ataribox creator Feargal Mac, we’re looking at a device that will a) run Linux and b) cost in the neighborhood of $250 to $300. Featuring a custom AMD processor and launching alongside a catalog of classic Atari games, GamesBeat writes, “the idea is to create a box that makes people feel nostalgic about the past, but it’s also capable of running the independent games they want to play today, like Minecraft or Terraria.”

You know what? Best of luck to them. If Valve couldn’t make the Linux-centric living room PC a hot item, though, We’re not sure that Atari will be able to. And that’s all this is—a very cheap Steam Machine, cheaper even than Alienware’s quaint little model.

Is that enough? Probably not. The problem, as always, is the games. Linux gaming is worlds better than it was a few years ago, especially if Atari focuses on the indie scene. Still, we’re talking a pretty small subset of available titles. Atari’s trotted out the ol’ Valve line of “You can install Windows on it if you want,” and that’s not a great omen in my mind.

And even a $250 Ataribox is still plenty expensive considering this thing won’t run any big-budget games. You can buy an Xbox One S for $250 right now on Amazon, and a PlayStation 4 is only $50 more expensive. Sure, it’s a console, but it’ll at least play Wolfenstein II just as easily as it’ll play Terraria.

Atari’s also been quiet about how you’ll control the Ataribox. GamesBeat mentions a “user interface [Atari is] customizing for TVs,” so I assume a controller, but every photo of the Ataribox is just the console on its own. Hell, for all we know Atari will be buying Steam Controllers in bulk and packaging them with the system. Might as well. Those who want to get into the system level and tinker, though, will probably need a keyboard and mouse, which isn’t very living room-friendly.

One last red flag: It’s still being crowdfunded. Plans are for an Indiegogo campaign later this fall, with a release scheduled for Spring 2018. We’ll keep you updated.

Have questions?

Get answers from Microsofts Cloud Solutions Partner!
Call us at: 856-745-9990 or visit: https://southjerseytechies.net/

South Jersey Techies, LL C is a full Managed Web and Technology Services Company providing IT Services, Website Design ServicesServer SupportNetwork ConsultingInternet PhonesCloud Solutions Provider and much more. Contact for More Information.

To read this article in its entirety click here.

7 advanced Google Chrome tips and tweaks that save you time

If you spend most of your workday with Google’s browser, you’ll want to put these Chrome tips to work so you can get more done in less time.

Live your best Chrome life

You probably live most of your computing day inside Google’s browser. Despite its tendency to be a resource hog, it’s still the most capable browser for its speed and optimization on the web’s most important sites.

But there’s always room to improve, especially given Chrome’s flexibility and strong feature set. This collection of tips will help you start the day off with just the sites you want, work quicker with keyboard commands, and ensure you can save the stuff you need for later use.

Stick a pin in it

Pinning tabs that you use throughout the day saves you screen real estate and keeps you from having to reopen tabs several times over. Right-click on a tab and select Pin tab to minimize it to the left side of the browser. It’ll be identifiable by the page’s favicon.

Keep in mind, when you close the browser, those tabs will reopen as pinned tabs when you relaunch Chrome. So if you don’t want to start your next session with 10 pinned tabs, you’ll need to unpin them by right-clicking and then selecting Unpin tab before closing the browser.

Reopen that tab you didn’t mean to close

There’s one, specific hotkey command that saves my bacon about 25 times a day: Control-Shift-T, which reopens the last tab closed. When you’ve got 70 or so different tabs open, you’re bound to close the wrong one from time to time.

That’s why it behooves you to memorize this command. Better yet, take a few moments to learn some of the other hotkeys shown here that will help you zip through your tabs, close them all, or quit Chrome altogether. Just as hotkeys help you work faster in Windows, the same level of convenience applies to Chrome.

Grab a Chrome extension

It’s very likely that your favorite desktop software has an accompanying Chrome extension that let’s you perform related tasks within the browser. If so, grab it. After all, the web touches a lot of aspects of the work you do. For example, Microsoft’s OneNote offers a useful Chrome extension for grabbing articles and other bits of the internet for later retrieval. Same goes for Evernote, another popular note-taking solution. And there’s a Chrome extension that notifies you of Skype alerts. Head to the Chrome Web Store to find the extensions you need.

Embrace Google Cloud Print

Google Cloud Print may still have that annoying beta tag, but it’s vastly improved since the service’s early days. It’s now reliable, and the fastest way to print a document without needing to futz with the Windows print menu.

Most printers can be added quite easily, so head to the Cloud Print site to enroll yours. Another great feature is that you can also save files right to Google Drive, helping you keep track of tax-payment confirmations or other key documents.

Know your history

Macs and iOS devices talk together very well through a feature called Handoff. Open a browser tab on the iPhone, and you can pull it up right away on your Mac.

Chrome has created something that’s not quite as seamless, but gets the job done for those of us who live outside of Fortress Apple. Control-H pulls up a list of your most recent tabs from all your devices. Next, touch Tabs from other devices to choose the site you want to check out. You can select what you were just looking at or something from a while back.

Go big (with text)

Save your eyes from strain. You can expand the text on a browser page in a couple of different ways. Hit Control+ to zoom in, and Control- to zoom out. Alternatively, pinching-and-zooming on a PC with a touchscreen will do the trick and gives you a more direct feel for what you want to see.

Control 0 will return you to the normal page size once you’re done with the close inspection.

Start off right

You can get right to work more quickly if you launch your browsing session with the sites you use most often. Go to Settings > On Startup and choose Open a specific page or set of pages.

Then, you can add your favorite pages by typing in the URLs or clicking the button for Use current pages. This’ll ensure that next time you launch Chrome, you can get right to work with the pages you need.

Have questions?

Get answers from Microsofts Cloud Solutions Partner!
Call us at: 856-745-9990 or visit: https://southjerseytechies.net/

South Jersey Techies, LL C is a full Managed Web and Technology Services Company providing IT Services, Website Design ServicesServer SupportNetwork ConsultingInternet PhonesCloud Solutions Provider and much more. Contact for More Information.

To read this article in its entirety click here.

Windows 10 quick tips: 10 ways to speed up your PC

Want Windows 10 to run faster? Take a few minutes to try out these tips, and your machine will be zippier and less prone to performance and system issues.


1. Change your power settings

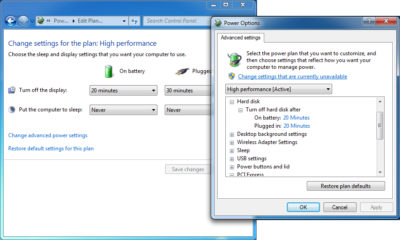
If you’re using Windows 10’s Power saver plan, you’re slowing down your PC. That plan reduces your PC’s performance in order to save energy. (Even desktop PCs typically have a Power saver plan.) Changing your power plan from Power saver to High performance or Balanced will give you an instant performance boost.

To do it, launch Control Panel, then select Hardware and Sound > Power Options. You’ll typically see two options: Balanced (recommended) and Power saver. (Depending on your make and model, you might see other plans here as well, including some branded by the manufacturer.) To see the High performance setting, click the down arrow by Show additional plans.

To change your power setting, simply choose the one you want, then exit Control Panel. High performance gives you the most oomph, but uses the most power; Balanced finds a median between power use and better performance; and Power saver does everything it can to give you as much battery life as possible. Desktop users have no reason to choose Power saver, and even laptop users should consider the Balanced option when unplugged and High performance when connected to a power source.


2. Disable programs that run on startup

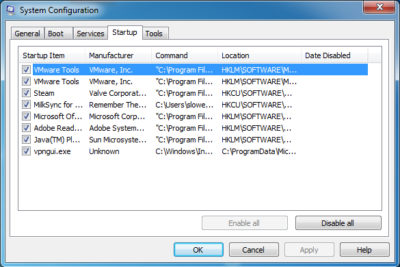
One reason your Windows 10 PC may feel sluggish is you’ve got too many programs running in the background programs that you may never use, or only rarely use. Stop them from running, and your PC will run more smoothly.

Start by launching the Task Manager: Press Ctrl-Shift-Esc or right-click the lower-right corner of your screen and select Task Manager. If the Task Manager launches as a compact app with no tabs, click “More details” at the bottom of your screen. The Task Manager will then appear in all of its full-tabbed glory. There’s plenty you can do with it, but we’re going to focus only on killing unnecessary programs that run at startup.

Click the Startup tab. You’ll see a list of the programs and services that launch when you start Windows. Included on the list is each program’s name as well as its publisher, whether it’s enabled to run on startup, and its “Startup impact,” which is how much it slows down Windows 10 when the system starts up.

To stop a program or service from launching at startup, right-click it and select “Disable.” This doesn’t disable the program entirely; it only prevents it from launching at startup — you can always run the application after launch. Also, if you later decide you want it to launch at startup, you can just return to this area of the Task Manager, right-click the application and select “Enable.”

Many of the programs and services that run on startup may be familiar to you, like OneDrive or Evernote Clipper. But you may not recognize many of them. (Anyone who immediately knows what “bzbui.exe” is, please raise your hand. No fair Googling it first.)

The Task Manager helps you get information about unfamiliar programs. Right-click an item and select Properties for more information about it, including its location on your hard disk, whether it has a digital signature, and other information such as the version number, the file size and the last time it was modified.

You can also right-click the item and select “Open file location.” That opens File Explorer and takes it to the folder where the file is located, which may give you another clue about the program’s purpose.

Finally, and most helpfully, you can select “Search online” after you right-click. Bing will then launch with links to sites with information about the program or service.

If you’re really nervous about one of the listed applications, you can go to a site run by Reason Software called Should I Block It? and search for the file name. You’ll usually find very solid information about the program or service.

Now that you’ve selected all the programs that you want to disable at startup, the next time you restart your computer, the system will be a lot less concerned with unnecessary program.


3. Turn off search indexing

Windows 10 indexes your hard disk in the background, allowing you – in theory – to search your PC more quickly than if no indexing were being done. But slower PCs that use indexing can see a performance hit, and you can give them a speed boost by turning off indexing. Even if you have an SSD disk, turning off indexing can improve your speed as well, because the constant writing to disk that indexing does can eventually slow down SSDs.

To get the maximum benefit in Windows 10, you need to turn indexing off completely. To do so, first type services.msc in the Start Menu search box, and click the Services result that come up. The Services app then appears. Scroll down to either Indexing Service or Windows Search in the list of services. Double-click it, and from the screen that appears, click Stop. Then reboot. Your searches may be slightly slower, although you may not notice the difference. But you should get an overall performance boost.

If you’d like, you can turn off indexing for only files in certain locations. To do this, first type index in the Start Menu search box, and click the Indexing Options result that appears. The Indexing Options page of Control Panel appears. Click the Modify button and you’ll see a list of locations that are being indexed, such as Microsoft Outlook, your personal files, and so on. Uncheck the boxes next to any location, and it will no longer be indexed.


4. Clean out your hard disk

If you’ve got a bloated hard disk filled with files you don’t need, you could be slowing down your PC. Cleaning it out can give you a speed boost. Windows 10 has a surprisingly useful built-in tool for doing this called Storage Sense. Go to Settings > System > Storage and at the top of the screen – in the Storage Sense section – move the toggle from Off to On. When you do this, Windows constantly monitors your PC, and deletes old junk files you no longer need; temporary files; files in the Downloads folder that haven’t been changed in a month; and old Recycle Bin files.

You can customize how Storage Sense works and also use it to free up even more space than it normally would. Underneath Storage Sense, click “Change how we free up space automatically.” From the screen that appears, you can change how often Storage Sense deletes files (every day, every week, every month or when Windows decides). You can also tell Storage Sense to delete files in your Download folder, depending on how long they’ve been there. And you can also set how long to wait to delete files in the Recycle Bin automatically.

You can also delete old versions of Windows that might be hogging space. At the bottom of the screen, check the box next to “Delete previous versions of Windows.” Storage Sense will then delete old versions of Windows ten days after you’ve installed an upgrade. Note that if you do this, you won’t be able to revert to the older version of Windows.


5. Clean out your Registry

Under the Windows hood, the Registry tracks and controls just about everything about the way Windows works and looks. That includes information about where your programs are stored, which DLLs they use and share, what file types should be opened by which program or just about everything else.

But the Registry is a very messy thing. When you uninstall a program, for example, that program’s settings don’t always get cleaned up in the Registry. So over time, it can get filled with countless outdated settings of all types. And that can lead to system slowdowns.

Don’t even think of trying to clean any of this out yourself. It’s impossible. To do it, you need a Registry Cleaner. There are plenty available, some free and some paid. But there’s really no need to outright buy  one, because the free Auslogics Registry Cleaner does a solid job.

Before using Auslogics or any other Registry Cleaner, you should back up your Registry so you can restore it if anything goes wrong. (Auslogics Registry Cleaner does this for you as well, but it can’t hurt to have it backed up twice.) To do your own Registry backup, type regedit.ext in the search box, then press Enter. That runs the Registry editor.  From the File menu, select Export. From the screen that appears, make sure to choose the “All” option in the Export range section at the bottom of the screen. Then choose a file location and file name and click Save. To restore the Registry, open the Registry editor, select Import from the File menu, then open the file you saved.

Now download, install and run Auslogics Registry Cleaner. On the left-hand side of the screen you can select the kinds of Registry issues you want to clean up – for example, File Associations, Internet or Fonts. I generally select them all.

Next tell it to scan the Registry for problems. To do that, click “Scan Now” and from a drop-down menu that appears select Scan. That lets you first examine the Registry problems it finds. If you instead choose “Scan and Repair,” it makes the fixes without you checking them.

It now scans your Registry for errors, then shows you what it found. It ranks the errors according to their severity, to help you decide which to fix. Click Repair when you’ve made your decision, and make sure that “Back up Changes” is checked, so you can restore the Registry easily if something goes wrong.


6. Disable shadows, animations and visual effects

Windows 10 has some nice eye candy — shadows, animations and visual effects. On fast, newer PCs, these don’t usually affect system performance. But on slower and older PCs, they can exact a performance hit.

It’s easy to turn them off. In the Windows 10 search box type sysdm.cpl and press Enter. That launches the System Properties dialog box. Click the Advanced tab and click “Settings” in the Performance section. That brings you to the Performance Options dialog box. You’ll see a varied list of animations and special effects.

If you have time on your hands and love to tweak, you can turn individual ones on and off. These are the animations and special effects you’ll probably want to turn off, because they have the greatest effect on system performance:

  • Animate controls and elements inside windows
  • Animate windows when minimizing and maximizing
  • Animations in the taskbar
  • Fade or slide menus into view
  • Fade or slide ToolTips into view
  • Fade out menu items after clicking
  • Show shadows under windows

However, it’s probably a lot easier to just select “Adjust for best performance” at the top of the screen and then click OK. Windows 10 will then turn off the effects that slow down your system.


7. Launch the Windows troubleshooter

Windows 10 has a very useful, little-known tool that can sniff out performance problems and solve them. To launch it, run Control Panel and select System and Security > Security and Maintenance > Troubleshooting > Run maintenance tasks. A screen titled “Troubleshoot and help prevent computer problems” will appear. Click Next.

The troubleshooter will find files and shortcuts you don’t use, identify any performance and other issues on your PC, report them to you and then fix them. Note that you may get a message that says, “Try troubleshooting as an administrator.” If you have administrative rights to the PC, click it and the troubleshooter will launch and do its work.


8. Get help from the Performance Monitor

There’s a great tool in Windows 10 called the Performance Monitor that can, among other things, create a detailed performance report about your PC, detail any system and performance issues, and suggest fixes.

To get the report, type perfmon /report into your search box and press Enter. (Make sure there’s a space between “perfmon” and the slash mark.) The Resource and Performance Monitor launches and gathers information about your system. It will say that it will take 60 seconds, but I’ve found that it takes several minutes. When the Monitor finishes, it will launch an interactive report.

You’ll find a lot of extremely detailed information in the report, and it can take a lot of time to go through. Your best bet is to first look at the Warnings section, which details the biggest issues (if any) it found on your PC, such as problems with Windows, with drivers and so on. It also tells you how to fix each problem — for example, how to turn on a device that has been disabled.

It is also worthwhile to scroll down to the Resource Overview section, where you’ll find an analysis of how well your CPU, network, disk and memory are performing. Each result is color-coded, with green meaning no problems, yellow meaning potential issues, and red showing a problem.

Beyond that, the Resource Overview also reports performance metrics and explanatory details. For example, for the CPU, it might show green and a utilization of 21%, with the details, “Normal CPU load.” Or for Memory, it might show yellow, with 62% utilization and the details, “1520 MB is available.” Based on what you get, you might want to do something about your hardware — for example, add more memory.


9. Kill bloatware

Sometimes the biggest factor slowing down your PC isn’t Windows 10 itself, but bloatware or adware that takes up CPU and system resources. Adware and bloatware are particularly insidious because they may have been installed by your computer’s manufacturer. You’d be amazed at how much more quickly your Windows 10 PC can run if you get rid of it.

First, run a system scan to find adware and malware. If you’ve already installed a security suite such as Norton Security or McAfee LiveSafe, you can use that. You can also use Windows 10’s built in anti-malware app — just type Windows Defender in the search box, press Enter, and then click Scan Now. Windows Defender will look for malware and remove any it finds.

It’s a good idea to get a second opinion, though, so consider a free tool like Malwarebytes Anti-Malware. The free version scans for malware and removes what it finds; the paid version offers always-on protection to stop infections in the first place.

Now you can check for bloatware and get rid of it. Several free programs will do this for you; your best bet is to run several of them, because no single one will find all the bloatware on your PC. Good choices are the PC Decrapifier, Should I Remove It? and SlimComputer.


10. Shut down and restart Windows

Here’s one of IT’s not-quite-secret weapons for troubleshooting and speeding up a PC: Shut it down and restart it. Doing that clears out any excess use of RAM that otherwise can’t be cleared. It also kills processes that you might have set in motion and are no longer needed, but that continue running and slow your system. If your Windows 10 PC has turned sluggish over time for no apparent reason, you may be surprised at how much more quickly it will run when you do this.

Try just some of these tricks, and you’ll find that you’ve got a faster Windows 10 PC — and one that is less likely to have any reliability problems.

10 compelling reasons to upgrade to Windows 10

The deadline for Microsoft’s free Windows 10 upgrade looms. Here’s why you don’t want to let it pass by.

windows-7-to-windows-10

An offer you shouldn’t refuse

The deadline cometh. July 29 looms, and after that, Windows 7 and 8 users will no longer be able to upgrade to Windows 10 for free. If you’ve been waiting for Microsoft to polish out the operating system’s initial bugs, it’s time to make the leap.

This article’s more for the fence-sitters—the folks who haven’t decided whether to stick with what they know or embrace Microsoft’s new-school operating system. There are some very valid reasons not to upgrade to Windows 10, to be honest. But Windows 10 is the best Windows yet, and most people should claim the free upgrade while there’s still time.

Here’s why.

Improved desktop experience
windows-10-desktop-1

Let’s be frank: Windows 8’s fugly, unfunctional, and obnoxiously colored Start screen sucked. So did the way Windows 8 hid crucial information behind hidden “charms,” which had no on-screen hints for how to access them. It scared a lot of people away from upgrading, and rightfully so.

You don’t have to worry about that with Windows 10.

Windows 10 takes the same core ideas behind Windows 8, but makes them palatable for the desktop audience. Windows Store apps are still present, but they’re in desktop windows that can be resized and used like any other. The Start menu’s back, with a pop-out section that puts information-delivering Live Tiles to better use—and yes, they can all be deleted if you want.

True, there are some changes to wrap your head around if you upgrade from Windows 7 to Windows 10. But the basic building blocks of the operating system will be largely familiar.

Enthusiast-friendly additions
windows-10-virtual-desktops-2

More than simply being familiar, Windows 10 is superior to Windows 7 for PC enthusiasts, because Microsoft made an active effort to woo desktop diehards.

Windows 10’s hardcore tools range from virtual desktops (pictured) to improved high-DPI monitor support to pasting text inside the command prompt. Easy file version recovery? Better storage management tools? Windows 10 has it all.

The operating system even provides power-user tools for Windows Updates, letting you schedule updates to run at a specific time or distribute patches across your local network using peer-to-peer technology. It’s great.

Under-the-hood improvements
windows-10-login-screen-3

If you’re upgrading from Windows 7, you’ll be amazed at just how quick and modern Windows 10 feels. Microsoft optimized Windows’ underlying code in Windows 8, resulting in an operating system that boots like greased lightning—especially if you have an SSD—and just plain feels faster.

It’s just one of the many Windows 8 improvements that Windows 7 holdouts will enjoy in Windows 10.

Native security protection
windows-defender-windows-4

This appeals more to everyday PC users than hardcore enthusiasts, but Windows 10 is inherently much more secure than Windows 7. The operating system ships with Microsoft’s Windows Defender antivirus software and the Windows Firewall installed and enabled by default, which provides many PCs with a huge security uplift. (You’d be amazed how many people never bother to install new security software after their free Norton or McAfee trial runs out.)

But Microsoft didn’t stop there. Windows 10’s UEFI Secure Boot requirement protects against low-level rootkits that could infect your PC, the SmartScreen filter guards against malicious websites, and Windows Hello makes biometric-based authentication easy-peasy.

Better security is always a good thing.

Cortana
cortana-call-jennifer-5

Cortana, Microsoft’s answer to Apple’s Siri and Google Now replaces Windows 10’s basic search functionality, and I couldn’t be happier. Cortana mixes good humor with web-based smarts that can help you set reminders and alarms, stay on top of sports scores and news, navigate and operate your operating system, track packages, plan trips, and more. Even better: Cortana’s going to become more proactive and usefulwhen the Windows 10 Anniversary Update rolls around August 2.

DirectX 12
ashes-of-the-singularity-6

Microsoft’s powerful, next-generation DirectX 12 graphics technology is exclusive to Windows 10 devices. If you’re a PC gamer, this feature alone is worth the upgrade.

We’re still in the early days of DirectX 12 adoption. Most PC games still release in DirectX 11. We’re not really sure of the graphics API’s full potential, but early DX12 implementations in games tend to result in smoother experiences and higher overall frame rates. That’s especially so on PCs with AMD Radeon graphics cards, thus far—check out our Radeon RX 480 review for hard benchmarks—but Nvidia’s GeForce cards enjoy DX12 benefits, too.

More and more games are starting to embrace DirectX 12. Seriously: If you’re a gamer, upgrade now. This isn’t coming to Windows 7 or 8.

Universal Windows apps
universal-windows-apps-7

But DirectX 12 has come to the Xbox One. That’s because Microsoft’s console runs Windows 10 under the hood, and Windows 10 devices can all run universal Windows apps. One tangible benefit of the cross-device compatibility is the forthcoming Xbox Play Anywhere feature, which lets you buy a game once and play it on both Windows 10 and the Xbox One, as well as transfer saves and play multiplayer games across the two platforms. Nifty!

Play Anywhere is definitely the highlight so far, but universal Windows apps likewise morph to fit the screens of tablets, phones, and even Microsoft’s HoloLens augmented reality headset. The one caveat: Microsoft hasn’t yet convinced developers to embrace the Windows Store en masse.

The little extraswindows-10-print-as-pdf-8

Windows 10 quietly eliminates many of the biggest little irritations present in previous versions of Windows. You can finally print to PDF natively now, and hovering your mouse over a background window lets you scroll that, rather than the in-focus program. Per-monitor display scaling eliminates visual oddities with multi-monitor setups. Cortana’s natural language search—“Hey Cortana, show my pictures from last Christmas”—can be a serious time-saver when used correctly.

All in all, these little touches add up to a big usability difference. Check out PCWorld’s story on the 12 obscure new Windows 10 features that eliminate everyday hassles for all the details.

It’s free!
windows-10-free-upgrade-9
C’mon. It’s a free upgrade until July 29. If you’re considering upgrading to Windows 10 at any point in the future, now’s the time to do it. Just be aware of what you’re giving in return.
It’ll keep getting better
windows-10-anniversary-edition-cortana-10


Microsoft isn’t resting on its laurels now that Windows 10 is out in the wild. A majorWindows 10 Anniversary Update is due to land on August 2, stuffed with new features and bug fixes, and Microsoft’s continually updating the operating system with the help of its legion of Windows Insider preview testers.

Windows 7, meanwhile, is solidly past the new-feature phase of life, though security updates will keep on a-rolling until 2020. Windows 8 is still ostensibly in its mainstream support phase through the beginning of 2018, but don’t expect to see any new goodies added there.

Counterpoint
windows-10-to-windows-7-11

That’s a pretty compelling list of reasons to upgrade to Windows 10—and the security boost might even push you into encouraging your non-geeky friends (you know, the ones always asking you for unofficial tech support) into accepting the upgrade, too. A safer environment for normal people is a safer world for everybody.

But again, there are some valid justifications for rejecting Microsoft’s offer. Most people should embrace the new operating system with open arms, but before you make the leap, be sure to read PCWorld’s list of the 10 reasons why you shouldn’t upgrade to Windows 10—especially if you’re using older hardware or software.

Have questions?

Get answers from Microsofts Cloud Solutions Partner!
Call us at: 856-745-9990 or visit: https://southjerseytechies.net/

South Jersey Techies, LL C is a full Managed Web and Technology Services Company providing IT Services, Website Design ServicesServer SupportNetwork ConsultingInternet PhonesCloud Solutions Provider and much more. Contact for More Information.

To read this article in its entirety click here.
Microsoft 365 Business: Get Office + Windows 10 in one SMB-friendly subscription

Will preview $20/month software-as-a-service plan Aug. 2

Earlier this week, Microsoft introduced two additional software-as-a-service subscription plans to the partners who will try to sell them.

The pair join an increasing number of subscription deals that the Redmond, Wash. company has modeled on the Office 365 pattern. The new plans even carry the “365” label, which Microsoft sees as a unifying identifier.

Microsoft 365 is, as CEO Satya Nadella introduced it Monday, “a fundamental departure in how we think about product creation,” composed of, initially at least, two plans. The more expensive, Microsoft 365 Enterprise, is simply a new name for a year-old, two-tier product titled “Secure Productive Enterprise E3” and “Secure Productive Enterprise E5.” Those SKUs (stock-keeping units) were introduced at Microsoft’s 2016 partner conference. Like SPE, M365 Enterprise tosses Windows 10 Enterprise, Office 365 and Enterprise Mobility + Security into a bucket.

But “Microsoft 365 Business,” or M365 Business for short, is the more interesting of the two plans because it is actually new. Nadella thought the same. “I’m so excited about the product innovation that you will see today around small and medium-sized businesses,” he said during a two-hour keynote before partners.

So, what’s Microsoft 365 Business?

That’s the new deal Microsoft will push later this year after an unspecified time in preview, which will start Aug. 2.

M365 Business includes:

Office 365 Business Premium, a software-and-service plan that includes all the Office applications, hosted Exchange email, OneDrive storage service and more. Alone, Office 365 Business Premium costs $12.50 per user per month when billed on an annual basis.

Windows 10 Pro: Devices currently running Windows 7 Professional or Windows 8.1 Pro may be upgraded to Windows 10 Pro under M365 Business.

Windows 10 Business: According to Microsoft, “Windows 10 Business is a set of cloud-[based] services and device management capabilities that complement Windows 10 Pro and enable the centralized management and security controls of Microsoft 365 Business.” The services and tools include a subset of those from Intune, Microsoft’s enterprise mobility management (EMM) platform, as well as Windows AutoPilot, an automated deployment service bundled with Windows 10’s March 2017 feature upgrade, aka 1703 and Creators Update.

How much does M365 Business cost?

$20 per user per month when it launches later this year.

That’s $7.50 per user per month more than Office 365 Business Premium, or an extra $90 per user annually. For that amount, customers receive the difference between the two plans: the upgrade to Windows 10 Pro and the various management service components.

Who is Microsoft 365 Business for?

According to Microsoft, the plan is “built for small and midsize customers that have little to no IT resources on staff.”

Although companies of any size can purchase M365 Business licenses, any one customer can buy no more than 300 subscriptions, another signal that it aims at small and medium-sized organizations.

The limited management tools also play to that theme. They’re designed to be easy to use and offer only basic functionality, and are accessed via simple control panels similar to what they may have already used for Office 365.

What’s the Windows 10 upgrade all about in M365 Business?

Microsoft’s descriptions of this component are sketchy thus far. An extensive company Q&A on the subscription plan had the most information, saying, “If you have devices that are licensed for Windows 7, 8 and 8.1 Professional, Microsoft 365 Business provides an upgrade to Windows 10 Pro.” (The “Professional” label holds for Windows 7, but 8 and 8.1 are dubbed “Pro” instead, as is Windows 10.)

Computerworld was unable to unearth additional details of the upgrade, specifically what happens when a customer cancels a M365 Business subscription or lets one expire. Do devices that were upgraded from Windows 7 Professional to Windows 10 Pro retain the latter license? Or is the Windows 10 license revoked, forcing customers to reinstall the previous OS?

Microsoft declined to answer questions about that scenario, and analysts who had been briefed by the company said that licensing issues were not discussed in Microsoft’s presentation.

The matter of expiring subscriptions requires context. Generally, when customers exit a subscription, say, Office 365, the applications and services will retreat into a reduced functionality mode or stop working entirely. Something similar happens after a subscription to Windows 10 Enterprise E3 or E5 lapses. “When a subscription license expires … the Windows 10 Enterprise device seamlessly steps back down to Windows 10 Pro,” Microsoft states in a support document.

In other instances, Microsoft doesn’t strip away an upgrade. Customers who have subscribed to Windows 10 Enterprise E3 or E5 may upgrade devices equipped with Windows 7 Professional or 8.1 Pro, to Windows 10 Pro; if they later depart the E3 or E5 plan, the Windows 10 license permanently remains in place.

Which of these options remains — cancellation or retention — is what’s unclear in the case of M365 Business.

What management tools does M365 Business include?

Enough, says Microsoft, to adequately serve small and mid-sized businesses.

What Microsoft calls “a simplified management console” controls device and user management functions. The tools bundled in M365 Business include:

  • Auto-install (and easy uninstall) Office
  • Wipe company data from devices, both company- and employee-owned
  • Enforce user settings on devices, including access to Windows Store or use of Cortana
  • Force users to save all work to OneDrive for Business
  • Configure new PCs as well as existing systems running Windows 10 Pro 1703 (Creators Update) or later using AutoPilot
  • Automatically update and upgrade Windows 10 PCs using Windows Update for Business

We heard there’s a preview of M365 Business. What’s that deal?

Yes, there will be a preview available starting, Microsoft’s said, on Wednesday, Aug. 2. The preview will be accessible from this website. Users may, in fact, sign up now for the preview on that page.

Although there is no charge for the preview, Microsoft recommended that potential customers contact their preferred Microsoft Partner — or locate one — to handle the M365 Business deployment.

Interestingly, Microsoft said, “Devices running Windows 7 [Professional] or 8.1 Pro are eligible for an upgrade to Windows 10 Pro within the Microsoft 365 Business preview.” It was unclear whether that upgrade would be retained or retracted at the end of the preview.

What does M365 Business require?

According to Microsoft, Windows 7 Professional PCs “likely meet the minimum requirements.” However, only Windows 10 devices can be managed in M365 Business, a powerful motivator for equipping as many systems as possible with the newer OS.

The other major precondition for the subscription — Azure Active Directory (AAD) — is necessary to enforce user and device policies set in the management console, and for other tasks, such as AutoPilot set-up. Microsoft acknowledged that on-premises Active Directory works with M365 Business, but “it is not recommended.”

Have questions?

Get answers from Microsofts Cloud Solutions Partner!
Call us at: 856-745-9990 or visit: https://southjerseytechies.net/

South Jersey Techies, LL C is a full Managed Web and Technology Services Company providing IT Services, Website Design ServicesServer SupportNetwork ConsultingInternet PhonesCloud Solutions Provider and much more. Contact for More Information.

To read this article in its entirety click here.

Detecting and Preventing Computer Overheating

Many people don’t think about the hidden danger of heat to their computers, or how easy computer overheating is to prevent.

A lot of people don’t think about the effects of heat on their personal computer or laptop. The effects of overheating may be subtle, such as causing the computer to run slower or shortening the expected lifespan of the components; or it can be so devastating as to cause a fire. The most common side effect of overheating is having programs freeze or the computer shutting down sporadically.

How Computers Handle Heat
Computer heat is most efficiently handled by fans. The main fan is usually in the back and blows out. In addition there’s usually a heat sink — cooled by another fan or by a coolant system — over the CPU to prevent the processor from overheating. Some computers have additional fans to encourage airflow and help cool off high-heat components, but this varies from computer to computer.

The power supply can cause overheating if it is not properly installed in the case; if the vents aren’t positioned correctly the hot air can end up in the wrong place. The amount of free space inside the computer also matters; if all the hot components are close together, or if the placements of cords/components is impeding airflow, it can cause more heat problems.

What Can Cause Computer Overheating

There are several things that can cause a computer to overheat.

•Dust inside the computer and around the fans acts as an insulator, causing overheating.
•Running the computer in a hot environment also causes overheating.
•Running a lot of unnecessary programs can aid overheating.
•If the fans are obstructed by walls or drapes it can impede airflow.
•If the computer is being overclocked it can cause the components to overheat.
•Leaving the computer on for extended periods of time can cause overheating.
•Having the computer next to a hot device (a hot vent, other machinery, etc) can heat the computer.

How to Prevent Computer Overheating
By looking at the causes of overheating it’s often easy to diagnose and fix the problem that causes it. It’s important to resist the temptation to leave the computer open while running; the typical computer case is designed to conduct airflow, and leaving the computer open may make the overheating worse.
Simple Ways to Increase the Life of Any Computer’s Parts

The easiest way to prevent the computer from overheating is to clean it out. Most retail stores carry compressed air in their computer aisles, and it’s the easiest way to clean dust out of a dirty computer. A vacuum cleaner can also be used to suck the dust out of fans and ports along the outside of the computer. For more in-depth cleaning instructions, Lifehacker offers a step-by-step guide to computer cleaning: Geek to Live: Evacuate PC Dust Bunnies

Keeping the computer off the floor can help keep excess dust and dirt from mucking up the inside of the computer and fans. Also, putting additional fans in the computer can help improve ventilation. Many cases have specific spots for installing these extra fans; make sure that they blow the hot air out.
Don’t keep the computer too close to the wall, or near anything that keeps the hot air around the case rather than dissipating. It’s also helpful to make sure that the computer is free of debris — keeping stuff on top of the computer can insulate the computer as well.

When Nothing Else Works
When nothing else seems to be fixing the problem it may be hardware related: a broken fan or heat sink can cause major heating issues. If there’s a warranty in effect, contacting the manufacturer about any heat problems may be the easiest solution.

An overheated computer can cause any multitude of trouble. Knowing what can cause the overheating is most of the battle, and even the most novice computer user can get inside to clean the parts and check for broken fans.

What You Need to Know About the Big Chip Security Problem

According to Intel Corp.,most of the processors running the world’s computers and smartphones have a feature that makes them susceptible to hacker attacks. The chipmaker, working with partners and rivals, says it has already issued updates to protect most processor products introduced in the past five years, but the news sparked concern about this fundamental building block of the internet, PCs and corporate networks.

The revelation of the so-called Meltdown and Spectre vulnerabilities spurred a scramble among technology’s biggest players, from Apple Inc. to Amazon.com Inc., to enact fixes and reassure customers they were on top of the problem.

1. What’s the problem?

Modern processors guess what they’ll have to do next and fetch the data they think they’ll need. That makes everything from supercomputers to smartphones operate very fast. Unfortunately, as Google researchers discovered, it also provides a way for bad actors to read data stored in memory that had been thought to be secure. In a worst-case scenario, that would let someone access your passwords.

2. How bad is it?

The vulnerability won’t stop your computer working and doesn’t provide an avenue for hackers to put malicious software on your machine. Though it could put important data at risk, there’s been no report so far of anyone’s computer being attacked in this manner. More broadly, though, the new fears could undermine longtime assurances that hardware and chip-level security is more tamper-proof than software.

3. How was it discovered?

The weakness was discovered last year by folks Google employs to find such issues before the bad guys do. Usually, solutions are developed in private and announced in a coordinated way. This time the news leaked before the companies involved had a chance to get a fix in place.


4. What’s being done to fix it?

Chipmakers and operating system providers, such as Alphabet Inc.’s Google and Microsoft Corp., are rushing to create software patches that will close the potential window of attack. Intel said that it expects to have issued updates for more than 90 percent of recently introduced processor products. Amazon.com Inc. said “all but a small single-digit percentage” of its servers have already been protected. In a blog post, Google said its security teams immediately “mobilized to defend” its systems and user data. Some customers of Android devices, Google Chromebook laptops and its cloud services still need to take steps to patch security holes, the company said. Patches for Windows devices are out now and the company is securing its cloud services, Microsoft said in a statement.

5. Is this just an Intel problem?

No, though that seems to be what panicky investors initially thought. Intel says it’s an issue for all modern processors. But rival Advanced Micro Devices Inc. stated that its products are at “near-zero risk.” ARM Holdings, which has chip designs that support all smartphones, said that, at worst, the vulnerability could “result in small pieces of data being accessed” and advised users of its technology to keep their software up to date. Google fingered all three companies. Apple said all Mac computers and iOS devices — including iPhones and iPads — were affected, but stressed there were no known exploits impacting users and that steps taken to address the issue haven’t dented performance.

6. What will the fallout be?

Some computers, mostly older ones, could be slowed down by the software patches that will make them more secure. Intel said that in common situations software might be slowed down by as much as 3 percent or not at all. But in other rare situations, performance might be reduced as much as 30 percent. The company doesn’t expect any financial impact and said it thinks customers will keep buying. As the fixes haven’t been widely deployed yet, it’s unclear whether anyone will even notice or whether computer slowdowns will be widespread. Intel has only done lab tests.

How to install and activate Windows 10 using your Windows 7 or Windows 8 product key

windowsproductkey

Summary

Microsoft recently announced the first major update to Windows 10 which includes numerous improvements for end users and businesses. One of the welcome improvements is the compliance check when qualifying for the Windows 10 upgrade. Previously, Windows 7, Windows 8.0 and Windows 8.1 users needed to have either of those versions Windows installed and activated in order to qualify for the free upgrade offer. For persons who needed to perform a clean install of Windows 10 from the outset, it was a two step process of first validating the machine through the upgrade routine, ensure the Windows 10 Upgrade was activated, then proceed to perform a Reset. With the latest November Update (1511), users no longer have to go through this process. In this article, we take a look at how to install and activate Windows 10 using your Windows 7 or Windows 8 product key.

Details

For the purposes of this article, We are using a Windows 7 license to perform clean install using Windows 10.

Please note: The copy of Windows 10 you download must correspond with the edition of Windows you are licensed for:

  • Windows 7 Starter, Home Basic, Home Premium, Windows 8.0 Core, Windows 8.1 Core must use a Windows 10 Home ISO
  • Windows 7 Professional, Windows 7 Ultimate, Windows 8.0 Pro, Windows 8.1 Pro must use a Windows 10 Pro ISO
  • If you are using Windows 7 Enterprise, Windows 8.0 Enterprise, Windows 8.1 Enterprise editions you won’t be able to use the free upgrade offer.

Review complete instructions how to download the Windows 10 ISO in the following article:

How to download official Windows 10 ISO files

Review instructions here how to start a clean install if you desire, if you want to perform an upgrade, clickhere.

Have your Windows 7 or 8/8.1 product key ready. If you purchased a retail license, you can find the product key within the product box. The Windows 7 product key is normally found on an orange sticker attached to a pamphlet inside the box. The Windows 8/8.1 product key is found on a small business size card. See examples below. Please note, you can also use your OEM product key too if Windows came preinstalled on your computer.

Retail:

retail

Windows 8/8.1

windows-8

If your computer came preinstalled with an OEM version of Windows 7, look for the Certificate of Authenticity sticker attached to the chassis of your computer. Normally this can be at the side or top of the system unit. For laptops, look at the bottom of the chassis or inside the battery or memory compartment. It looks like the following:

productkey

If you are running an OEM preinstalled Windows 8/8.1 license, Windows 10 setup should automatically detect the product key and install it automatically.

With Windows 8, Microsoft had changed from stickers that have the product key that the user has to type in when installing the operating system to new BIOS embedded product keys. The idea is that by eliminating the sticker, you eliminate one of the easier ways for nefarious users to get a legitimate product key. Eliminating the product key sticker also removes any worry that the sticker might get damaged while at the same time eliminating the long and irritating process of typing in various letters and numbers when installing the operating system.

If the user has to reinstall the operating system on a machine that came with Windows 8, the installation process automatically grabs the software product key from the motherboard BIOS with no input from the user. This means that those familiar Windows product key stickers will no longer appear on the Windows 8 computers.

If you have lost your Windows product key, Microsoft recommends you purchase a new one. 

http://windows.microsoft.com/en-gb/windows/where-find-windows-product-key#where-find-windows-product-key=windows-7

You might be lucky by contacting Microsoft Support who might be sympathetic to your situation:
http://support2.microsoft.com/kb/326246/en-us

Contact the Microsoft store:
US: http://www.store.microsoft.com/Help/Contact-Us
1-877-696-77861-877-696-7786 FREE
Canada: https://www.microsoftstore.ca/shop/en-CA/Contact-Us

Microsoft Support Contact Information:
http://support.microsoft.com/contactus/?ws=support

General Microsoft contact site: http://support.microsoft.com/contactus#tab0

If you are prompted to enter a product key during Windows 10 setup (November Update aka 1511) from within a running version of Windows, your Windows 7 or Windows 8/8.1 product key will not work. Instead, you should activate your Windows 7 or Windows 8/8.1 first, then re-run Windows 10 setup. You will not be prompted to enter a product key.

windows10productkey

During Setup: If you are prompted to enter a product key when you boot from the Windows 10 setup installation media, click the option ‘I don’t have a product key’. Select the appropriate edition you are licensed for.

Windows 7 Starter, Home Basic, Home Premium, Windows 8.0 Core, Windows 8.1 Core will install Windows 10 Home ISO

  • Windows 7 Professional, Windows 7 Ultimate, Windows 8.0 Pro, Windows 8.1 Pro will installWindows 10 Pro ISO

setup

  • Out of Box Experience, if you are prompted for a product key, Click Do this Later.Complete the installationReview instructions how to activateHow to troubleshoot Product Activation in Windows 10windowstroubleshootSuppose you decide to reinstall Windows 7 or Windows 8?You can reinstall or restore a system image of your previous version of Windows and continue using it, this will not affect the validity of the license.

    If you continue to experience problems entering your product key:

    Click Start > Settings (press Windows key + i) > Update & security > Activation then click Change product key

    windowsupdatekey

    OR

    Press Windows key + X

    Click Command Prompt (Admin)

    At the command prompt, type the following commands:

    slmgr.vbs -ipk xxxx-xxxx-xxxx-xxxx (allows you to replace the current product key with the specified)

    xxxx-xxxx-xxxx-xxxx – represents your product key

    Hit Enter on your keyboard

    Exit the command prompt

    Restart your computer

    Wait a while and it should activate, if not, give it a few days.

Have questions?

Get answers from Microsofts Cloud Solutions Partner!
Call us at: 856-745-9990 or visit: https://southjerseytechies.net/

South Jersey Techies, LL C is a full Managed Web and Technology Services Company providing IT Services, Website Design ServicesServer SupportNetwork ConsultingInternet PhonesCloud Solutions Provider and much more. Contact for More Information.

To read this article in its entirety click here.

Move Over Skype, Calling From Gmail

Kon’nichiwa, hola, and bonjour says Google, as it expands Gmail calling to support a total of 38 languages and four currencies including Euros, British pounds and Canadian / US dolla dolla bills y’all. The calling feature allows Gmail users to call landlines and mobile phones from within their Gmail browser for next to nothing, making the email center a one-stop shop for IMs, emails, video and voice calls. The year-old service is lowering its call rates to $0.10 per minute to mobile phones in the UK, France, and Germany, $0.15 per minute to Mexico, and $0.02 per minute to any number in China and India. Calling landlines is even cheaper — which would be fantastic if you actually knew someone that still used one. The expanded language support and cheaper calls adds another piece of ammo to Google’s arsenal as it goes head-to-head with Skype (which charges $0.18 – $0.25 per minute for calls to UK mobile numbers), after the company conveniently partnered with Google+’s arch nemesis for calls from within the social network. But hey, at least those late-night arguments won’t cost the former nearly as much as it once did.


To view the original article in it’s entirety, Click Here.

CALL US NOW!