
The new iPhone doesn’t come out until September, but that won’t stop the rumor mill from churning at a furious pace.

Now that WWDC is over, the iPhone 7 rumors are getting even louder, since its expected unveiling in September is probably the next time we’ll see Tim Cook on stage. Yes, that’s still a good while from now. To help keep track of all the scuttlebutt, we’re collecting every rumor we’ve heard so far—and every new one that crops up between now and the day Tim pulls the new iPhone out of his pocket. Then we’ll assess whether each rumor seems legit or absurd, and we’d love to hear your thoughts too. Sound off in the comments.
What’s the latest?
The rumor: Pricing specs for the upcoming iPhone 7 have allegedly leaked on Weibo, according to 9to5Mac. If believed, the specs show that Apple is looking to release a 256GB model of the iPhone 7 that will be the same price as the 128GB model of the current generation iPhone 6s. Furthermore, Apple would drop the meager 16GB models, offering instead 32GB, 64GB, and 256GB for the iPhone 7 and 32GB, 128GB, and 256GB for iPhone 7 Plus. And that’s not all, the rumor on Weibo has it that Apple is gearing up an iPhone 7 Pro line. This Pro model would be the only one to offer the dual-camera system that’s been rumored before, and a Smart Connector for accessories similar to the iPad Pro.
Plausible: Generation after generation, Apple has mostly retained the same pricing for iPhone models, so the fact that the 256GB iPhone 7 would cost the same as the current 128GB wouldn’t be unheard of. However, we’re a little skeptical that Apple would get rid of the 16GB base models, especially since iOS 10 seems to have been designed to optimize storage. And the Pro line would be an interesting addition, and would certainly make up for the fact that the iPhone 7 is rumored to be almost-identical to the 6s models. Apple is also making some strides in enterprise software, so an iPhone Pro would be a logical next-step.
Headphone jack after all?
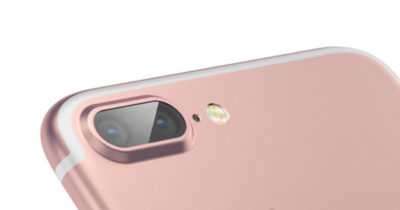
The rumor: Via Engadget comes some component photos from Rock Fix, a smartphone repair shop in China. They allegedly show a dual-SIM tray, another shows a dual-lens camera for the larger Plus model, and curiously, there’s even an Lightning assembly that still has the headphone jack attached. People who need a lot of storage will be pleased to hear another photo shows SanDisk memory ships up to 256GB, which would be the most storage Apple’s ever offered in an iPhone.
Plausible? It’s hard to give much weight to photos of components, and as reported in the same Engadget article, conflicting rumors about the dual-lens camera surfaced within days. But it is plausible that these components could be for the iPhone 7—and we know plenty of people who would be thrilled if the new phone had a headphone jack after all.
New colors?
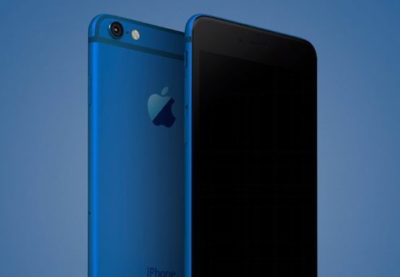
The rumor: It’s not easy being green, and iPhone owners might be starting to get envious of how many colors you can get an Android phone in. iPhones used to be pretty monochromatic, until Apple added gold and then an even brighter splash of color with last year’s rose gold hue (OK, OK, it’s pink). Japanese blog Macotara is reporting that Apple is switching it up this year, swapping the space gray color for navy blue instead.
Plausible? This is absolutely plausible. Apple’s iPhones have never been colorful, but the iPod touch comes in beautiful colored aluminum, and Apple has also set a tradition recently of switching up its Apple Watch bands to fit the season. One of the latest additions is a handsome navy Sport Band, and the Classic Buckle, Leather Loop, Modern Buckle, and two of the Hermès bands come in navy too. Navy looks great on both men and women, but we can’t help being a bit surprised it’s the “basic black” space gray color that’s rumored to be replaced.
A flat Home button?
The rumor: Blurry, possibly fake spy photos from mobipicker (via 9to5Mac) seem to show a very flat-looking Home button. As in, maybe it’s not a button, maybe it’s just a touch-sensitive place you touch (and/or 3D Touch) instead of physically clicking it.
A fully flat Home button could have 3D Touch potential too.
Plausible? The Touch ID button got a lot faster between the iPhone 6 and 6s, but any button that physically clicks is another opportunity for hardware failure. With the rise of installment plans and the iPhone Upgrade program, we expect Apple to keep making little tweaks that make its phones more durable, so they’re turned in good enough shape to be possibly refurbished and resold. So yes, this is very plausible, and we think Apple could pull it off where the experience is the same, perhaps even using a little haptic feedback to make it feel like the button is clicking but it’s not—just like the Force Touch trackpad.
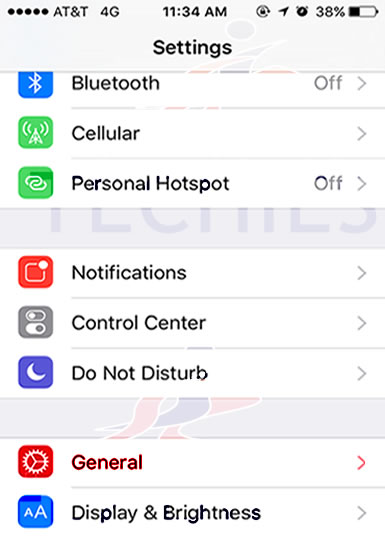
What about storage size?
The rumor: Apple is ditching the 16GB base model iPhone at long last, at least according to an IHS Technology analyst. The analyst posted on Chinese social media that the base model iPhone 7 will start at 32GB of storage space and 2GB of RAM, based on supply chain research.
Plausible? We sure hope so. Long-time Apple watchers have criticized the company for years over refusing to drop the 16GB model and forcing buyers to choose between the paltry base model and a 64GB option, with no 32GB in between. This is a tale as old as iPhones. In fact, when iOS 8 was released two years ago, many 16GB iPhone owners had to choose between offloading some of their apps, photos, and other files to upgrade to the space-hogging new version or hold off. Apple made iOS 9 a smaller, smarter upgrade, with temporary app deletion making the process easier. But apps easily eat up storage space, and Apple has improved its camera with Live Photos and 4K video-recording, both of which create large files. Sure, you can accept reality and choose the 64GB model, but it’s a lot more expensive. A 32GB base would hit the sweet spot and show Apple can change with the times.
Leaked photos show conflicting design tweaks?
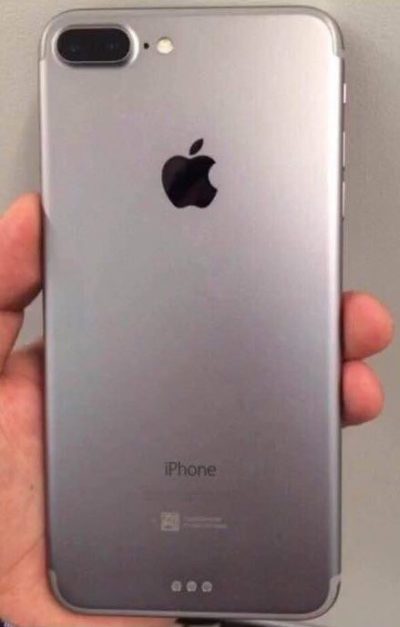
The rumor: Forbes reported on leaked photos that allegedly depict the iPhone 7 chassis. First posted on French tech site NowhereElse.fr, the photos suggest that Apple’s forthcoming iPhone with have double speakers on the top and the bottom, created quad array audio experience similar to the iPad Pro. The photos also seem to confirm, yet again, that the iPhone 7 will not have a headphone jack. Lastly, this iPhone 7 chassis has the flash repositioned underneath the camera, instead of right next to it.
But hold on… according to another recent iPhone 7 photo leak picked up by 9to5Mac, the flash will remain where it is on the 6s. So now we have conflicting rumors. Both sets of photos, however, do show that Apple has redesigned the antenna lines. Instead of horizontal lines, the antenna lines on the iPhone 7 will allegedly be traced along the top and bottom edge of the device.
Plausible? These conflicting Apple rumors could mean a few things. Either both leaked photos are fake, one of them is fake, or both of them are real. According to Forbes, Apple is known for creating several different prototypes of its upcoming products to test, so these photos could both be depicting early but different iterations of the iPhone 7. That both of them would leak, however, seems unlikely.
Smart connector?
The rumor: New images and renderings have surfaced allegedly depicting the iPhone 7 and 7 Plus models. Quoting the Japanese site Mac Otakara, MacRumors reported that these images could be the “real thing.” The leaked image of the iPhone 7 Plus shows a Smart Connector, hinting at the possibility of a Smart Keyboard. While the Mac Otakara report seems to confirm previous rumors the iPhone 7 and 7 Plus will have a similar design to the current generation 6s and 6s Plus, the website also contests previous reports. Most notably, Mac Otakara now refutes the rumor that these new iPhones will have a second speaker to create stereo sound.
Plausible? Apple has been releasing a lot of accessories in the last few months, especially for the iPad Pros. It’s possible the company wants to continue this trend and adding Smart accessories to the 7 Plus. However, a Smart Keyboard suggests that the larger iPhone could have some Pro-style features, and we’re not sure if Apple would want to have it compete with the just-released 9.7-inch iPad Pro.
No headphone jack, really?

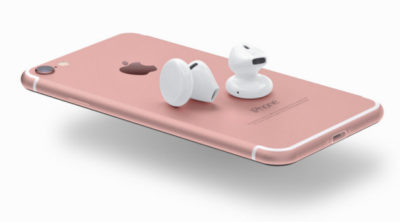
The rumor: Here it is: a leaked iPhone 7 case… allegedly!9to5Mac reported the leaked images as first posted on the@OnLeaks Twitter account. The leaks seem to corroborate a few other rumors about the iPhone 7. For example, the case has no slot for a 3.5mm audio jack, signaling that Apple might be pushing for only Bluetooth and Lightning-connected headphones. The case also has two equally sized speaker grills on each side of the Lightning port slot, confirming that the iPhone 7 will be the first to sport two speakers for stereo sound. Other than that, the purported case points to an iPhone 7 hardware design that’s nearly identical to the iPhone 6s.
The no-headphone-jack rumor has been around for a while, previously reported by Fast Company and others. Apple is said to be developing wireless EarPods to be sold separately, alongside the iPhone 7. The premium EarPods will reportedly support Siri and wireless phone calls and ship with a carrying case that doubles as a charger.
Plausible? The larger design of the iPhone 6 and 6s lines have proven very successful for Apple, so we can see why the company would want to play it safe design-wise with the iPhone 7. But this similar design may not offer enough reasons to upgrade as we’ve seen with previous numbered upgrades—and if the major innovation requires a lot of people to ditch their 3.5mm headphones or use an adapter, get ready to hear some major griping.
This is the most controversial iPhone rumor in years, even more than the change of sizes with the iPhone 6. Some people love the idea. Others hate it. There’s even a petition to convince Apple that people still love the headphone jack. That petition has just over 300,000 signatures.
How does the dual-lens camera work?
The rumor: We previously reported on the rumor that Apple is looking to bring a dual-lens camera to forthcoming iOS devices. Based on LinX camera technology that Apple acquired last year, the dual-lens incorporates a wide-angle lens and a telephoto lens. According to MacRumors, a recent Apple patent shows for a a split-screen viewfinder where users can see the full image in the wide-angle lens and zoom in with the telephoto lens. The camera will be able to take two separate pics, or use one of the lenses to shoot video and the other to take stills. More impressively, the camera could also implement LinX’s technology to stitch it all together into one really crisp image.
Plausible? The race for bringing DSLR-quality cameras into smartphones is on. Samsung’s recently-unveiled Galaxy S7 garnered rave reviews for its use of Duo Pixel Technology to take photos. Apple may be feeling the heat to create an equally-stunning photo experience to the iPhone 7. If the dual-lens technology as outlined in this patent comes to fruition, it would help the iPhone regain its reputation as the best camera phone on the market.
How thin will the iPhone 7 be?
The rumor: Macotakara reported this week that the iPhone 7 will be 6.1mm thick. That’s one whole millimeter thinner than the current iPhone 6s, which measures 7.1mm. This new thinner model will be accompanied by a flush rear camera (so not protruding) for a design that’s sleeker overall.
Plausible? If this rumor is true, Apple seems to be under the impression that thinner is better. Apple has already made a device that measures just 6.1mm: the iPod touch. So it makes sense that the company would want to try to make the newest iPhone be just as thin. Hopefully, the iPhone 7 won’t be affected by any “Bendgate” issues because of this thinner design.
Will the thinner Lightning port mean I have to get new cables?
The rumor: In addition to getting rid of the 3.5mm headphone jack to achieve this new thinness, the iPhone 7 is rumored to integrate a thinner Lightning port. This will not affect the actual Lighting cables, however, so you won’t have to get all new connectors for the iPhone 7. What Apple is doing is simply making the cutout around the port smaller, so it should only affect case-makers, according to 9to5Mac.
Plausible? If Apple is already going insofar as to removing the headphone jack, which has already sparked plenty of controversy, then a slight redesign of the Lightning port doesn’t seem like a big deal. Especially if our current Lightning connectors will still be able to hook up to it.
Camera differences between the 7 and 7 Plus?
The iPhone 7 Plus might have the most amazing smartphone camera ever.
The rumor: The iPhone 7 Plus will have a better camera, to the chagrin of small-handed amateur photographers around the world. According to MacRumors, the 7 Plus may have a dual-lens camera with optical zoom, which means this phone will take better photos than many traditional cameras. Instead of pinching to zoom in digitally, which usually results in a terrible grainy photo, the 7 Plus camera will have an optical zoom. That’s where the second camera lens comes in: It’s essentially a zoom lens.
Plausible? Yes. The iPhone 6s and 6s Plus have most of the same features, but the larger phone has a small but key difference: optical image stabilization. That feature uses the Plus’s gyroscope and camera array to steady your photos even if your hand shakes. The 6 and 6s rely on camera software to achieve the same effect, though the resulting images aren’t quite as clear. If the 7 Plus has a dual-lens camera with optical zoom, it would be a huge differentiator—the Plus could become the phone to beat for serious photographers.
Is that unsightly camera lens bulge going away?
The rumor: Apple redesigned the 6 and 6s models to be thinner and lighter than ever before, but there’s one big problem: The rear-facing camera lens juts out of the body, so the phones won’t sit flat on a surface. For a company that’s all about the details, this seemed like a strange design decision. The iPhone 7 is reportedly getting a camera that sits flush against the phone, according to MacRumors, so your eyes won’t be offended any longer.
Plausible? We sure hope so. That camera protrusion had to happen for a reason, but even Apple design chief Jony Ive is not a fan.
Will the iPhone 7 be waterproof?
The rumor: Making the iPhone thinner than ever and adding a DLSR-quality camera aren’t game-changing enough for Apple, apparently, so the company is reportedly working on ways to waterproof the iPhone 7. Ambitious? Yes. Possible? Definitely. Without a headphone jack to trap water, Apple could coat the iPhone with a waterproof coating and make those third-party rugged, waterproof cases obsolete.
Plausible? Actually, yes. Apple took several steps to waterproof the iPhone 6s without actually calling it waterproof, as detailed here, and word on the street from people who have accidentally submerged a 6s indicates that those techniques worked. All Apple needs is some waterproof buttons (which it’s reportedly working on), and they’re set.
Next year’s iPhone
Yes, you read that right. In this craziest of iPhone rumor cycles, we’re been reading rumors for the 2017 iPhone mixed in with rumors of the iPhone that should come out in September of 2016. Just to keep them all straight, here are the things we may have to look forward tonext year.
An OLED screen and glass on both sides
The rumor: Remember the iPhone 4, encased in glass on both sides, so you’d have twice as many surfaces that could shatter every time it slipped out of your hand? Apple might bring back an all-glass design in 2017. Hopefully it’s a bit more durable this time.
KGI Securities analyst Ming-Chi Kuo thinks that Apple is planning a major iPhone redesign for 2017—not this fall. In a note to investors, he predicted an iPhone with a 5.8-inch OLED screen that’s encased in glass on both sides, yet smaller than the current iPhone 6s Plus, meaning Apple would be looking to eliminate as much bezel and “chin” as possible. DisplayMate President Ray Soneira echoed Kuo’s OLED predictions in a recent report, citing the “rapid improvements” in OLED performance over the last six years.
“Apple simply has no choice in switching,” Soneira said, because OLEDs are thinner, lighter, more responsive, and can be curved or bent in ways that LCD displays just can’t.
Kuo also predicted the all-glass 2017 iPhone would have wireless charging, and some kind of biometrics, like face recognition or iris scanning. The Home button takes up a lot of space on the current iPhones, and replacing it with other biometrics for login and Apple Pay (along with deep-touch gestures for exiting apps) could let Apple expand the screen.
Plausible? In Apple’s usual “tick-tock” cycle, the 2016 iPhone would get a redesign, since the current iPhone 6s and 6s Plus are upgrades to the iPhone 6 and 6 Plus designs that launched in 2014. But if Apple really is switching to OLED, that’s a major shift that might need more time to perfect. It’ll be interesting to see what innovations Apple can add in 2016 to make the iPhone seem exciting even if the overall design stays the same—a better camera and a Smart Connector are a start.
More evidence of OLED
The rumor: According to a recent Bloomberg report, Applied Materials, an Apple supplier, has received almost four times the amount of orders for its display-making machines. This jump is linked to Apple retooling the iPhone manufacturing process to include OLED screens in the fall of 2017.
Plausible? We’ve already bought into the general rumor that Apple would switch to OLED, and this report supports the 2017 timeline—according to Applied Materials, it takes about 3 quarters for their machines to be build, delivered, and installed.
Have questions?
Get answers from Microsofts Cloud Solutions Partner!
Call us at: 856-745-9990 or visit: https://southjerseytechies.net/
South Jersey Techies, LL C is a full Managed Web and Technology Services Company providing IT Services, Website Design Services, Server Support, Network Consulting, Internet Phones, Cloud Solutions Provider and much more. Contact for More Information.
To read this article in its entirety click here.


