Back to Top

Tech, Web, Cloud & Cabling Services

Category: PCs

Hardware / PCs Category

10 cool technologies to look for in your next PC

Takeaway: Impressive new technologies are revolutionizing PC performance, but should you buy now or wait for more improvements? These details will help you decide.

It’s an exciting time for PC enthusiasts. I can’t remember a period when so many existing technologies were being upgraded to the next generation and new technologies were being introduced. Even non-enthusiasts need to know about the changes that are happening to the desktop PC.

But knowing when to upgrade your PC to the latest and greatest can be a difficult decision. Should you buy now or wait for the even more advanced technology that has been promised by the likes of Intel, AMD, and others? For power users, and a lot of IT professionals fall into this category, waiting for a specific technology can have a huge impact on their future productivity and ultimate success. I will list 10 PC-based technologies that are either new or soon to be released and leave it to you whether it is “got to have” or “can do without” technology.

Note: Release schedules, specifications, and prices are subject to change prior to formal release. Use this information as a guideline only.

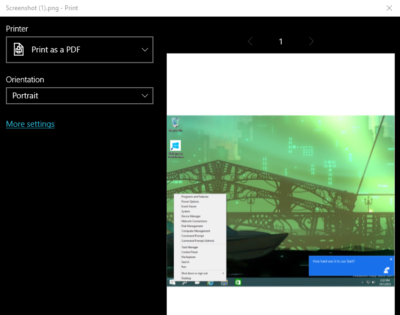
Extra info: This article is available as a PDF download that includes 11 tables containing additional details on availability, configuration, and technical specifications.

1: USB 3.0

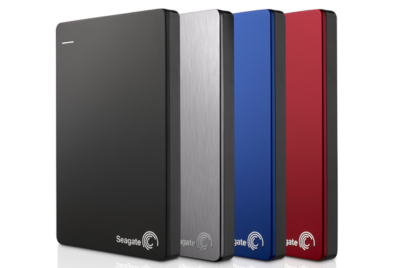
USB devices are ubiquitous, so it’s only natural to want to know more about the successor to USB 2.0. USB 3.0 increases the effective data transfer rate by a factor of more than six — a huge improvement over USB 2.0. It also provides more power than USB 2.0 when devices need it, 4.5 Watts versus 2.5 Watts, respectively, and less when they don’t. USB 3.0 is available now as a chip added to the motherboard or via an add-in card. AMD supports USB 3.0 natively and Intel has announced plans to support USB 3.0 in its 7-series Panther Point chipsets.

Additional resources

  • 10 things you should know about USB 2.0 and 3.0 (TechRepublic)
  • USB 3.0 (Wikipedia)

2: Intel Thunderbolt

Intel, along with Apple, has developed a technology to compete with USB called Thunderbolt — although Intel prefers to think of Thunderbolt as coexisting with USB. Originally codenamed “Light Peak” and making use of optical cables, Thunderbolt is copper-based, allowing for 10 watts of power over the copper. Thunderbolt combines PCI Express and DisplayPort protocols into one shared interface.

There is quite a bit of confusion about the total bandwidth of a Thunderbolt port. According to this Intel Technology Brief, “A Thunderbolt connector is capable of providing two full-duplex channels. Each channel provides bi-directional 10Gbps of bandwidth.” That is 20Gb/s upstream and 20Gb/s downstream. So why is Thunderbolt advertised at 10Gb/s or “only” twice the speed of USB 3.0? An Intel spokesman explained it this way in PC Magazine: “So in summation you have potential for up to 20Gb/s upstream AND 20Gb/s downstream, but any single device maxes out at 10Gb/s (you don’t ‘combine’ the two channels).”

Of course, most consumer storage devices don’t come anywhere near the 10Gb/s data rate, but that is changing with the faster SSDs and flash drives now being produced. Also, up to seven total devices can be daisy-chained to use the remaining 20Gb/s per direction total bandwidth. One or two of these can be high resolution DisplayPort v1.1a displays.

This speed comes at a price, though. A 2.0 meter copper-based Thunderbolt cable costs $49.00 USD, the cost due primarily to the Gennum GN2033 controllers and other electronics built into each end of the cable that performs the data moving and multiplexing magic. You also have to add the cost of the Thunderbolt controllers needed on both the host and peripheral device.

Expect Thunderbolt to be supported on Intel’s Ivy Bridge processors but don’t count on it being available on the 7-series Panther Point chipsets due out in March of 2012. There are limitations I won’t bore you with here, but they are listed in this article, along with other Thunderbolt details.

Thunderbolt using optical cable, also known as 50G Silicon Photonics Link (PDF), continues to be in the works and may appear as early as 2012. According to Dave Salvator of Intel, “Current supported data rate is two channels at 10Gbps bi-directional each.” Thunderbolt ports accept either copper or optical cables.

Additional resources

  • Thunderbolt Technology: The Transformational PC I/O (Intel)
  • Thunderbolt Web site (Intel)
  • Thunderbolt (interface) (Wikipedia)
  • Introducing Thunderbolt (Apple)

3: Serial ATA International Organization: Serial ATA Revision 3.0

That long name is the formal specification name of the follow-on to SATA Revision 2.0. SATA Revision 3.0 or SATA 6Gb/s doubles the effective data transfer rate of SATA Revision 2.0. Looking further out, the SATA Revision 3.2 specification is due by the end of 2011 that creates the SATA Express standard. SATA Express combines SATA software infrastructure and PCI Express to enable 8Gb/s using PCIe 2.0 or 16Gb/s using PCIe 3.0. Both SATA Revision 3.0 and SATA Express are intended to accommodate the increasing data speeds of sold-state and hybrid drives.

Except for Queued TRIM Command, SATA Revision 3.1 includes features primarily for non-PC devices.

Additional resources

  • Fast Just Got Faster:  SATA 6Gb/s (The Serial ATA International Organization [PDF])
  • SATA-IO Releases Revision 3.1 Specification (The Serial ATA International Organization [PDF])
  • SATA revision 3.0 (SATA 6 Gbit/s) (Wikipedia)

4: PCI Express 3.0

PCI Express 3.0 is the next generation standard for the Peripheral Component Interconnect Express, or PCIe. For average PC users, this means that their graphics cards and other extreme I/O add-in cards will be able to transfer data at twice the rate of PCIe 2.0.

PCI Express 3.0 uses a more efficient method of data encoding, 128b/130b, with a 1.5385% overhead versus the 20% overhead of 8b/10b used in the PCIe 2.0 specification. This allows for a doubling of the effective transfer rate even though the total bandwidth increases only 60% from 5GT/s to 8GT/s. Tom’s Hardware is reporting that the first three Sandy Bridge-E processors scheduled for release in November 2011 will have PCIe 3.0 capability but without the PCIe 3.0 certification.

Additional resources

  • PCI Express 3.0 (Wikipedia)
  • PCI Express 3.0 Frequently Asked Questions (PCI-SIG)

5: SSDs & SSD Toolbox

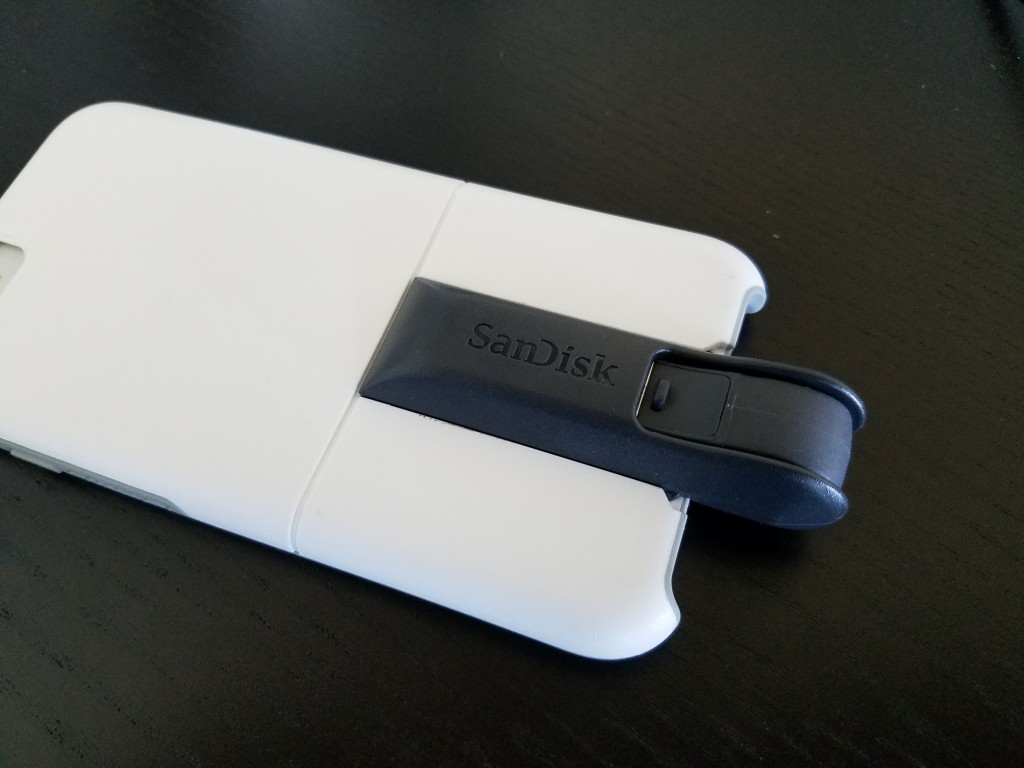
SSDs promise huge increases in performance over the most common bottleneck in a personal computer system, data access to and from hard drives. SSDs are approaching and even exceeding 500MB/s sequential read and write rates. But there are plenty of cons that come with that speedy SSD. SSDs have small capacities and are still expensive compared to hard disk drives. While they are available and have been for quite a while now, the technology is going through birthing pains, as exemplified by the continued compatibility issues with the SandForce SF-2200 series of controllers (see below).

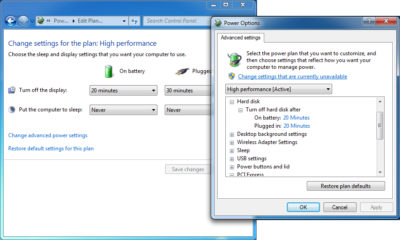
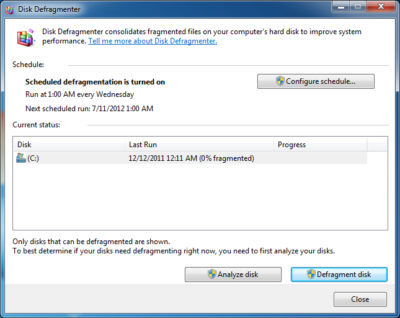
Firmware issues continue to appear, though as in the case of the Intel “Addresses Bad Context 13x Error,” firmware updates to remediate the issue are available. SSDs require a different mindset than with traditional hard disk drives. To maximize life and performance, users need to be educated about defragmentation, Hibernation, AHCI and TRIM and Page File.

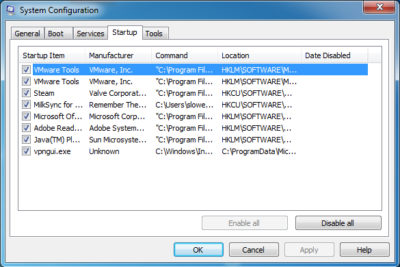
The Intel Solid-State Drive Toolbox (PDF) monitors and manages Intel’s SSDs and adds new features. These features include the Intel SSD Optimizer TRIM function, System Configuration Tuner, Secure Erase, access to the SMART data, and running diagnostics to check for read or write errors. OCZ offers a toolbox for their SSDs, and Samsung provides the SSD Magician Tool. SSD Tweaker optimizes Windows for your SSD, and a free version is available.

Additional resources

  • Solid-state drive (Wikipedia)
  • Intel SSD Toolbox Questions and Answers (Intel [PDF])

6: SandForce DuraClass SSD controllers

SandForce has developed a controller for SSDs that adds these DuraClass technology features to the base SSD drive:

  • Five-year expected life using inexpensive MLC flash memory
  • SATA 6Gb/s Interface
  • DuraWrite — Reduces write amplification to 0.5 (typical)
  • SandForce RAISE technology
  • (Redundant Array of Independent Silicon Elements) – Provides RAID-like redundant protection for single SSD computers
  • Automatic AES-128 encryption (SF-1000)
  • Automatic AES-256 encryption (SF-2000)
  • Currently available

Look for the SandForce DRIVEN logo when specing out an SSD or check out this list of SSDs that use the SandForce DuraClass Controllers. Before purchase, be aware that some users have reported problems (including some BSODs) with the SF-2200 controllers. SandForce continues to look into the issue and new firmware updates are in test now.

Additional resources

  • SandForce (Home page)
  • SandForce (Wikipedia)

7: AMD Bulldozer

Power users have been anxiously awaiting the details of AMD’s Bulldozer processors. The desktop processor models are called AMD FX and were officially launched on October 12, 2011. This is not your secretary’s processor — the full AMD FX lineup of CPUs is unlocked. Four models are available at the initial launch, one 4-core model, one 6-core model, and two 8-core models. The processors, codenamed Zambezi, have a 32nm die size. High-end FX models will ship with a sealed liquid cooling system made by Asetek, pictured here, though they will initially be limited to specific markets and not available at launch. Availability of the liquid cooling system in the U.S. is still to be determined.

Before you get too excited, you need to fully understand the exact meaning of a Bulldozer “core.” The Bulldozer microarchitecture employs one module with “two tightly-linked processor cores” that share a fetch, decode, and 256-bit floating-point units and 2MB of L2 memory cache. For example, four Bulldozer modules provide the eight “cores” of the FX-8000 series processors. Testing by AnandTech and Tom’s Hardware of an FX-8150 processor shows that single-threaded performance is similar to that of the Intel Core i5-2500K. Performance is better with higher workloads and multi-threaded applications that can utilize more of its eight “cores.”

Additional resources

  • AMD FX Processors (AMD)
  • AMD Hot Chips Bulldozer & Bobcat Presentation (SlideShare)
  • AMD “Bulldozer” Interactive Series – Introduction (YouTube)
  • Bulldozer (processor) (Wikipedia)

8: Intel Sandy Bridge-E

The next generation of Sandy Bridge processors is dubbed Sandy Bridge-E, with the E meaning Enthusiast. Unlike AMD, which delayed the release of its nex- generation processors, rumors are that the release date of three of the Sandy Bridge-E processors has been pushed up to November 2011. Performance increases of 12% to 65% are expected, compared to similar processors. While the Sandy Bridge-E processors will be built using the 32nm production process, the follow-on processor series, codenamed Ivy Bridge, which is expected in March 2012, will use the 22nm process.

It’s a little confusing, but the Sandy Bridge-E processers will use the new LGA 2011 socket and the X79 Patsburg chipset. The Ivy Bridge processors will use the existing LGA 1155 socket plus the existing 6-series Cougar Point chipset or the yet-to-be-released 7-series Panther Point chipset. As mentioned above, one advantage of the 7-series Panther Point chipset is that it will have native USB 3.0 support.

Like AMD, X-bit labs is reporting that top Sandy Bridge-E models will ship with a new liquid cooling system. The RTS2011C liquid-cooling system looks remarkably like the AMD cooler, which may be more than coincidental, since both are supposedly built by Asetek. This cooling solution will also be sold separately, which is of note since Sandy Bridge-E processors may ship without a cooler.

You will want to wait before purchasing a Sandy Bridge-E processor if you are interested in using hardware accelerated virtualization. Rumors are that the C1 stepping revision has a problem with VT-d, Virtualization Technology for Directed I/O, which will be fixed in the C2 stepping.

Additional resources

  • Intel Core i7-3960X (Sandy Bridge-E) And X79 Platform Preview (Tom’s Hardware)
  • LGA 2011 and Sandy Bridge-E News from IDF 2011 (X-bit labs)

9: DDR4 SDRAM

With publication of the DDR4 SDRAM standard not expected until mid-2012, don’t expect to see DDR4 memory in desktops anytime soon. Availability is confusing since a presentation by the JEDEC director at MemCon 2010 suggested 2015. But BeHardware.com claims that Hynix plans to begin mass production of DDR4 SDRAM in the second half of 2102. Regardless of DDR4 memory module production dates, supporting processors and chipsets may lag well behind — late 2013 is projected for AMD. Unless you are willing to wait until then, your next PC will contain DDR3 SDRAM memory. There is some good news for those wanting faster SDRAM in the near future. The FlyingSuicide Web site is reporting that Sandy Bridge-E processors will officially support DDR3 speeds up to 2133MHz. X-bit labs is reporting that Ivy Bridge processors will support DDR3 memory operating at 2800MHz, even though DDR3 memory at these speeds is not yet available. Either of these would be a great interim solution while waiting for DDR4, assuming of course that the rumors turn out to be accurate.

DDR4 is expected to use a point-to-point approach instead of dual- and triple-channel architecture, though JEDEC has not formally announced that it will be in the final spec. According to JDEC, “The DDR4 standard will be implemented with 3D support from the start.” This means that memory can be stacked using technologies like Through-Silicon Via (TSV). The voltage is expected to eventually decrease from 1.2V to 1.05V.

Additional resources

  • DDR4 SDRAM (Wikipedia)
  • JEDEC Announces Key Attributes of Upcoming DDR4 Standard (JEDEC)
  • DDR4: What we can Expect (bit-tech)

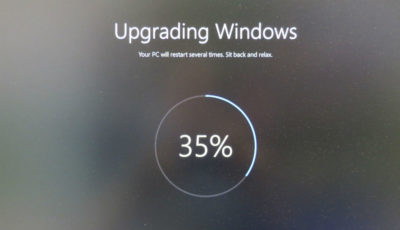
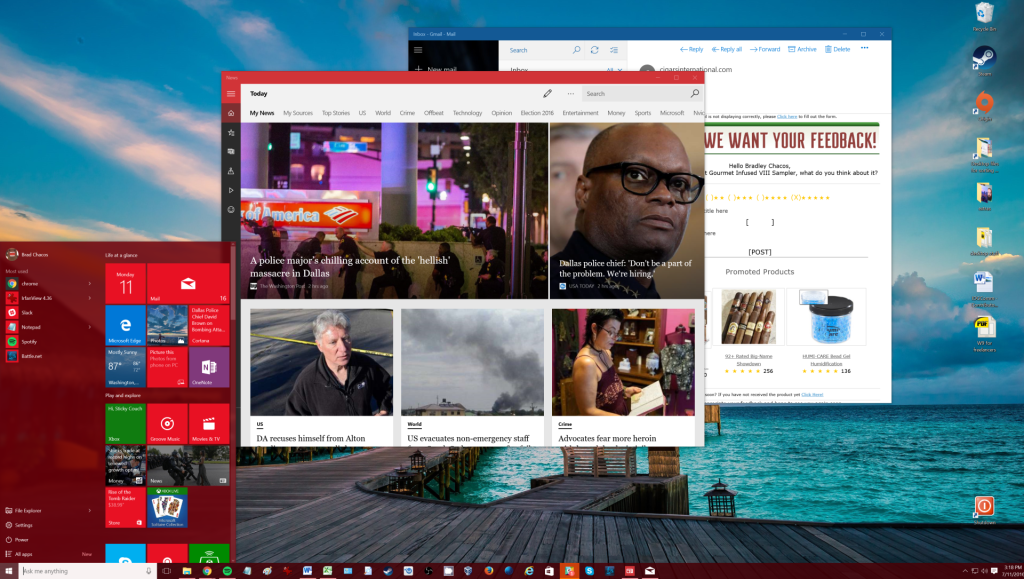
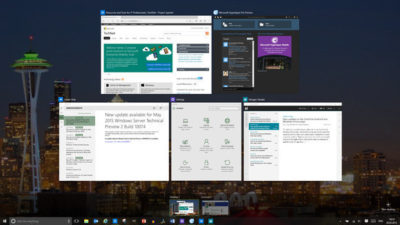
10: Microsoft Windows 8

The major change in Windows 8 begins with the UI, called the Metro UI. A new start screen with Live Tiles replaces shortcut icons. A touch screen monitor will obviously be required if you want to use the new interface with your fingers instead of a mouse. The hints so far are of a UI more befitting a tablet than a personal computer. Yes, you almost certainly will be able to turn off the Metro UI in the final release, but why upgrade to Windows 8 just to turn off its biggest selling feature? It is still too early to tell what other new features will be available that will increase productivity and make for a better user experience on a PC. Windows 8 is expected to support USB 3.0, but as of this time there is no definite news whether Thunderbolt will also be supported. With Thunderbolt coming to the PC in 2012, Microsoft would be remiss to overlook it.

Many questions remain as to whether Windows 8 will be a success on a desktop PC in the workplace:

  • Will users adopt the new interface — with or without a touch screen monitor?
  • Will employers invest in more expensive touch screen monitors?
  • Will Windows 8 be more productive?
  • Will reaching out to touch a monitor eight hours a day cause physiological pain or even harm?

Until more is known, expect businesses to take a cautious, even skeptical approach to Windows 8. Decide for yourself if you like the new interface- – preview Windows 8 by downloading the Windows Developer Preview, a pre-beta version for developers but available to everyone.

Additional resources

  • Windows 8 (Wikipedia)
  • Previewing “Windows 8? (Microsoft)
  • Windows 8 features explained: What’s new and how it works (Digital Trends)
  • Windows 8 features we know about so far (TechRepublic)
  • Building robust USB 3.0 support (Microsoft)

The bottom line

It’s taken 30 years, but I finally have a system that is fast enough for my needs. My Foxconn BlackOps, Intel Core 2 Quad Q9650 with RAID 10 system will more than suffice. Which leads to the obvious question: How much of this technology do you really need? The core wars between AMD and Intel continue, but realistically, how many of those Bulldozer “cores” can you keep busy in a world of single-threaded apps? Other technologies, like USB 3.0, Thunderbolt, SATA Revision 3.0, PCIe 3.0, SSDs, and SandForce promise immediate performance gains. Of course, needs vary, and whatever new technology you include in that next PC should be based on your individual needs.

With all of the buzz about the latest tablet or smart phone, the PC is still the workhorse for most cubicle residents. No matter how careful you are future-proofing your next personal computer, there will always be newer technologies on the horizon. But the next six months look like a great time to upgrade that relic sitting on your desktop you used to call a PC and get the bulk of the new technologies. Happy shopping!

Author’s note: I would like to thank SandForce, Intel, and AMD for their help with this article.


3 ways to create more secure passwords

The must-read IT business eNewsletter

Encrypted passwords

“There is no such thing as perfect security,” says Jim Waldron, Senior Architect for Platform Security at HP. If you can access a website or server, consider it vulnerable to security breaches. That’s why so many businesses account for fraud in their business models—they expect to lose a certain amount each year to security leaks, lost IP, and more.

While you can never be 100% secure from hackers while connected to the internet, there are steps you can take to help protect your personal and professional data. All you need to do is activate features that are increasingly common (or easy to manage) on modern business-class PCs: Multi-factor authentication, client-based user authentication, and password best practices.

Multi-factor authentication
Multi-factor authentication is a simple but effective security system that involves the use of at least two factors (or methods) of authentication. It groups different factors together so that even if one is compromised, the data remains protected. Under this system, factors are divided into three domains:

HP support


  • Something you know: Password, PIN, etc.
  • Something you have: ATM card, smartcard, etc.
  • Something you are: Fingerprint, iris, etc.

For multi-factor authentication to be successful, you want to pull from at least two different domains, with a maximum of three domains. A common example of multi-factor authentication is when you withdraw cash from an ATM. To do so, you insert your ATM card (something you have) and enter your PIN (something you know). Without both factors you can’t access your account—and neither should anyone else.

Businesses are taking notice too, and multi-factor authentication’s popularity is rising. In 2014, 37% of enterprise organizations surveyed used multi-factor authentication for the majority of their employees, and that number is expected to grow to 56% by 2016.

What you can do now
If you have a business-grade PC, chances are your PC already includes the technologies you need to start using multi-factor authentication. In fact, HP offers multi-factor authentication on all of its business PCs. Consult your manual or HP Support, and identify the factors your PC supports in addition to traditional passwords, such as fingerprint or smartcard readers. Just make sure to choose factors from separate domains.

Client-based user authentication
Every time you log into a system, your identity needs to be authenticated by that system. This process occurs one of two ways: server-side authentication or client-based authentication. With server-side authentication your unencrypted information—such as your password or fingerprint—is sent to a server where it is compared against that server’s records. With client-based authentication, the authentication process—e.g., “Does this fingerprint match the one in our records?”—is performed on the client device, such as your work PC.

While client-based authentication is not as common as its counterpart, it is far more secure. In fact, “In almost all authentication scenarios it is preferable to perform the direct authentication on the client and then communicate an ‘Identity Assurance’ to the relying party,” says Waldron.

Everyone wins when it comes to client-based authentication. The client no longer has to send unencrypted, private information over the internet or store that information on another party’s server, while the relying party no longer has to store sensitive client information on their server—reducing the amount of information that can be stolen if and when a hack occurs.

What you can do now
One of the easiest ways to use client-based authentication is with a hardened fingerprint sensor. The sensor authenticates your fingerprint directly in the hardware, rather than sending it to a server or hard drive, and returns a key that can be used to decrypt password vaults.

Password best practices
As we’ve mentioned before, passwords aren’t perfect. While implementing and using the above features might not seem practical for some of us, everyone can benefit from following basic password best practices. They are quick to implement, and can save you a lot of hassle down the line.

To make the most of your password security, your passwords should be:

  • Long—at least 16 characters. Use a password manager to store unique passwords and fill out log-in forms so that you don’t have to memorize them.
  • Complex—containing symbols, numbers, uppercase letters, lowercase letters, and spaces (if possible)
  • Unique—only use a password once, don’t recycle or repeat across accounts
  • Short-lived—the National Cyber Security Alliance suggests changing your password every 60 days
  • Difficult to guess—avoid common words found in a dictionary, all or part of your name, repeated letters, or combos that align to your keyboard layout, such as “QWERTY” or “123456”

If you are uncertain whether your password is secure enough or if it meets enough of the criteria above, there are several reliable services that will check your password strength for you. Microsoft’s Safety & Security Center offers a free password checker you can access through your browser, while Mac users can access Apple’s Password Assistant through the Keychain Access utility.

What you can do now
The first thing you can do—right this second—is revise your most important passwords to align with password best practices. That includes your work accounts, personal email, bank accounts, and any other services that contain sensitive data. If you need help remembering your new passwords, consider using a password manager such as HP Password Manager. That way you only have to authenticate once to gain access to all your systems. You can also adopt a system to make your passwords easier to remember. Using acronyms, for example, you can turn the phrase “I was born in 1986 and my parents still live on Lake Street!” into “Iwbi1986ampsloLS!”—creating a strong password that’s easy to remember.

Passwords are changing, and while they will never be perfect, they can still provide an effective first layer of defense against hackers and ne’er do wells. The above features and techniques are increasingly common on modern business PCs, making it easier than ever to protect your private data. All you have to do is use them.

Have questions?

Get help from IT Experts/Microsofts Cloud Solutions Partner
Call us at: 856-745-9990 or visit: https://southjerseytechies.net/

South Jersey Techies, LLC is a full Managed Web and Technology Services Company providing IT Services, Website Design ServicesServer SupportNetwork ConsultingInternet PhonesCloud Solutions Provider and much more. Contact for More Information.

To read this article in its entirety click here.

How to get the Windows 10 Anniversary Update

windows10anniversary

Update 8/16/16: The Windows 10 Anniversary Update has begun rolling out for Windows 10 Mobile. The Anniversary Update includes additional features and improvements for your Windows 10 phone. To manually check for the update, on Start, swipe over to the All apps list, then select Settings > Update & security > Phone update > Check for updates. Note that availability may vary by manufacturer, model, country or region, mobile operator or service provider, hardware limitations and other factors.

The Windows 10 Anniversary Update has begun rolling out for customers around the world*. The Windows 10 Anniversary Update is full of new features and innovations that bring Windows Ink and Cortana** to life; a faster, more accessible and more power-efficient Microsoft Edge browser; advanced security features; new gaming experiences and more. The Windows 10 Anniversary Update will start rolling out to Windows 10 Mobile phones in the coming weeks.

The Windows 10 Anniversary Update is being rolled out to Windows 10 PCs across the world in phases starting with the newer machines first. You don’t have to do anything to get the Windows 10 Anniversary Update, it will roll out automatically to you through Windows Update if you’ve chosen to have updates installed automatically on your device. However, if you don’t want to wait for the update to roll out to you, you can manually get the update yourself on your personal PC. If you’re using a Windows 10 PC at work, you will need to check with your IT administrator for details on your organization’s specific plans to update.

Here are a couple ways you can manually get the Windows 10 Anniversary Update

Go to Settings > Updates & Security > Windows Update

settings

1. In Windows Update simply click Check for Updates.

checkfor-updates

2. The Anniversary Update will appear as, Feature update to Windows 10, version 1607. Click update and the update will begin downloading and installing.

updateinstalling

Another way to get the Windows 10 Anniversary Update will be by clicking “Learn more” just below the “Looking for info on the latest updates? In Windows Update.

learnmore

From there you’ll be taken to a support page on Microsoft.com that will allow you to download the ISO file to your PC.

We hope you enjoy the Windows 10 Anniversary Update!

*Windows 10 Anniversary Update will be available in all countries where Windows 10 is available.
**Cortana available in select markets

Have questions?

Get answers from Microsoft’s Cloud Solutions Partner!
Call us at: 856-745-9990 or visit: https://southjerseytechies.net/

South Jersey Techies, LL C is a full Managed Web and Technology Services Company providing IT ServicesWebsite Design ServicesServer SupportNetwork ConsultingInternet PhonesCloud Solutions Provider and much more. Contact for More Information.

To read this article in its entirety click here.

Windows 10 quick tips: 10 ways to speed up your PC

Want Windows 10 to run faster? Take a few minutes to try out these tips, and your machine will be zippier and less prone to performance and system issues.


1. Change your power settings

If you’re using Windows 10’s Power saver plan, you’re slowing down your PC. That plan reduces your PC’s performance in order to save energy. (Even desktop PCs typically have a Power saver plan.) Changing your power plan from Power saver to High performance or Balanced will give you an instant performance boost.

To do it, launch Control Panel, then select Hardware and Sound > Power Options. You’ll typically see two options: Balanced (recommended) and Power saver. (Depending on your make and model, you might see other plans here as well, including some branded by the manufacturer.) To see the High performance setting, click the down arrow by Show additional plans.

To change your power setting, simply choose the one you want, then exit Control Panel. High performance gives you the most oomph, but uses the most power; Balanced finds a median between power use and better performance; and Power saver does everything it can to give you as much battery life as possible. Desktop users have no reason to choose Power saver, and even laptop users should consider the Balanced option when unplugged and High performance when connected to a power source.


2. Disable programs that run on startup

One reason your Windows 10 PC may feel sluggish is you’ve got too many programs running in the background programs that you may never use, or only rarely use. Stop them from running, and your PC will run more smoothly.

Start by launching the Task Manager: Press Ctrl-Shift-Esc or right-click the lower-right corner of your screen and select Task Manager. If the Task Manager launches as a compact app with no tabs, click “More details” at the bottom of your screen. The Task Manager will then appear in all of its full-tabbed glory. There’s plenty you can do with it, but we’re going to focus only on killing unnecessary programs that run at startup.

Click the Startup tab. You’ll see a list of the programs and services that launch when you start Windows. Included on the list is each program’s name as well as its publisher, whether it’s enabled to run on startup, and its “Startup impact,” which is how much it slows down Windows 10 when the system starts up.

To stop a program or service from launching at startup, right-click it and select “Disable.” This doesn’t disable the program entirely; it only prevents it from launching at startup — you can always run the application after launch. Also, if you later decide you want it to launch at startup, you can just return to this area of the Task Manager, right-click the application and select “Enable.”

Many of the programs and services that run on startup may be familiar to you, like OneDrive or Evernote Clipper. But you may not recognize many of them. (Anyone who immediately knows what “bzbui.exe” is, please raise your hand. No fair Googling it first.)

The Task Manager helps you get information about unfamiliar programs. Right-click an item and select Properties for more information about it, including its location on your hard disk, whether it has a digital signature, and other information such as the version number, the file size and the last time it was modified.

You can also right-click the item and select “Open file location.” That opens File Explorer and takes it to the folder where the file is located, which may give you another clue about the program’s purpose.

Finally, and most helpfully, you can select “Search online” after you right-click. Bing will then launch with links to sites with information about the program or service.

If you’re really nervous about one of the listed applications, you can go to a site run by Reason Software called Should I Block It? and search for the file name. You’ll usually find very solid information about the program or service.

Now that you’ve selected all the programs that you want to disable at startup, the next time you restart your computer, the system will be a lot less concerned with unnecessary program.


3. Turn off search indexing

Windows 10 indexes your hard disk in the background, allowing you – in theory – to search your PC more quickly than if no indexing were being done. But slower PCs that use indexing can see a performance hit, and you can give them a speed boost by turning off indexing. Even if you have an SSD disk, turning off indexing can improve your speed as well, because the constant writing to disk that indexing does can eventually slow down SSDs.

To get the maximum benefit in Windows 10, you need to turn indexing off completely. To do so, first type services.msc in the Start Menu search box, and click the Services result that come up. The Services app then appears. Scroll down to either Indexing Service or Windows Search in the list of services. Double-click it, and from the screen that appears, click Stop. Then reboot. Your searches may be slightly slower, although you may not notice the difference. But you should get an overall performance boost.

If you’d like, you can turn off indexing for only files in certain locations. To do this, first type index in the Start Menu search box, and click the Indexing Options result that appears. The Indexing Options page of Control Panel appears. Click the Modify button and you’ll see a list of locations that are being indexed, such as Microsoft Outlook, your personal files, and so on. Uncheck the boxes next to any location, and it will no longer be indexed.


4. Clean out your hard disk

If you’ve got a bloated hard disk filled with files you don’t need, you could be slowing down your PC. Cleaning it out can give you a speed boost. Windows 10 has a surprisingly useful built-in tool for doing this called Storage Sense. Go to Settings > System > Storage and at the top of the screen – in the Storage Sense section – move the toggle from Off to On. When you do this, Windows constantly monitors your PC, and deletes old junk files you no longer need; temporary files; files in the Downloads folder that haven’t been changed in a month; and old Recycle Bin files.

You can customize how Storage Sense works and also use it to free up even more space than it normally would. Underneath Storage Sense, click “Change how we free up space automatically.” From the screen that appears, you can change how often Storage Sense deletes files (every day, every week, every month or when Windows decides). You can also tell Storage Sense to delete files in your Download folder, depending on how long they’ve been there. And you can also set how long to wait to delete files in the Recycle Bin automatically.

You can also delete old versions of Windows that might be hogging space. At the bottom of the screen, check the box next to “Delete previous versions of Windows.” Storage Sense will then delete old versions of Windows ten days after you’ve installed an upgrade. Note that if you do this, you won’t be able to revert to the older version of Windows.


5. Clean out your Registry

Under the Windows hood, the Registry tracks and controls just about everything about the way Windows works and looks. That includes information about where your programs are stored, which DLLs they use and share, what file types should be opened by which program or just about everything else.

But the Registry is a very messy thing. When you uninstall a program, for example, that program’s settings don’t always get cleaned up in the Registry. So over time, it can get filled with countless outdated settings of all types. And that can lead to system slowdowns.

Don’t even think of trying to clean any of this out yourself. It’s impossible. To do it, you need a Registry Cleaner. There are plenty available, some free and some paid. But there’s really no need to outright buy  one, because the free Auslogics Registry Cleaner does a solid job.

Before using Auslogics or any other Registry Cleaner, you should back up your Registry so you can restore it if anything goes wrong. (Auslogics Registry Cleaner does this for you as well, but it can’t hurt to have it backed up twice.) To do your own Registry backup, type regedit.ext in the search box, then press Enter. That runs the Registry editor.  From the File menu, select Export. From the screen that appears, make sure to choose the “All” option in the Export range section at the bottom of the screen. Then choose a file location and file name and click Save. To restore the Registry, open the Registry editor, select Import from the File menu, then open the file you saved.

Now download, install and run Auslogics Registry Cleaner. On the left-hand side of the screen you can select the kinds of Registry issues you want to clean up – for example, File Associations, Internet or Fonts. I generally select them all.

Next tell it to scan the Registry for problems. To do that, click “Scan Now” and from a drop-down menu that appears select Scan. That lets you first examine the Registry problems it finds. If you instead choose “Scan and Repair,” it makes the fixes without you checking them.

It now scans your Registry for errors, then shows you what it found. It ranks the errors according to their severity, to help you decide which to fix. Click Repair when you’ve made your decision, and make sure that “Back up Changes” is checked, so you can restore the Registry easily if something goes wrong.


6. Disable shadows, animations and visual effects

Windows 10 has some nice eye candy — shadows, animations and visual effects. On fast, newer PCs, these don’t usually affect system performance. But on slower and older PCs, they can exact a performance hit.

It’s easy to turn them off. In the Windows 10 search box type sysdm.cpl and press Enter. That launches the System Properties dialog box. Click the Advanced tab and click “Settings” in the Performance section. That brings you to the Performance Options dialog box. You’ll see a varied list of animations and special effects.

If you have time on your hands and love to tweak, you can turn individual ones on and off. These are the animations and special effects you’ll probably want to turn off, because they have the greatest effect on system performance:

  • Animate controls and elements inside windows
  • Animate windows when minimizing and maximizing
  • Animations in the taskbar
  • Fade or slide menus into view
  • Fade or slide ToolTips into view
  • Fade out menu items after clicking
  • Show shadows under windows

However, it’s probably a lot easier to just select “Adjust for best performance” at the top of the screen and then click OK. Windows 10 will then turn off the effects that slow down your system.


7. Launch the Windows troubleshooter

Windows 10 has a very useful, little-known tool that can sniff out performance problems and solve them. To launch it, run Control Panel and select System and Security > Security and Maintenance > Troubleshooting > Run maintenance tasks. A screen titled “Troubleshoot and help prevent computer problems” will appear. Click Next.

The troubleshooter will find files and shortcuts you don’t use, identify any performance and other issues on your PC, report them to you and then fix them. Note that you may get a message that says, “Try troubleshooting as an administrator.” If you have administrative rights to the PC, click it and the troubleshooter will launch and do its work.


8. Get help from the Performance Monitor

There’s a great tool in Windows 10 called the Performance Monitor that can, among other things, create a detailed performance report about your PC, detail any system and performance issues, and suggest fixes.

To get the report, type perfmon /report into your search box and press Enter. (Make sure there’s a space between “perfmon” and the slash mark.) The Resource and Performance Monitor launches and gathers information about your system. It will say that it will take 60 seconds, but I’ve found that it takes several minutes. When the Monitor finishes, it will launch an interactive report.

You’ll find a lot of extremely detailed information in the report, and it can take a lot of time to go through. Your best bet is to first look at the Warnings section, which details the biggest issues (if any) it found on your PC, such as problems with Windows, with drivers and so on. It also tells you how to fix each problem — for example, how to turn on a device that has been disabled.

It is also worthwhile to scroll down to the Resource Overview section, where you’ll find an analysis of how well your CPU, network, disk and memory are performing. Each result is color-coded, with green meaning no problems, yellow meaning potential issues, and red showing a problem.

Beyond that, the Resource Overview also reports performance metrics and explanatory details. For example, for the CPU, it might show green and a utilization of 21%, with the details, “Normal CPU load.” Or for Memory, it might show yellow, with 62% utilization and the details, “1520 MB is available.” Based on what you get, you might want to do something about your hardware — for example, add more memory.


9. Kill bloatware

Sometimes the biggest factor slowing down your PC isn’t Windows 10 itself, but bloatware or adware that takes up CPU and system resources. Adware and bloatware are particularly insidious because they may have been installed by your computer’s manufacturer. You’d be amazed at how much more quickly your Windows 10 PC can run if you get rid of it.

First, run a system scan to find adware and malware. If you’ve already installed a security suite such as Norton Security or McAfee LiveSafe, you can use that. You can also use Windows 10’s built in anti-malware app — just type Windows Defender in the search box, press Enter, and then click Scan Now. Windows Defender will look for malware and remove any it finds.

It’s a good idea to get a second opinion, though, so consider a free tool like Malwarebytes Anti-Malware. The free version scans for malware and removes what it finds; the paid version offers always-on protection to stop infections in the first place.

Now you can check for bloatware and get rid of it. Several free programs will do this for you; your best bet is to run several of them, because no single one will find all the bloatware on your PC. Good choices are the PC Decrapifier, Should I Remove It? and SlimComputer.


10. Shut down and restart Windows

Here’s one of IT’s not-quite-secret weapons for troubleshooting and speeding up a PC: Shut it down and restart it. Doing that clears out any excess use of RAM that otherwise can’t be cleared. It also kills processes that you might have set in motion and are no longer needed, but that continue running and slow your system. If your Windows 10 PC has turned sluggish over time for no apparent reason, you may be surprised at how much more quickly it will run when you do this.

Try just some of these tricks, and you’ll find that you’ve got a faster Windows 10 PC — and one that is less likely to have any reliability problems.

Why business-class PCs are a smart investment

Business PCs

Think back to the last time you bought a new PC or laptop for your business. Did you approach the purchase the same way you would for a personal device? And if you had a problem, were you satisfied with the level of service you received?

Many small and medium-sized businesses purchase consumer-grade PCs and notebooks by default, not realizing the amount of difference a business-class model can make. Consumer-grade devices can work fine for many organizations, but businesses with more stringent performance, reliability, and support needs can save time and frustration by moving up to business-class devices.

Think of it this way: when you purchase an economy-class plane ticket you know there’s going to be a marked difference between your experience and the experience of someone flying first class. More legroom, better menu options, more responsive service—the benefits are clear, and for many business travelers it makes sense to upgrade, especially if the flight is long.

When it comes to technology, the difference between consumer-grade and business-class PCs is just as marked as for flights—and for many businesses, the upgrade is just as worthwhile. Here’s the difference a business-class device can make for you:

  • Performance: Many modern consumer-grade processors and mobile operating systems prioritize battery life over processing power. Business-class PCs often offer both better performance and longer battery life, allowing users to work faster and longer while on the road.
  • Reliability: HP Elite PCs are designed to pass MIL STD testing and are tested for 115,000 hours to HP’s own testing standards to help ensure durability. New HP EliteBook 700 series notebooks are also made with Corning® Gorilla® Glass and a magnesium alloy chassis that’s 18 times stronger than plastic.
  • Support: Every HP Elite PC comes with HP Elite Premium Support, providing 24/7/365 dedicated service from U.S.-based specialists who are dedicated solely to supporting HP Elite products.
  • Software and security: Business-class devices help their users take advantage of their advanced features with free, bundled software that is not available (or requires an additional purchase) on consumer-grade PCs. For example, HP Elite family products come with security software and features that protect at the data, identity, and device levels to help keep proprietary data safe.

On average, small businesses hold on to their PCs for five to seven years. Your next device purchase will likely be with you for years to come. So when you consider that many of us are quick to upgrade our airline tickets—even though flights don’t last more than a day—upgrading to a business-class device can make a lot of sense. Weigh the benefits, and choose the device with the level of support and reliability that meets your business needs.

Have questions?

Get help from IT Experts/Microsofts Cloud Solutions Partner
Call us at: 856-745-9990 or visit: https://southjerseytechies.net/

South Jersey Techies, LLC is a full Managed Web and Technology Services Company providing IT Services, Website Design ServicesServer SupportNetwork ConsultingInternet PhonesCloud Solutions Provider and much more. Contact for More Information.

To read this article in its entirety click here.

Symantec Security Cloud

Symantec Endpoint Protection Cloud Windows client upgrade scheduled for August 5, 2019

The SEP Cloud client for Windows is updated periodically to provide improvements and defect fixes. The next update is scheduled to start on August 5, 2019.

WHAT’S NEW ?

In this release, the SEP Cloud client for Windows will be updated to version 22.18 to provide an enhanced protection framework and client stability.

  • Fixed an issue related to the OS feature on the agent, which was randomly failing with a medium severity while applying the Management policy.
  • Fixed an issue related to the security event: “A process modified a critical system resource.” This event was erroneously displayed in the console as a threat detection/remediation event. The event is now removed and will not be displayed in the console.
  • Enhancement to process HTTP error 429 status code request. The SEP Cloud agent will not attempt to connect with the cloud when the 429 status code is returned, but instead, try to connect based on the timeout information.
  • If the timeout information is not available, then the product will retry to connect in 15 minutes by default.

IMPACT

All Windows devices that are currently enrolled in SEP Cloud will automatically be updated in the background, using LiveUpdate. This update does not affect the security of your devices.

To start, the update is distributed to a small set of clients over the first seven days of the release, and then the remaining clients will get the update. If you want to update sooner, you can run LiveUpdate from the Symantec Endpoint Protection Cloud client UI.

Action Required

  • Windows device restart
    All users with Windows devices will be prompted to restart their devices after the update. Even if they delay the restart, their Windows clients remain Protected.

If no user is logged on the device when the upgrade is made available, then the prompt is provided until the user logs on. The product update will not force the restart of the device.

  • Windows installation package refresh
    Administrators who created a Windows installation package before August 5 should create and distribute a new one after August 5 to use for new Windows package deployments.

If you have any questions, please email us at support@sjtechies.com or call us at (856) 745-9990.

End of Life Windows 7, Server 2008 R2, & Small Business Server 2011

The End of Life for Windows 7, Server 2008 R2, & Small Business Server 2008 + 2011

End of Life Windows 7, Server 2008 R2, & Small Business Server 2011
[wpdevart_countdown text_for_day=”Days” text_for_hour=”Hours” text_for_minut=”Minutes” text_for_second=”Seconds” countdown_end_type=”date” end_date=”13-01-2020 23:59″ start_time=”1556805309″ end_time=”0,1,1″ action_end_time=”hide” content_position=”center” top_ditance=”10″ bottom_distance=”10″ countdown_type=”button” font_color=”#000000″ button_bg_color=”#3DA8CC” circle_size=”130″ circle_border=”5″ border_radius=”8″ font_size=”30″ countdown_font_famaly=”monospace” animation_type=””][/wpdevart_countdown]

Microsoft has announced that its support for Windows 7, Windows Server 2008 R2, and Small Business Server (SBS) 2011 will be coming to an end on January 14, 2020.

What does that mean for you? First, security patches and updates will no longer be implemented, leaving Windows 7 workstations and servers susceptible to security breaches. On January 13, 2015, Microsoft ended mainstream support for Windows 7, but now extended support is ending as well. Extended support is still safe to use until 2020 currently. Normally Microsoft would add new features during the mainstream support phase, but they will not be being doing this anymore. They will however, continue to patch any security treats. South Jersey Techie’s strongly recommends upgrading your business’s servers and workstations before the January 2020 deadline- and to start planning now to avoid the urgency of the deadline. Businesses in the healthcare industry will be impacted by the changes in relation to HIPPA violations if their server isn’t updated before the deadline. The deadline will be here before you know it and updating an IT infrastructure is a large task and shouldn’t be put off until the last minute.

What are the next steps for your business? Many of our clients are starting to upgrade now or are planning to include the upgrades in their 2019 budget. Send us an email or give us a call and we will evaluate your line of business software for Windows 10 and upgraded server compatibility. If your company decides to upgrade its old server and workstations to meet the January 2020 deadline, South Jersey Techie’s has the reliable solutions and experienced technicians you need for managing the data migration and even the retired hardware. You can have peace of mind knowing your old data will be securely erased and destroyed.

Unsure if this deadline will affect your business? South Jersey Techie’s can review your server for you and determine its end of life date or if it will be affected by the 2020 end of support date. If you have any questions or concerns about your office and the 2020 end of support date, please give us a call today: (856)745-9990.

GET STARTED WITH A NEW WINDOWS 10 PC

HP ELITEDESK 800 G4 – SFF – CORE I7
HP ELITEDESK 800 G4 – SFF – CORE I5
HP ProDesk 400 G5 – SFF – Core i5 8500

Can’t Find What You’re Looking For?

Whether you are upgrading an existing device, buying a new one, or just need support deploying, we have the help you need.


How to access the traditional Control Panel lost in the Windows 10 Creators Update

Microsoft is phasing out the traditional Control Panel with the Windows 10 Creators Update, but with a few tweaks you can still access it. Mark Kaelin explains how.

Microsoft has been slowly and methodically rolling out the Windows 10 Creators Update to customers throughout 2017. If you are one of the lucky ones to receive the update already, you have likely noticed more than a few changes to how Windows 10 looks and works. Some of the changes are good, some are a little annoying.

One of the changes Microsoft implemented in the Windows 10 Creators Update that I don’t like is the removal of the traditional Control Panel from the Win+X menu—that’s the menu you see displayed when you right-click the Start button from the Desktop interface (Figure A). Microsoft is migrating the interface for configuring the operating system to the new Settings screen, but some of us, especially IT pros who have been doing this for a long time, prefer the old Control Panel interface.

Figure A

Fortunately, the old Control Panel is still available; it is just lurking in the background. We can bring it back to the forefront with a few clicks, tweaks, and tricks, and this tutorial will show you how they work.

First, what you can’t do

The commands for the Win+X menu are located in this file folder, as shown in Figure B:

C:\Users\USERNAME\AppData\Local|Microsoft\Windows\WinX

Figure B

But you can’t just add a shortcut to the Control Panel executable to one of those Group folders and expect to see it show up in the Win+X menu. The special links within the Win+X menu system are protected with a special hash calculation, which greatly complicates any attempt to edit its contents.

To add the Control Panel back to the Win+X menu you will have to use a link with the hash already included. In general, that means acquiring a link from a version of Windows that is not the Creators Update. It is possible with the help of a third-party app, but it is complicated, convoluted, and not really necessary.

If you want to go through the process, you can check out this website for the details. But before you do, I have some simple solutions that might work better for you.

Now, what you can and should do

For those of us who want to keep things simple, here are a couple of ways to access the traditional Control Panel in Microsoft Windows 10 Creators Update.

1. Search for it

Figure C

If you just want to access the control panel occasionally and not add more icons to your desktop, the simplest way to access the Control Panel is by typing control panel in the Cortana search box. Control Panel should be the first entry in the search results (Figure C). You can left-click the link to start the app or right-click it and add the link to the Start Menu or to your Taskbar for easy future access.

Adding the Control Panel to the Start Menu is handy if you are using a touch screen interface. Adding it to the Taskbar works well if you find yourself accessing configuration settings on a regular basis.

2. Add to Desktop

Figure D

There are two ways to add the Control Panel to your Desktop. The first way is fairly obvious: Right-click an empty area on your Desktop and create a new shortcut that points to the Control Panel executable located here:

C:\Windows\System32

But you can also add the Control Panel icon to your Desktop through the Personalization screen. Right-click the Start button to open the Win+X menu and click the Settings menu item. Click the Personalization icon to open the next screen and drill down to the Themes screen. Scroll down until you see the Desktop Icon Settings item under the Related Settings area and click it. A dialog box will pop open and you can check the Control Panel radio button to add that link to your Desktop (Figure D). Click OK and the icon will be added as a primary system link on your Desktop.

Have questions?

Get answers from Microsofts Cloud Solutions Partner!
Call us at: 856-745-9990 or visit: https://southjerseytechies.net/

South Jersey Techies, LL C is a full Managed Web and Technology Services Company providing IT Services, Website Design ServicesServer SupportNetwork ConsultingInternet PhonesCloud Solutions Provider and much more. Contact for More Information.

To read this article in its entirety click here.

10 Windows 7 tips to get the most out of your machine

If you’re one of the many business users who has not upgraded their computer to Windows 10, there are still resources to boost your experience. Here are 10 tips for getting the most out of the OS.

Windows 10 faced a controversial roll-out, with privacy concerns, bugs, and other issues plaguing many users. And as of August 2016, just 1% of business machines had upgraded to Windows 10, according to a study from Softchoice. Instead, 91% of the machines were operating with Windows 7—an 18% increase over the same period of time in 2015.

“It seems businesses don’t see an urgent need to move operating systems, so long as their cloud-based applications are still running fine on Windows 7,” Softchoice’s Microsoft director Craig McQueen wrote in a press release at the time. “In addition to the security benefits, I think once organizations grasp the user benefits—such as touch and Cortana—we will start to see a boost in adoption.”

While experts predict Windows 10 deployments will pick up this year, it’s important for those still using Windows 7 for business to get the most out of their machines. Here are 10  articles with Windows 7 tips that will help enterprise users operate the machines more effectively.

1. 10 ways to speed up Windows 7

While Windows 7 generally performs well, over time, the system can slow down and require some care to get it back up to speed. The OS also contains certain features that users can take advantage of to improve overall performance. Here, we outline 10 steps business users can take to enhance the performance of your Windows 7 system.

2. Use multiple monitors with Windows 7’s Remote Desktop Connection

Windows 7 allows users to connect to a remote computer and utilize the local system’s multiple monitors. Here is a step by step advice on how to configure and operate multiple monitors using Windows 7’s Remote Desktop Connection, as well as how to connect to and from Windows versions that do not support this feature.

3. Quick Tips: Flush the ARP cache in Windows 7

The Address Resolution Protocol (ARP) cache is an important part of IP networking on any OS, as it links Ethernet addressing to hardware addressing. Newly mapped addresses are saved in an ARP cache, which is usually fine, but can sometimes cause issues with internet connections and web page loading times. Here, are the necessary steps to clear the ARP cache, and how to manage it going forward.

4. 10+ Windows 7 services you may not need

While every version of Windows includes a core set of system services, business users can disable some that are not necessary in order to improve performance and security. In this article, we highlight 13 services that users can disable if they so choose on Windows 7 systems that will likely not have any impact on business operations, including IP Helper, offline files, and Network Access Protection.

5. 10 Windows 7 commands every administrator should know

IT staff who troubleshoot Windows 7 problems often have to dive into the command line. Here, are 10 fundamental Windows 7 commands that are useful for IT administrators, including System File Checker, File Signature Verification, and Driverquery.

6. Modifying the Windows 7 boot loader with the Boot Configuration Data Editor tool

In Windows Vista and later versions of Windows, the bootloader was moved from boot.ini to a utility called BCDEdit. This article walks users through how to modify the boot config data using this tool.

7. Change and customize Windows 7’s Logon screen wallpaper

Changing and customizing the Windows 7 Logon screen wallpaper is easy once you know the steps, as Microsoft built the ability to change the wallpaper right into the OS, as opposed to needing any third-party software. Here, we offer a tutorial on doing so.

8. Change the Processor Affinity setting in Windows 7 to gain a performance edge

Most applications have been designed for multi-core processors, and work with an OS to distribute their operations evenly across cores to enhance performance. However, you can sometimes achieve better overall performance from certain applications by configuring them to run on different processor cores, which Windows 7 allows via the Processor Affinity setting. In this article, we explain two ways to change the Processor Affinity setting in Windows 7.

9. Use Windows 7 Event Viewer to track down issues that cause slower boot times

Experiencing a slow Windows 7 boot time? You can use Windows 7’s Event View to investigate the source of the problem. The Event Viewer includes a category of event logs called Applications and Services Logs, which track key elements of the OS. Here, we explain how it is possible to find out how long it took to boot up your system every time, since the day Windows 7 was first installed, along with instances where boot time slowed down, all through these logs.

10. Tag your files for easier searches in Windows 7

This article, walks users through how to tag files to make them searchable via the Search filters built into Windows Explorer’s Search box in Windows 7. It’s possible to do this easily from many applications while saving a file. The ability to more easily find files is a boon for business users who want to enhance their productivity.

Have questions?

Get answers from Microsofts Cloud Solutions Partner!
Call us at: 856-745-9990 or visit: https://southjerseytechies.net/

South Jersey Techies, LL C is a full Managed Web and Technology Services Company providing IT Services, Website Design ServicesServer SupportNetwork ConsultingInternet PhonesCloud Solutions Provider and much more. Contact for More Information.

To read this article in its entirety click here.

10 Windows 7 commands every administrator should know

The command line is often the best place to resolve Windows 7 desktop problems. These basic commands will help speed your troubleshooting tasks.

PC troubleshooting is becoming less common in larger organizations, but consultants and techs in smaller shops still have to get their hands dirty identifying and fixing desktop problems. Oftentimes, troubleshooting Windows 7 means delving into the command line. Here are 10 fundamental Windows 7 commands you might find helpful.

1: System File Checker

Malicious software will often attempt to replace core system files with modified versions in an effort to take control of the system. The System File Checker can be used to verify the integrity of the Windows system files. If any of the files are found to be missing or corrupt, they will be replaced. You can run the System File Checker by using this command:

sfc /scannow

2: File Signature Verification

One way to verify the integrity of a system is to make sure that all the system files are digitally signed. You can accomplish this with the File Signature Verification tool. This tool is launched from the command line but uses a GUI interface. It will tell you which system files are signed and which aren’t. As a rule, all the system files should be digitally signed, although some hardware vendors don’t sign driver files. The command used to launch the File Signature Verification tool is:

sigverif

3: Driverquery

Incorrect device drivers can lead to any number of system problems. If you want to see which drivers are installed on a Windows 7 system, you can do so by running the driverquery tool. This simple command-line tool provides information about each driver that is being used. The command is:

driverquery

If you need a bit more information, you can append the -v switch. Another option is to append the -si switch, which causes the tool to display signature information for the drivers. Here’s how they look:

driverquery -v
driverquery -si

4: Nslookup

The nslookup tool can help you to verify that DNS name resolution is working correctly. When you run nslookup against a host name, the tool will show you how the name was resolved, as well as which DNS server was used during the lookup. This tool can be extremely helpful when troubleshooting problems related to legacy DNS records that still exist but that are no longer correct.

To use this tool, just enter the nslookup command, followed by the name of the host you want to resolve. For example:

nslookup dc1.contoso.com

5: Ping

Ping is probably the simplest of all diagnostic commands. It’s used to verify basic TCP/IP connectivity to a network host. To use it, simply enter the command, followed by the name or IP address of the host you want to test. For example:

ping 192.168.1.1

Keep in mind that this command will work only if Internet Control Message Protocol (ICMP) traffic is allowed to pass between the two machines. If at any point a firewall is blocking ICMP traffic, the ping will fail.

6: Pathping

Ping does a good job of telling you whether two machines can communicate with one another over TCP/IP, but if a ping does fail, you won’t receive any information regarding the nature of the failure. This is where the pathping utility comes in.

Pathping is designed for environments in which one or more routers exist between hosts. It sends a series of packets to each router that’s in the path to the destination host in an effort to determine whether the router is performing slowly or dropping packets. At its simplest, the syntax for pathping is identical to that of the ping command (although there are some optional switches you can use). The command looks like this:

pathping 192.168.1.1

7: Ipconfig

The ipconfig command is used to view or modify a computer’s IP addresses. For example, if you wanted to view a Windows 7 system’s full IP configuration, you could use the following command:

ipconfig /all

Assuming that the system has acquired its IP address from a DHCP server, you can use the ipconfig command to release and then renew the IP address. Doing so involves using the following commands:

ipconfig /release
ipconfig /renew

Another handy thing you can do with ipconfig is flush the DNS resolver cache. This can be helpful when a system is resolving DNS addresses incorrectly. You can flush the DNS cache by using this command:

ipconfig /flushdns

8: Repair-bde

If a drive that is encrypted with BitLocker has problems, you can sometimes recover the data using a utility called repair-bde. To use this command, you will need a destination drive to which the recovered data can be written, as well as your BitLocker recovery key or recovery password. The basic syntax for this command is:

repair-bde <source> <destination> -rk | rp <source>

You must specify the source drive, the destination drive, and either the rk (recovery key) or the rp (recovery password) switch, along with the path to the recovery key or the recovery password. Here are two examples of how to use this utility:

repair-bde c: d: -rk e:\recovery.bek
repair-bde c: d: -rp 111111-111111-111111-111111-111111-111111

9: Tasklist

The tasklist command is designed to provide information about the tasks that are running on a Windows 7 system. At its most basic, you can enter the following command:

tasklist

The tasklist command has numerous optional switches, but there are a couple I want to mention. One is the -m switch, which causes tasklist to display all the DLL modules associated with a task. The other is the -svc switch, which lists the services that support each task. Here’s how they look:

tasklist -m
tasklist -svc

10: Taskkill

The taskkill command terminates a task, either by name (which is referred to as the image name) or by process ID. The syntax for this command is simple. You must follow the taskkill command with -pid (process ID) or -im (image name) and the name or process ID of the task that you want to terminate. Here are two examples of how this command works:

taskkill -pid 4104
taskkill -im iexplore.exe

Have questions?

Get answers from Microsofts Cloud Solutions Partner!
Call us at: 856-745-9990 or visit: https://southjerseytechies.net/

South Jersey Techies, LL C is a full Managed Web and Technology Services Company providing IT Services, Website Design ServicesServer SupportNetwork ConsultingInternet PhonesCloud Solutions Provider and much more. Contact for More Information.

To read this article in its entirety click here.

CALL US NOW!