 Takeaway: When equipment reaches the end of its useful life, IT must either dispose of it or find it a new home. Here are several good ways to handle the situation.
Few companies amortize their computing equipment for more than three years of useful life. So once computing assets reach the end of the line, what do you do with them? In 2013, some best practice answers remain the same, but others are new. Here’s a checklist for dealing with old IT equipment.
1: Meet Your Green Requirements
In some industries and geographical areas, companies are now required to demonstrate adherence to green standards and environmental sustainability. One way to show compliance is by having environmentally effective policies for disposing of old computing equipment. In doing so, you also contribute to corporate sustainability compliance. There is value in that.
2: Work with Local Schools
Corporate IT can partner with local schools by donating good but used equipment that they can use for technology projects. Some companies take this goodwill effort even further by partnering with schools in tech development programs that include student internships with the company. “Proven” interns from these programs can make excellent IT hires. The company also develops a great reputation in the community.
3: Use Older Equipment for Training and Testing
Especially in thin client application environments that don’t depend on compute-in-the-box (think cloud), older equipment is ideal for training, which historically operates on thin budgets and is always looking for a resource infusion.
You can also use older equipment for testing purposes, as long as your test results will accurately emulate the production environment they are targeted for.
4: Cannibalize
Some older equipment can be used as spare part sources if there is enough version compatibility between the old and the new equipment. Replacement disk drives are a great example.
5: Work your Trade-ins (lease/buy)
Never underestimate your ability to trade up to new equipment by turning in your old equipment. You can secure a discount that may be as much as one-third of your new equipment retail price. If you lease equipment instead of buying it, a mechanism in the lease contract allows you to get credit for older equipment on the lease that you are exchanging for new.
6: Sell to the Third-party Market
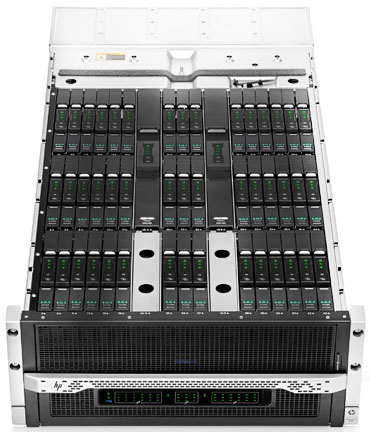
Especially for power servers, mainframes, and disk drives, you can usually find a third-party reseller of older equipment that will buy it from you (only to resell it to another company). However, to qualify your equipment for this market, you must first recertify it with its original vendor. In the equipment re-certification process, the vendor examines and (if necessary) repairs the equipment to make sure it is production-ready.
7: Cycle Down Older Equipment to Low Power Users
In most companies, the high power users are in areas like finance and engineering. Users requiring desktop or laptop computers with fewer bells and whistles might be in the warehouse, the factory, or in work locations where there is a lot of environmental interference (dust, etc.), which you don’t want to subject your newest equipment to. Many companies have a downward rotation cycle they apply to desktop and laptop computers that cycles these assets into lower-power user groups after a certain time frame. By using this strategy, companies can often extend the life cycles of these assets for two or more years.
8: Sell or Auction Older Equipment to Employee
Many employees look for inexpensive laptops that they and their children can use at home or at school. If they can purchase a nice computer that might not be the latest and greatest but that still works and fits their budgets, they are happy to take an older piece of equipment off your hands.
9: Donate to Charities
Charities are always looking for free computing equipment that can run their operations. However, never approach them with an eye toward dumping off equipment that is so antiquated it won’t support Internet or run a current word processor or spreadsheet program. In fact, many charities have wised up to the old “dump it” approach and now set minimum standards for accepting older equipment (e.g., “must at least run a Windows 7 operating system”).
10: Sell for Scrap
Companies used to give away old equipment to recycling. But in today’s lucrative scrap metal market, the goal instead should be to sell this equipment to scrappers.
If you are looking to purchase new equipment please contact us at (856) 745-9990.