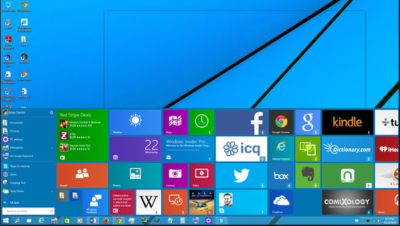
This year will mark the first full year of release for Microsoft’s new OS. A look at what’s in store for Windows 10 this year.
Windows 10 was described as the “last version of Windows” – an OS that would evolve over time rather than be superceded.
In the few months since Windows 10’s launch Microsoft says it has been installed on more than 110 million devices. But just what lies in store for the OS in 2016, how will it get better and what new devices will it find its way onto?
1. Windows 10 will begin automatically installing on your old machine
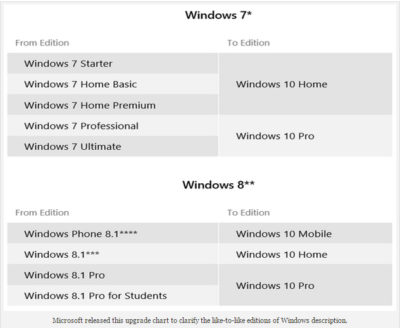
Windows 10 is available as a free upgrade to Windows 7 and 8.1 users and Microsoft is getting increasingly aggressive about moving these users to the new OS.
From this year Windows 10 will automatically begin installing on most Windows 7 and 8.1 machines.
Users will still need to confirm the installation manually for it to continue. However, if they choose not to proceed it’s unclear if they can cancel it altogether, with Jeremy Korst, general manager of the Windows and Devices team at Microsoft, saying only that “the customer will have the ability to delay it for some period”.
If users do upgrade but don’t like Windows 10 they will have 31 days to roll back to their previous OS.
The automatic installation, the result of Microsoft changing the status of the Windows 10 upgrade to a Recommended update, will be preceded by increasingly insistent nag messages to upgrade. These notices are already being shown to some Windows users and have been criticised for not offering an easy opt-out.
2. Microsoft Edge will get extensions
Windows 10 launched with Microsoft Edge, a new browser that cast off a lot of the legacy code holding Internet Explorer back.
However, while speedy and capable on paper, the browser suffers from its share of bugs and is missing support for extensions, a key feature found in competitors such as Chrome and Firefox.
Microsoft will rectify this omission “early next year” when Korst said it will add extensions to Edge in test builds of Windows 10, ahead of being made generally available.
Extensions are small software programs, typically written using HTML, CSS and JavaScript, that augment the functionality of a browser.
Earlier this month, Microsoft accidentally published a website announcing the introduction of extensions to test builds of Windows 10. The site, which was taken down, referenced extensions for Pinterest and Reddit.
Microsoft originally planned to add support for extensions to Edge this year.
3. Windows 10 will blur the virtual and real world
Microsoft’s Windows 10-powered augmented reality headset HoloLens will ship to developers in the first quarter of 2016.
The augmented reality headset places 3D virtual images in the wearer’s vision so that they appear part of the real world – for instance, a Minecraft landscape sits on a coffee table or a Skype video sits on the wall.
After trying a demo of the headset this week, TechRepublic senior writer Dan Patterson said that though the headset had a limited “field of vision”, “the 3D animations are smooth, easy to interactive with, and result in only marginal eyestrain”.
The HoloLens doesn’t come cheap, with the developer kit priced at $3,000 – although Microsoft says this early release is meant for developers and commercial customers.
Although HoloLens has obvious consumer and gaming uses, Microsoft is stressing its use for business and is working with NASA, AutoDesk, Volvo, Dassault Aviation, Case Western Reserve University, and other large organisations to develop applications for it.
4. More security for enterprise
The coming year will also see some notable new features added to the enterprise version of Windows 10.
Key among these additions is Enterprise Data Protection, which will allow companies to separate work and personal data on devices using containerisation file techniques. It will also encrypt data as it moves around the organisation – helping to ensure that information isn’t accessed by the wrong people.
The feature will be rolled out to people testing Windows under the Insider Program “early this year”.
5. Testers will get a peek at even earlier builds
Those testing early releases of Windows 10 under the Windows Insider Program will be able to get earlier access to new features from January this year.
Those who choose to be in the “fast” ring of the Insider Program will receive builds of Windows 10 more frequently in 2016, according to Microsoft VP Gabe Aul.
The price of testers getting their hands on early builds more regularly will be that this software will likely include more bugs, he said. Those testers who prefer stability to early access should opt for the “slow” ring, he said.
6. Cortana will be everywhere
Microsoft is planning a major upgrade to Windows 10, codenamed Redstone, next year – with reports the upgrade will put Microsoft’s virtual assistant Cortana at the core of the OS.
An unnamed source told The Verge the new Cortana will help users with a much wider range of tasks inside Windows 10, appearing contextually in documents to provide “information and assistance” and giving Cortana control over a wider range of notifications.
The other major upgrade to Cortana will reportedly be an ability to start a task on one device and pick it up on another, for instance if you get a missed call on an Android phone running the Cortana app you could reply from your Windows 10 PC via text.
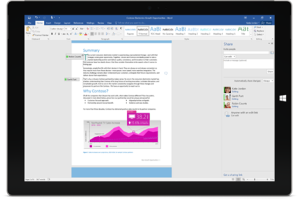
7. Microsoft doubles down on Windows 10 phones as desktops
A much touted feature of Windows 10 is its ability to run a desktop OS from a phone.
Microsoft’s new Lumia 950 and 950XL handsets can – wirelessly or via a dock – be hooked up to a monitor, mouse and keyboard and used to run a Windows desktop.
The Windows 10 OS can change the look and feel of certain apps, as well as its own appearance, to suit the phone or the desktop, as well as coping with everyday desktop tasks, such as multitasking and copying files from a USB stick.
The expectation is that Microsoft will further commit to this idea of using your phone as a desktop in 2016, with rumours that Panos Panay and the team behind the high-end Surface Book laptop are working on a Surface Phone that will release next year.
8. No more free upgrade
Windows 10 is available as a free upgrade to everyone running Windows 7 or 8.1 but only for a limited time.
The offer of a free upgrade will expire on 29 July 2016 – after which point it seems that users will have to buy a Windows 10 licence.
However, due to the in-your-face tactics that Microsoft is adopting to persuade people to upgrade, it seems unlikely that Windows 7 and 8.1 users will inadvertently miss out on the offer.
9. Windows 10 replaces its predecessors on new PCs
If you’re not a fan of Windows 10 then you should buy a new PC before October.
From the end of October 2016, PC makers will have to sell new machines with Windows 10, rather than Windows 7 or 8.1.
After that point businesses that want to run older Windows versions on new machines will have to rely on downgrade rights or software assurance rights under volume license agreements.
10. Windows 10 Surface Hub arrives
From January 2016 Windows 10 will power another new piece of hardware,Microsoft’s touchscreen computer the Surface Hub.
The successor to its large-screen Perceptive Pixel displays, the Surface Hub will run a custom version of Windows 10 and various apps needed for workplace communication and collaboration, including OneNote, Skype for Business and Office.
The 55-inch, Intel Core i5-based Surface Hub model will sell for $6,999 (estimated retail price), and the Intel Core i7-based 84-inch version for $19,999 ERP.
Have questions?
Get help from IT Experts/Microsofts Cloud Solutions Partner
Call us at: 856-745-9990 or visit: https://southjerseytechies.net/
South Jersey Techies, LLC is a full Managed Web and Technology Services Company providing IT Services, Website Design Services, Server Support, Network Consulting, Internet Phones, Cloud Solutions Provider and much more. Contact for More Information.
To read this article in its entirety click here.