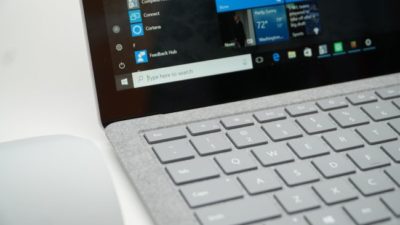
Back to Top

Tech, Web, Cloud & Cabling Services

Category: Laptops

Hardware / Laptops Category

Microsoft hints at September release of Windows 10’s next feature upgrade

Based on the current progress for Windows 10 version 1903, due to arrive next spring, it now looks like the fall update for the OS will arrive around Sept. 10 or Sept. 24.

Microsoft last week released the first preview of what will become Windows 10 version 1903, the opening feature upgrade of next year, slated to ship in the spring.

The debut of what Microsoft calls the “Skip Ahead” build for Windows 10 1903 also hints that the release of this fall’s upgrade, aka 1809, will take place in September. If so, it would be the first time since late-2015 that the actual delivery date matched the numerical label.

On July 25, Microsoft forked the 1809 preview of Windows 10 – as it’s done before when a feature upgrade approaches – so developers could continue to deliver betas for that build while also beginning to work on the next-in-line, 1903. (Microsoft uses a yymm labeling system to mark its Windows 10 feature upgrades; 1809 should indicate a September 2018 release, while 1903 would be a March 2019 release.)

When it forks preview code, Microsoft provides the even-further-in-the-future build, in this case, 1903, to Windows Insider participants who earlier volunteered for Skip Ahead. As the current feature upgrade gets close to release, Microsoft switches Skip Ahead users to the following upgrade, so that engineers can start collecting feedback on that version even as they keep polishing the one set to launch soon. The bulk of Insiders remain on the latter.

Think of the Skip Ahead debut as a warning bell, like the one rung at track meets when racers start the final lap: When Microsoft begins to ship Skip Ahead code, it’s close to wrapping up the impending feature upgrade.

In 2017, as Windows 10 1709 (aka “Fall Creators Update”) neared completion, Microsoft first forked the preview code and distributed a different build to Skip Aheaders on Aug. 31. Windows 10 1709 began its release cycle on Oct. 17, or 47 days later. With this year’s version 1803, Skip Ahead debuted Feb. 14, or 75 days before the April 30 release of that upgrade.

(Windows 10 1803’s original launch date, reportedly April 10 – which was one of two dates Computerworld had forecast in February – was postponed by 20 days after a deal-breaking bug was uncovered at nearly the last minute.)

For one estimate of the release date for Windows 10 1809, Computerworld added 47 days to July 25, arriving at Sept. 10. A second estimate was generated by adding 61 days – the average of the two previous Skip Ahead triggers – to July 25, resulting in a Sept. 24 rollout.

Because the last three feature upgrades launched on either a Monday or Tuesday – April 11, 2017 for version 1703; Oct. 17, 2017 for 1709; April 30, 2018 for 1803 – Sept. 10 or 11 would be the most likely release dates for 1809, absent a show-stopping problem like the bug before 1803’s launch. Computerworld’s alternate forecast would be September 24 or 25, also a Monday/Tuesday combination, because it would match the previous upgrades’ average time-between-Skip-Ahead-and-release.

If Microsoft does release Windows 10 1809 in September, it would be the first time since November 2015 that the company has matched delivery date and the upgrade’s label. Version 1511 debuted Nov. 10, 2015. The four subsequent upgrades, 1607, 1703, 1709 and 1803, all missed their release months by between 2 and 30 days. (Version 1607 came the nearest, releasing Aug. 2, 2016.)

Although Microsoft has never expressly tied itself to March and September release months – in a support document, it gives itself wiggle room by stating that feature upgrades will be released “twice per year, around March and September [emphasis added]” – the disconnect between release and numerical designation has always seemed odd.

Issuing feature upgrades during the appointed months would be a sign that Microsoft has gotten a better handle on the rapid development tempo it has at times struggled with executing. It would also be a step toward a more predictable schedule, which was the point of the pledge it made over a year ago to issue a pair of feature upgrades annually.

Delete WINDOWS.OLD on Windows Server


After performing an in-place upgrade on a Windows machine, you will find a WINDOWS.OLD folder in the root of C:. This folder will have a backup of your old program files, appdata and Windows folder… just in case you need to revert back or recover something that might have been lost during the upgrade. When you try to delete it though you are told you don’t have permissions. Just a small point here, it is generally not recommended to do in-place upgrades on servers. In fact there are some products (e.g. Exchange, ConfigMgr) that explicitly state they do not support upgrading the Operating System. There is of course a difference between “what works” and “what is supported”, but we do suggest where possible you do a clean Server install and migrate your application to the new server. Anyway, let’s assume you’ve understand all the risks and have done a successful in-place upgrade, you now find the old WINDOWS.OLD folder of several GB in size sitting there. If all is well, then you might as well just delete it.

SOLUTION

On Desktop OS version, you can just use the disk cleanup tool to remove it, but that is not available (by default) on Servers, so there are a couple of approaches.

Command line tools to take ownership and delete the folder. Make sure to “run as administrator”

How can I delete the windows.old from an upgraded Windows Server?

For a client OS that’s upgraded, the Disk Cleanup utility can be used to delete the very large windows.old folder containing the old OS. This isn’t available on a server OS without installing the Desktop Experience feature.

To delete, it is necessary to take ownership of the folder, give administrators full control, then delete. This can be done with the commands below:

  •  takeown /F c:\Windows.old\* /R /A /D Y
  •  cacls c:\Windows.old\*.* /T /grant administrators:F
  •  rmdir /S /Q c:\Windows.old


Or you can add the “Desktop” features to provide the Disk Cleanup tool:

Step By Step Guide to Enabling “Disk Cleanup Utility”

1. Open The Roles and Features Wizard

To open the roes and feauture wizard. Lauch the “server manager” by pressing the Windows key

and clicking on the server manage please see Screenshot as shown.

Personally, the command line option is less messy and saves having to add features to your server that don’t really need to be there.

2. Click on Add role and Feature

Click on add role and feture to launch the add role and feature wizard.

3.  Choose installation Type

Choose rolebase or feature based installation to install to local machine.

4. Click Next all the way to features

Click “next” all the way to features. Locate “User Interface and Infrastructure”. Click on “Desktop Experience”

and install additional required feature.

5.  Proceed with the installation and Reboot

Make it sure that you reboot the system

6.  Verify that the Utility is indeed installed

Ready to run diskcleanup. See screen shot below.

Disk Cleanup in Action

Below is a sample snapshot of disk cleanup in action.

4 WAYS TO SPEED UP YOUR PC

Speed Up Computer

How to make a computer faster: 4 ways to speed up your PC

By following a few simple guidelines, you can maintain your computer, help increase your PC speed, and help keep it running smoothly. This article discusses how to use the tools installed on your computer, plus a few safe and free downloads, to help make your computer faster, maintain your computer efficiently, and help safeguard your privacy when you’re online.

Note: Some of the tools mentioned in this article require you to be logged on as an administrator. If you aren’t logged on as an administrator, you can only change settings that apply to your user account.

1. Remove spyware, and help protect your computer from viruses

Spyware collects personal information without letting you know and without asking for permission. From the websites you visit to user names and passwords, spyware can put you and your confidential information at risk. In addition to privacy concerns, spyware can hamper your computer’s performance. To combat spyware, you might want to consider using Malwarebytes. This scan is a free service that helps check for and remove viruses. You should also download Microsoft Security Essentials for free to help guard your system in the future from viruses, spyware, adware, and other malicious software (also known as malware). Microsoft Security Essentials acts as a spyware removal tool and includes automatic updates to help keep your system protected from emerging threats.

2. Free up disk space

The Disk Cleanup tool helps you to free up space on your hard disk to improve the performance of your computer. The tool identifies files that you can safely delete and then enables you to choose whether you want to delete some or all of the identified files.

Use Disk Cleanup to:

– Remove temporary Internet files.
– Delete downloaded program files, such as Microsoft ActiveX controls and Java applets.
– Empty the Recycle Bin.
– Remove Windows temporary files, such as error reports.
– Delete optional Windows components that you don’t use.
– Delete installed programs that you no longer use.
– Remove unused restore points and shadow copies from System Restore.

Tip: Typically, temporary Internet files take the most amount of space because the browser caches each page you visit for faster access later.

To use Disk Cleanup:

Windows 7 users

1. Click Start, click All Programs, click Accessories, click System Tools, and then click Disk Cleanup. If several drives are available, you might be prompted to specify which drive you want to clean.

2. When Disk Cleanup has calculated how much space you can free up, in the Disk Cleanup for dialog box, scroll through the content of the Files to delete list.

3.  Clear the check boxes for files that you don’t want to delete, and then click OK.

4.  When prompted to confirm that you want to delete the specified files, click Yes.

After a few minutes, the process completes and the Disk Cleanup dialog box closes, leaving your computer cleaner, performing better, and potentially increasing your PC speed.  For more options, such as cleaning up System Restore and Shadow copy files, under Description, click Clean up system files, and then click the More Options tab.

Windows Vista users

1. In the Start menu, click All Programs, click Accessories, click System Tools, and then click Disk Cleanup.

2. In the Disk Cleanup Options dialog box, choose whether you want to clean up your own files only or all of the files on the computer.

3. If the Disk Cleanup: Drive Selection dialog box appears, select the hard disk drive that you want to clean up, and then click OK.

4. Click the Disk Cleanup tab, and then select the check boxes for the files you want to delete.

5. When you finish selecting the files you want to delete, click OK, and then, to confirm the operation, click Delete files. Disk Cleanup then removes all unnecessary files from your computer. This may take a few minutes.

The More Options tab is available when you choose to clean files from all users on the computer.

Windows XP users

1.  Click Start, point to All Programs, point to Accessories, point to System Tools, and then click Disk Cleanup. If several drives are available, you might be prompted to specify which drive you want to clean.

2.  In the Disk Cleanup for dialog box, scroll through the content of the Files to delete list.

3.  Clear the check boxes for files that you don’t want to delete, and then click OK.

4.  When prompted to confirm that you want to delete the specified files, click Yes.

After a few minutes, the process completes and the Disk Cleanup dialog box closes, leaving your computer cleaner and potentially performing better.

3. Speed up access to data

Disk fragmentation slows the overall performance of your system. When files are fragmented, the computer must search the hard disk as a file is opened (to piece it back together). The response time can be significantly longer.

Disk Defragmenter (sometimes shortened to Defrag by users) is a Windows utility that consolidates fragmented files and folders on your computer’s hard disk so that each occupies a single space on the disk. With your files stored neatly end to end, without fragmentation, reading and writing to the disk speeds up.

When to run Disk Defragmenter
In addition to running Disk Defragmenter at regular intervals (weekly is optimal), there are other times you should run it, too, such as when:

– You add a large number of files.
– Your free disk space totals 15 percent or less.
– You install new programs or a new version of the Windows operating system.

To use Disk Defragmenter:

Windows 7 users

1. Click Start, click All Programs, click Accessories, click System Tools, and then click Disk Defragmenter.


2. In the Disk Defragmenter dialog box, click the drives that you want to defragment, and then click the Analyze disk button. After the disk is analyzed, a dialog box appears, letting you know whether you should defragment the analyzed drives.

Tip: You should analyze a volume before defragmenting it to get an estimate of how long the defragmentation process will take.

3.  To defragment the selected drive or drives, click the Defragment disk button. In the Current status area, under the Progress column, you can monitor the process as it happens. After the defragmentation is complete, Disk Defragmenter displays the results.

4.  To display detailed information about the defragmented disk or partition, click View Report.

5.  To close the View Report dialog box, click Close.

6.  You can also schedule the Disk Defragmenter to run automatically. (Your computer might even be set up this way by default.) Under Schedule, it reads Scheduled defragmentation is turned on and then displays the time of day and frequency of defragmentation. If you want to turn off automatic defragmentation or to change the time or frequency, click Configure schedule (or Turn on Schedule, if it is not currently configured to run automatically). Change the settings, and then click OK.

7.  To close the Disk Defragmenter utility, on the title bar of the window, click the Close button.

Windows Vista users

1.  Open Disk Defragmenter: Click the Start button, click All Programs, click Accessories, click System Tools, and then click Disk Defragmenter. If you are prompted for an administrator password or confirmation, type the password or provide confirmation.

2.  In the Disk Defragmenter dialog box, click the drives that you want to defragment and then click the Analyze diskbutton. After the disk is analyzed, a dialog box appears letting you know whether you should defragment the analyzed drives.

Tip: You should analyze a volume before defragmenting it to get an estimate of how long the defragmentation process will take.

3.  To defragment the selected drive or drives, click the Defragment disk button. In the Current status area, under the Progress column, you can monitor the process as it happens. After the defragmentation is complete, Disk Defragmenter displays the results.

4.  To display detailed information about the defragmented disk or partition, click View Report.

5.  To close the View Report dialog box, click Close.

6.  You can also schedule the Disk Defragmenter to run automatically. (Your computer might be set up this way by default.) Click Modify schedule….

7.  In the Disk Defragmenter: Modify Schedule dialog box, choose how often, which day, and at what time of day you want defragmentation to occur, and then click OK.

8.  Click OK again.

Windows XP users

1.  Click Start, point to All Programs, point to Accessories, point to System Tools, and then click Disk Defragmenter.

2.  In the Disk Defragmenter dialog box, click the drives that you want to defragment and then click the Analyze button. After the disk is analyzed, a dialog box appears, letting you know whether you should defragment the analyzed drives.

Tip: You should analyze a volume before defragmenting it to get an estimate of how long the defragmentation process will take.

3.  To defragment the selected drive or drives, click the Defragment button. Note:In Windows Vista, there is no graphical user interface to demonstrate the progress—but your hard drive is still being defragmented.  After the defragmentation is complete, Disk Defragmenter displays the results.

4.  To display detailed information about the defragmented disk or partition, click View Report.

5.  To close the View Report dialog box, click Close.

6.  To close the Disk Defragmenter utility, on the title bar of the window, click the Close button.

Running Disk Cleanup and Disk Defragmenter on a regular basis is a proven way to help keep your computer running quickly and efficiently. If you’d like to learn how to schedule these tools and others to run automatically, please read Speed up your PC: Automate your computer maintenance schedule.

4. Detect and repair disk errors

In addition to running Disk Cleanup and Disk Defragmenter to optimize the performance of your computer, you can check the integrity of the files stored on your hard disk by running the Error Checking utility.

As you use your hard drive, it can develop bad sectors. Bad sectors slow down hard disk performance and sometimes make data writing (such as file saving) difficult or even impossible. The Error Checking utility scans the hard drive for bad sectors and scans for file system errors to see whether certain files or folders are misplaced.

If you use your computer daily, you should run this utility once a week to help prevent data loss.

Run the Error Checking utility:

1.  Close all open files.

2.  Click Start, and then click Computer.

3.  In the Computer window (My Computer in Windows XP), right-click the hard disk you want to search for bad sectors, and then click Properties.

4.  In the Properties dialog box, click the Tools tab.

5.  Click the Check Now button.

6.  In the Check Disk dialog box (called Error-checking in Windows 7), select the Scan for and attempt recovery of bad sectors check box, and then click Start.

7.  If bad sectors are found, choose to fix them.

Tip: Only select the “Automatically fix file system errors” check box if you think that your disk contains bad sectors.

To see the original article in its entirety click here.

What you need to know about the WannaCry Ransomware

What has happened?

On May 12, 2017 a new variant of the Ransom.CryptXXX ransomware family (detected as Ransom.Wannacry) began spreading widely, impacting a large number of organizations, particularly in Europe.

What is the WannaCry ransomware?

WannaCry encrypts data files and asks users to pay a US$300 ransom in bitcoins. The ransom note indicates that the payment amount will be doubled after three days. If payment is not made after seven days, the encrypted files will be deleted.

Figure 1. Ransom demand screen displayed by the WannaCry Trojan

It also drops a file named !Please Read Me!.txt which contains the ransom note.

Figure 2. Ransom demand note from WannaCry Trojan

It propagates to other computers by exploiting a known SMB remote code execution vulnerability (MS17-010) in Microsoft Windows computers.

Are you protected against this threat?

South Jersey Techies, LLC recommends and offers Symantec Endpoint Protection to its clients. Symantec Endpoint Protection customers are protected against WannaCry using a combination of technologies: Antivirus, SONAR protection, Network-based protection.

All South Jersey Techies Managed IT Services client computers have the latest Windows security updates installed, in particular MS17-010, to prevent spreading. If your business / organization is not on our Managed IT Services plan please check or contact us to ensure that you have the latest updates installed.

Who is impacted?

A number of organizations globally have been affected, the majority of which are in Europe.

Is this a targeted attack?

No, this is not believed to be a targeted attack at this time. Ransomware campaigns are typically indiscriminate.

Can I recover the encrypted files?

Decryption is not available at this time but companies are investigating. South Jersey Techies, LLC does not recommend paying the ransom. Encrypted files should be restored from back-ups where possible. South Jersey Techies offers a number of backup solutions including Carbonite Online Backup and cloud storage solutions. If you are unsure about your computer / server backups, please check or contact us to discuss the best solution for your business.

What are best practices for protecting against ransomware?

  • New ransomware variants appear on a regular basis. Always keep your security software up to date to protect yourself against them.
  • Keep your operating system and other software updated. Software updates will frequently include patches for newly discovered security vulnerabilities that could be exploited by ransomware attackers.
  • Email is one of the main infection methods. Be wary of unexpected emails especially if they contain links and/or attachments.
  • Be extremely wary of any Microsoft Office email attachment that advises you to enable macros to view its content. Unless you are absolutely sure that this is a genuine email from a trusted source, do not enable macros and instead immediately delete the email.
  • Backing up important data is the single most effective way of combating ransomware infection. Attackers have leverage over their victims by encrypting valuable files and leaving them inaccessible. If the victim has backup copies, they can restore their files once the infection has been cleaned up. However organizations should ensure that back-ups are appropriately protected or stored off-line so that attackers can’t delete them.
  • Using cloud services could help mitigate ransomware infection, since many retain previous versions of files, allowing you to “roll back” to the unencrypted form.

Have additional questions?

Feel free to call us at contact us or (856) 745-9990 with any questions you may have.

Save Big on Toner!

toner

TECHIEDEPOT.COM

Your #1 Source for the Best Printer Ink Cartridges

Looking to save on toner ?  Save upto 35% when you order Re-manufactured Toner Cartridges with TECHIE DEPOT. Our toner cartridges are intelligently re-engineered and environmentally friendly.   We offer a 3 year 100% warranty whereas most OEMs only offer a 1 year warranty.

We guarantee our products will perform better than any other aftermarket imaging product.  Rest assure you never have to worry about leaking cartridges because of our Patented Ultrasonic and Gasket Seal Technologies.  Our Secondary cleaning System also eliminates streaking.  Our toner cartridges are ISO Certified for OEM page yield and quality.  With our Extended Yield Cartridges you will get up to 100% more yield.

You will find that we are different because everyone is not as committed to quality like we are and our product is better built and more consistent.  Our cartridges have a documented 99.2% success rate and for 7 consecutive years we were awarded the best quality supplier in the aftermarket  by Recharger Magazine.

Pay less for great quality, we are sure you won’t be disappointed with our product.  Contact us and place your order today!

Office 365 Exchange Online


Work smarter, anywhere, with hosted email for business.

Close-up of an email message with a Policy Tip to help prevent sending sensitive info.

Security and reliability

Exchange Online helps protect your information with advanced capabilities. Anti-malware and anti-spam filtering protect mailboxes. Get a Exchange Online Protection Trial or Office 365 Professional Trial to see how good it works. Data loss prevention capabilities prevent users from mistakenly sending sensitive information to unauthorized people. Globally redundant servers, premier disaster recovery capabilities, and a team of security experts monitoring Exchange Online around the clock safeguard your data. And with a guaranteed 99.9% uptime, financially-backed service level agreement, you can count on your email always being up and running.

Stay in control

Maintain control over your environment while gaining the advantage of hosting your email on Microsoft servers. Manage your organization efficiently with the Exchange admin center, an easy-to-use, web-based interface. Run In-Place eDiscovery across Exchange, SharePoint, and Skype for Business data from a single interface through the eDiscovery Center. With mobile device policies, you can create approved mobile device lists, enforce PIN lock, and remove confidential company data from lost phones. And IT-level phone support is available to you 24 hours a day, 7 days a week.

Close-up of the Preview Results page for a search in Exchange Online.

Close-up of a user’s inbox in Outlook Web App.

Easy to use and maintain

It’s easier than ever to provide your users with the business email they need to stay productive. Automatic patching eliminates the time and effort of maintaining your system. Give your users an In-Place Archive, so they can keep all their important data in one place. And provide them with anywhere access to email, calendar, and contacts on all major browsers and across devices. Integration with Outlook means they’ll enjoy a rich, familiar email experience with offline access.

Have questions?

Our Hosted Cloud Solution team is here to help.

Call us at: 856-745-9990 or Visit: https://southjerseytechies.net/

To learn more and how Office 365 Exchange Online can benefit your business please contact South Jersey Techies, LLC. South Jersey Techies, LLC is a certified Small and Midmarket Cloud Solutions Microsoft Partner.

To read this article in its entirety click here.

Office 2016 Preview

Office 2016 Preview for existing Office 365 subscribers

For enterprise

Office 365 administrators with an Office 365 ProPlus subscription can now enable the Office 2016 Preview for their organization by turning on First Release. Learn how to turn on First Release.

Once First Release is turned on, users can install the Office 2016 Preview.

Enabled Office 365 ProPlus users

1. Sign in to the My Software page.

2. Go to Try the next version of Office.

3. Click Install.office2016

This will install the Office 2016 Preview on your device.

Note Enabled Office 365 ProPlus users can follow the same process above to install the Project 2016 Preview and the Visio 2016 Preview. On your Software page, select Project or Visio from the Software list. If Project and Visio are not listed, they are not included with your subscription.
Not ready to join First Release? You can still get the Office 2016 Preview,find out how.

For home

  • Go to the Office M Account page.
  • Click Language and install options.
  • Click Additional install options.
  • Open the Version drop-down menu and select the 32-bit or 64-bit Office 2016 Preview.
This will install the Office 2016 Preview on your device. You will stay on the Office 2016 Preview track until you uninstall the Office 2016 Preview or until Office 2016 is released.

How To Remove Windows 7 Antispyware

Remove Windows 7 Antispyware 2012, Vista Antivirus 2012, and XP Security 2012 (See Uninstall Guide Below)

Win 7 Antispyware 2012, Vista Antivirus 2012, and XP Security 2012 are all names for the same rogue anti-spyware program. This family of rogues is promoted in two ways. The first is through the use of fake online antivirus scanners that state that your computer is infected and then prompt you to download a file that will install the infection. The other method are hacked web sites that attempt to exploit vulnerabilities in programs that you are running on your computer to install the infection without your knowledge or permission. Regardless of how it is installed, once it is running on your computer it will install itself as a variety of different program names and graphical user interfaces depending on the version of Windows that is running. Regardless of the name, though, they are all ultimately the same program with just a different skin on it. This rogue goes by different program names, which I have listed below based upon the version of Windows that it is installed on:

Windows XP Rogue Name Windows Vista Rogue Name Windows 7 Rogue Name
XP Antispyware 2012 Vista Antispyware 2012 Win 7 Antispyware 2012
XP Antivirus 2012 Vista Antivirus 2012 Win 7 Antivirus 2012
XP Security 2012 Vista Security 2012 Win 7 Security 2012
XP Home Security 2012 Vista Home Security 2012 Win 7 Home Security 2012
XP Internet Security 2012 Vista Internet Security 2012 Win 7 Internet Security 2012

When installed, this rogue pretends to be a security update for Windows installed via Automatic Updates. It will then install itself as a single executable that has a random consisting of three characters, such as kdn.exe, that uses very aggressive techniques to make it so that you cannot remove it. First, it makes it so that if you launch any executable it instead launches Vista Home Security 2012, XP Internet Security 2012, Win 7 Security 2012, or any of the other names it goes under. If the original program that you wanted to launch is deemed safe by the rogue, it will then launch it as well. This allows the rogue to determine what executables it wants to allow you to run in order to protect itself. It will also modify certain keys so that when you launch FireFox or Internet Explorer from the Window Start Menu it will launch the rogue instead and display a fake firewall warning stating that the program is infected.

Win 7 Antispyware 2012 Screen shot

Once started, the rogue itself, like all other rogues, will scan your computer and state that there are numerous infections on it. If you attempt to use the program to remove any of these infections, though, it will state that you need to purchase the program first. In reality, though, the infections that the rogues states are on your computer are all legitimate files that if deleted could cause Windows to not operate correctly. Therefore, please do not manually delete any files based upon the results from this rogue’s scan.

While running, XP Internet Security 2012, Win 7 Antivirus 2012, and Vista Security 2012 will also display fake security alerts on the infected computer. The text of some of these alerts are:

XP Home Security 2012 Firewall Alert
XP Home Security 2012 has blocked a program from accessing the internet
Internet Explorer is infected with Trojan-BNK.Win32.Keylogger.gen
Private data can be stolen by third parties, including credit card details and passwords.

Malware Intrusion
Sensitive areas of your system were found to be under attack. Spy software attack or virus infection possible. Prevent further damage or your private data will get stolen. Run an anti-spyware scan now. Click here to start.

System danger!
Your system security is in danger. Privacy threats detected. Spyware, keyloggers or Trojans may be working the background right now. Perform an in-depth scan and removal now, click here.

System Hijack!
System security threat was detected. Viruses and/or spyware may be damaging your system now. Prevent infection and data loss or stealing by running a free security scan.

Privacy threat!
Spyware intrusion detected. Your system is infected. System integrity is at risk. Private data can be stolen by third parties, including credit card details and passwords. Click here to perform a security repair.

Stealth intrusion!
Infection detected in the background. Your computer is now attacked by spyware and rogue software. Eliminate the infection safely, perform a security scan and deletion now.

XP Antispyware 2012 Alert
Security Hole Detected!
A program is trying to exploit Windows security holes! Passwords and sensitive data may be stolen. Do you want to block this attack?

Just like the scan results, these security warnings and alerts are all fake and should be ignored.

While running, Win 7 Home Security 2012, XP Antivirus 2012, and Vista Antivirus 2012 will also hijack Internet Explorer so that you cannot visit certain sites. It does this so that you cannot receive help or information at sites like BleepingComputer.com on how to remove this infection. When you attempt to visit these sites you will instead be shown a fake alert stating that the site you are visiting is dangerous and that the rogue is blocking it for your protection. The message that you will see is:

Vista Security 2012 Alert
Internet Explorer alert. Visiting this site may pose a security threat to your system!

Possible reasons include:
– Dangerous code found in this site’s pages which installed unwanted software into your system.
– Suspicious and potentially unsafe network activity detected.
– Spyware infections in your system
– Complaints from other users about this site.
– Port and system scans performed by the site being visited.

Things you can do:
– Get a copy of Vista Security 2012 to safeguard your PC while surfing the web (RECOMMENDED)
– Run a spyware, virus and malware scan
– Continue surfing without any security measures (DANGEROUS)

Just like the fake security alerts, the browser hijack is just another attempt to make you think that your computer has a security problem so that you will then purchase the program.

Without a doubt, this rogue is designed to scam you out of your money by hijacking your computer and trying to trick you into thinking you are infected. Therefore, please do not purchase this program , and if you have, please contact your credit card company and dispute the charges stating that the program is a computer infection. Finally, to remove Win 7 Antispyware 2012, Vista Antivirus 2012, and XP Security 2012 please use the guide below, which only contains programs that are free to use.

Tools Needed for this fix:

  • Malwarebytes’ Anti-Malware


Automated Removal Instructions for Win 7 Antispyware 2012 & Vista Antivirus 2012 using Malwarebytes’ Anti-Malware:

  1. Print out these instructions as we will need to close every window that is open later in the fix.
  1. It is possible that the infection you are trying to remove will not allow you to download files on the infected computer. If this is the case, then you will need to download the files requested in this guide on another computer and then transfer them to the infected computer. You can transfer the files via a CD/DVD, external drive, or USB flash drive.
  1. This infection changes settings on your computer so that when you launch an executable, a file ending with .exe, it will instead launch the infection rather than the desired program. To fix this we must first download a Registry file that will fix these changes. From a clean computer, please download the following file and save it to a removable media such as a CD/DVD, external Drive, or USB flash drive. FixNCR.reg.  Once that file is downloaded and saved on a removable devices, insert the removable device into the infected computer and open the folder the drive letter associated with it. You should now see the FixNCR.reg file that you had downloaded onto it. Double-click on the FixNCR.regfile to fix the Registry on your infected computer. You should now be able to run your normal executable programs and can proceed to the next step.If you do not have any removable media or another clean computer that you can download the FixNCR.reg file onto, you can try and download it to your infected computer using another method. On the infected computer, right click on the Internet Explorer’s icon, or any other browser’s icon, and select Run As or Run as Administrator. If you are using Windows XP, you will be prompted to select a user and enter its password. It is suggested that you attempt to login as the Administratoruser. For Windows 7 or Windows Vista, you will be prompted to enter your Administrator account password.Once you enter the password, your browser will start and you can download the above FixNCR.reg file. When saving it, make sure you save it to a folder that can be accessed by your normal account. Remember, that you will be launching the browser as another user, so if you save it to a My Documents folder, it will not be your normal My Documents folder that it is downloaded into. Instead it will be the My Documents folder that belongs to the user you ran the browser as. Once the download has finished, close your browser and find the FixNCR.reg file that you downloaded. Now double-click on it and allow the data to be merged. You should now be able to run your normal executable programs and can proceed to the next step.
  1. Now we must first end the processes that belong to Win 7 Antispyware 2012 & Vista Antivirus 2012 and clean up some Registry settings so they do not interfere with the cleaning procedure. To do this, please download RKill to your desktop from the following link.RKill Download Link.  When at the download page, click on the Download Now button labeled iExplore.exe download link . When you are prompted where to save it, please save it on your desktop.
  1. Once it is downloaded, double-click on the iExplore.exe icon in order to automatically attempt to stop any processes associated with Win 7 Antispyware 2012 & Vista Antivirus 2012 and other Rogue programs. Please be patient while the program looks for various malware programs and ends them. When it has finished, the black window will automatically close and you can continue with the next step. If you get a message that RKill is an infection, do not be concerned. This message is just a fake warning given by Win 7 Antispyware 2012 & Vista Antivirus 2012 when it terminates programs that may potentially remove it. If you run into these infections warnings that close RKill, a trick is to leave the warning on the screen and then run RKill again. By not closing the warning, this typically will allow you to bypass the malware trying to protect itself so that rkill can terminate Win 7 Antispyware 2012 & Vista Antivirus 2012 . So, please try running RKill until the malware is no longer running. You will then be able to proceed with the rest of the guide. If you continue having problems running RKill, you can download the other renamed versions of RKill from the rkill download page. All of the files are renamed copies of RKill, which you can try instead. Please note that the download page will open in a new browser window or tab.Do not reboot your computer after running RKill as the malware programs will start again.
  1. There have been reports of this infection being bundled with the TDSS rootkit infection. To be safe you should also run a program that can be used to scan for this infection. Please follow the steps in the following guide:

How to remove Google Redirects or the TDSS, TDL3, or Alureon rootkit using TDSSKiller

If after running TDSSKiller, you are still unable to update Malwarebytes’ Anti-malware or continue to have Google search result redirects, then you should post a virus removal request using the steps in the following topic rather than continuing with this guide:

Preparation Guide For Use Before Using Malware Removal Tools and Requesting Help Topic

If TDSSKiller requires you to reboot, please allow it to do so. After you reboot, reboot back into Safe Mode with Networking again.

  1. Download Malwarebytes’ Anti-Malware, also referred to as MBAM, from the following location and save it to your desktop:Malwarebytes’ Anti-Malware Download Link (Download page will open in a new window)
  1. Once downloaded, close all programs and Windows on your computer, including this one.
  1. Double-click on the icon on your desktop named mbam-setup.exe. This will start the installation of MBAM onto your computer.
  1. When the installation begins, keep following the prompts in order to continue with the installation process. Do not make any changes to default settings and when the program has finished installing, make sure you leave both the Update Malwarebytes’ Anti-Malware and Launch Malwarebytes’ Anti-Malware checked. Then click on the Finish button.
  1. MBAM will now automatically start and you will see a message stating that you should update the program before performing a scan. As MBAM will automatically update itself after the install, you can press the OK button to close that box and you will now be at the main program as shown below.


  1. On the Scanner tab, make sure the the Perform full scan option is selected and then click on the Scan button to start scanning your computer for Win 7 Antispyware 2012 & Vista Antivirus 2012 related files.
  1. MBAM will now start scanning your computer for malware. This process can take quite a while, so we suggest you go and do something else and periodically check on the status of the scan. When MBAM is scanning it will look like the image below.


  1. When the scan is finished a message box will appear as shown in the image below.


You should click on the OK button to close the message box and continue with the Vista AntiSpyware 2012 & Win 7 Home Security removal process.

  1. You will now be back at the main Scanner screen. At this point you should click on the Show Results button.
  2. A screen displaying all the malware that the program found will be shown as seen in the image below. Please note that the infections found may be different than what is shown in the image.


You should now click on the Remove Selected button to remove all the listed malware. MBAM will now delete all of the files and registry keys and add them to the programs quarantine. When removing the files, MBAM may require a reboot in order to remove some of them. If it displays a message stating that it needs to reboot, please allow it to do so. Once your computer has rebooted, and you are logged in, please continue with the rest of the steps.

  1. When MBAM has finished removing the malware, it will open the scan log and display it in Notepad. Review the log as desired, and then close the Notepad window.
  1. You can now exit the MBAM program.
  1. As many rogues and other malware are installed through vulnerabilities found in out-dated and insecure programs, it is strongly suggested that you use Secunia PSI to scan for vulnerable programs on your computer. A tutorial on how to use Secunia PSI to scan for vulnerable programs can be found here:How to detect vulnerable and out-dated programs using Secunia Personal Software Inspector

Your computer should now be free of the Vista AntiSpyware 2012 & Win 7 Home Security program. If your current anti-virus solution let this infection through, you may want to consider purchasing the PRO version of Malwarebytes’ Anti-Malware to protect against these types of threats in the future.

If you are still having problems with your computer after completing these instructions, then please follow the steps outlined in the topic linked below:

Preparation Guide For Use Before Using Malware Removal Tools and Requesting Help

To see the original article in its entirety click here.


CALL US NOW!