Back to Top

Tech, Web, Cloud & Cabling Services

Category: Laptops

Hardware / Laptops Category

10 Killer Cheap Upgrades for Your PC

Looking to put more pep in your PC’s step? These surprisingly cheap PC upgrades and accessories do the trick without breaking the bank.

PCupgrades1

No need to break the bank

Sure, swanky new Surface Pros and $1,200 graphics cards may capture all the headlines, but on a practical level, the real story is that PCs aren’t cheap. But if your computer’s starting to feel pokey, there’s fortunately no reason to rush out a spend hundreds on a new one.

Investing small amounts in key new PC hardware can keep your computer running strong for years to come. These upgrades—most costing well under $100—breathe new life into slow machines. You just have to be strategic and make sure you’re putting your money in the best place for your particular system.

PCupgrades2

Speed up your PC with an SSD

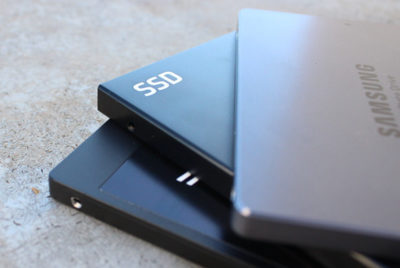
Let’s start in the most obvious place. If your PC still runs with a mechanical hard drive, swapping it out with an SSD will make it feel like a whole new computer. SSDs inject face-melting speed into a PC, drastically improving boot times, file transfers, and overall system responsiveness.

A lot of PCs don’t have SSDs, for two reasons: Solid-state drives use to be extravagantly expensive, and computer makers often charge hefty mark-ups for upgrading to an SSD. Fortunately, SSD prices have plummeted in recent years. Superb models like theSamsung 850 EVO ($89.39 for 250GB on Amazon) and the OCZ Trion 150 ($45 for 120GB on Amazon) can be found for well under $100 online. If you find the storage capacities a bit too tight, you can always install the SSD as a boot drive alongside your current hard drive.

A word of warning about SSDs, and all the hardware discussed in this article: You can often find lower prices if you sift through Amazon or Newegg for no-name or lesser-known brands. But you’re gambling on reliability and support when you move away from established PC hardware makers. Stick with name brand gear unless you absolutely, positively can’t afford it.

PCupgrades3

Mass storage is dirt cheap

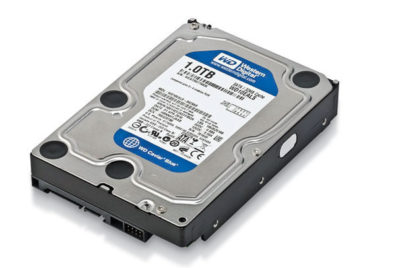
Good news if your available storage space is filled to the brim: Traditional hard drives are even cheaper than SSDs these days. A 1TB Western Digital Blue hard drive spinning at a speedy 7,200rpm will only set you back $50 on Amazon, while a 3TB WD Blue drive is just $90 on Amazon (albeit at a slower 5,400rpm).

Hybrid drives blend the best of both worlds, combining a large amount of traditional storage with a small, speedy flash storage cache. The drive monitors your oft-used files and keeps them on the cache, where they benefit from SSD-esque speeds. A Seagate 1TB hybrid drive goes for $85 on Amazon with an 8GB SSD cache, or $114 on Amazonwith a 32GB cache.

PCupgrades4

Add RAM for more multitasking

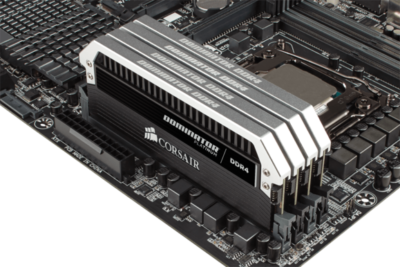
If your computer’s having trouble running multiple tasks simultaneously, low memory is a likely culprit. Two gigabytes of RAM is the absolute minimum modern Windows systems need to run smoothly, and even PCs with 4GB of memory can start to feel pokey if you’re running several programs, keep a dozen Chrome tabs open, or game with some background processes still running.

Fortunately, memory is dirt cheap. Picking up an 8GB memory kit from Corsair ($36 for 2x4GB kit on Amazon) or Kingston ($36 for 2x4GB kit on Amazon)—two reliable brands I’ve had nothing but success with personally—will set you back less than $5 per gigabyte.

Just be sure to get the right type of memory for your PC! RAM comes in all sorts of different packages. The easiest way to tell what type of RAM resides in your PC is to download the free, superb CPU-Z software, then open the Memory tab and look for the “type” option.

PCupgrades5

MAYBE upgrade your CPU

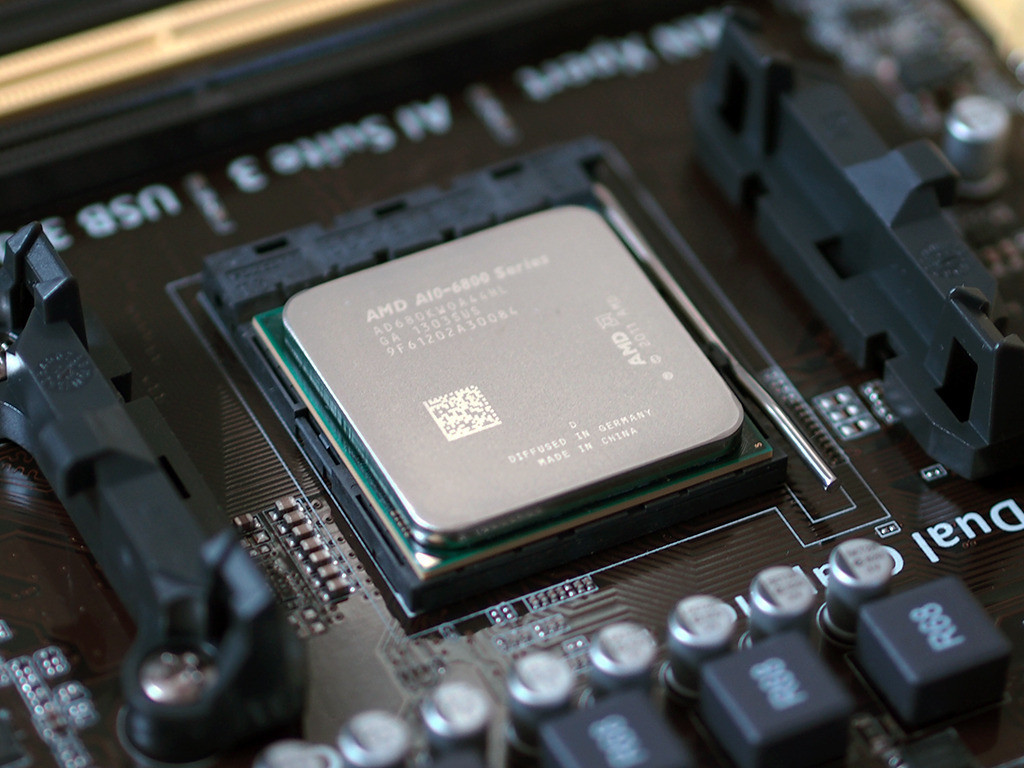
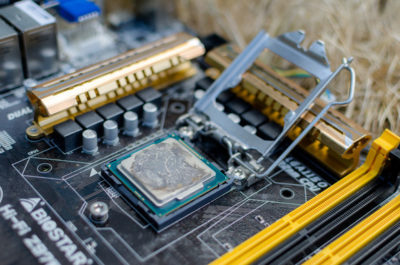
A pokey PC may be the result of an outdated processor. Unfortunately, replacing your CPU often means replacing your motherboard too, making the endeavor pretty pricey. But not always—especially if you have an AMD-powered system.

AMD’s AM3+ and FM2 motherboards have been powering AMD’s CPUs and APUs, respectively, since mid-2012. Since many prebuilt AMD systems sport modest processors, upgrading to a modern CPU can give your PC a shot in the arm. If you’re on FM3+, the new Athlon X4 860K ($75 on Amazon) is a solid entry-level quad-core processor for gaming, while the 8-core FX-8320E ($130 on Amazon) is a great step-up option and price-to-performance champion. If you have an FM2-based system with an AMD APU, the A10-7860K ($110 on Amazon) could be a solid upgrade, complete withintegrated graphics that let you get into e-sports games at modest frame rates.

Intel switches out its motherboards and socket types much more often, and its chips tend to be much more expensive. Replacing Intel chips aren’t really an affordable upgrade in most cases.

It’s important to make sure your new chip is compatible with your existing motherboard! Before you buy, fire up CPU-Z and search for the “Package” entry in the main CPU tab to see what sort of socket your motherboard packs.

PCupgrades6

Gaming doesn’t have to be expensive

Want to dip your toes into PC gaming? Despite what fearmongers may tell you, gaming doesn’t have to cost an arm and a leg.

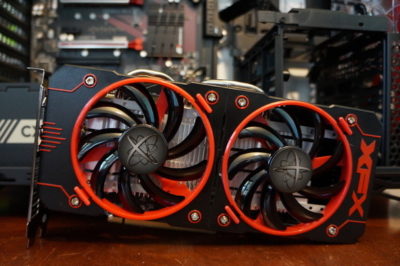
AMD’s Radeon RX 460 ($110 and up on Newegg) delivers great performance in e-sports games like League of Legends and Overwatch. It also lets you play modern games at a console-esque 30 frames per second with High graphics settings at 1080p, or up to 60fps at Medium settings. That’s damned good for a hair over $100. Even better: Many models pull their power directly from your motherboard, with no need for additional power connectors. That makes AMD’s budget card a great option for adding gaming capabilities to prebuilt “big box” PCs from the likes of HP and Dell, as they often pack modest power supplies that lack extra connectors.

Be careful though: Some of the more potent Radeon RX 460 models require extra 6-pin power connectors. You don’t want that if you don’t have one available—unless you want to buy a power supply, too. A 500 watt power supply from a reputable company doesn’t cost much, as evidenced by the EVGA 500 W1, which only costs $35 on Amazon.

PCupgrades7

Buy some canned air

No, seriously. If you haven’t cleaned out your PC in a year or more, mounds of dust and debris can be collected inside. Clogged fans and exhaust ports lead to overheating, which leads to your PC throttling back performance. Single containers of canned air can be relatively pricey; grab a four pack ($16.22 on Amazon) for a lower price and enough air to clean out your PC for years to come.

PCupgrades8

Improve your cooling, improve your performance

If your PC’s still running hot after blowing out the dust, the thermal paste coating the area where your CPU or GPU touches its cooler could be old, dry, and ineffective, especially if you’ve had the equipment for several years.

First, install SpeedFan and double check that your CPU or GPU is indeed overheating. If one (or both!) is, grab a syringe of thermal paste—Arctic Silver 5 ($7.43 on Amazon)—then use guides to installing a CPU cooler and refreshing your graphics card to help you apply new thermal paste after scraping off the old stuff.

Still running hot overall? Try adding a case fan or two. Case fans from reputable vendors are shockingly cheap ($7.91 from Cooler Master on Amazon, or $9 from NZXT on Amazon) and can be installed in mere minutes.

PCupgrades9

A better monitor

You spend most of your time interacting with your computer’s input and output devices, so it’s definitely worth investing in decent peripherals if you spend considerable time at your PC.

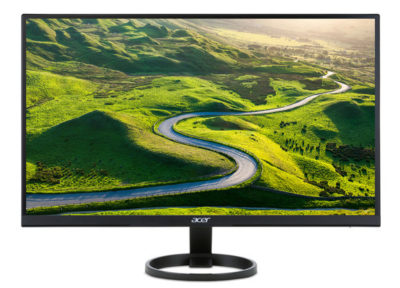
Start with your monitor. If you’re still using a lower-resolution display or (shudder) a fat CRT display, embracing a high-definition 1080p monitor will provide a huge step up in usability. It won’t break the bank either: You can buy a 1080p HP with a 21.5-inch IPS screen for just $100 on Amazon. IPS screens provide a much more vibrant image than the twisted-nematic panels found in most budget monitors.

Alternatively, if you’re a gamer with a Radeon graphics card, consider buying a monitor that supports AMD’s FreeSync technology. FreeSync synchronizes the refresh rate of your graphics card and display to eliminate stutter and screen tearing in games. While monitors with Nvidia’s competing G-Sync technology fetch steep price premiums, FreeSync adds minimal cost to a display. A 22-inch 1080p FreeSync display by ViewSonic costs just $110 on Amazon, for example.

PCupgrades10

Aural bliss

Treat your ears, too. The speakers that come bundled with prebuilt PCs tend to be utter garbage. While audio gear pricing can escalate to frightening levels, some of our favorite headsets will set you back less than a Benjamin.

If you’re a gamer, our favorite all-around gaming headset is the Kingston HyperX Cloud($67.93 on Amazon). The sound quality is second to none in this bracket, the build quality is superb, and it’s extremely comfortable—though its microphone is merely average.

Don’t need a mic? Music lovers will find a lot to love in the Sennheiser HD 280 Pro ($99.95 on Amazon), which I’ve personally been using for years now. The comfortably snug cans lack the extreme bass kick of, say, Beats or Monster headphones, but make up for it by delivering rich, accurate, and dynamic audio across the full sound spectrum. They’re beloved among Amazon buyers for a reason.

PCupgrades11

Enhance the parts you physically touch

If you’re used to crappy bundled PC keyboards, or laptop keyboards, upgrading to a mechanical keyboard will change your life. The well-reviewed Logitech G610 Orion withCherry MX Brown or Red switches only costs $90 on Amazon.That’s probably more than most people have spent on a keyboard before, but it’s cheap by mechanical standards. Once you’ve tried it, you won’t be able to go back to a rubber-dome board.

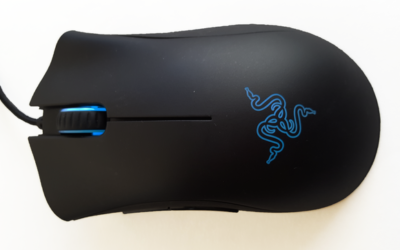
Likewise, investing in a decent mouse makes interacting with your PC that much more pleasant. The Razer DeathAdder ($42.69 on Amazon) is ostensibly a gaming mouse, but its ergonomic design and high DPI sensor help it feel good in your palm and generate nice, smooth cursor movements. I’ve been using one for more than five years now, and grimace whenever i’m forced to use a cheap mouse bundled with a prebuilt PC.

PCupgrades12

But first…

Speeding up your well-loved PC doesn’t actually have to cost any money. You’ll find a few tips repeated from here—seriously, buy an SSD—but for the most part, it focuses on no-cost software solutions for potentially boosting your computer’s performance. Try those before dropping dough on new gear!

Have questions?

Get answers from Microsofts Cloud Solutions Partner!
Call us at: 856-745-9990 or visit: https://southjerseytechies.net/

South Jersey Techies, LL C is a full Managed Web and Technology Services Company providing IT Services, Website Design ServicesServer SupportNetwork ConsultingInternet PhonesCloud Solutions Provider and much more. Contact for More Information.

To read this article in its entirety click here.

Maximize Your Windows 7 Experience

If you’re one of the many business users who has not upgraded their computer to Windows 10, there are still resources to boost your experience. Here are 10 tips for getting the most out of the OS.

Windows 10 faced a controversial roll-out, with privacy concerns, bugs, and other issues plaguing many users. And as of August 2016, just 1% of business machines had upgraded to Windows 10, according to a study from Softchoice. Instead, 91% of the machines were operating with Windows 7—an 18% increase over the same period of time in 2015.

“It seems businesses don’t see an urgent need to move operating systems, so long as their cloud-based applications are still running fine on Windows 7,” Softchoice’s Microsoft director Craig McQueen wrote in a press release at the time. “In addition to the security benefits, I think once organizations grasp the user benefits—such as touch and Cortana—we will start to see a boost in adoption.”

While experts predict Windows 10 deployments will pick up this year, it’s important for those still using Windows 7 for business to get the most out of their machines. Here are 10  articles with Windows 7 tips that will help enterprise users operate the machines more effectively.

1. 10 ways to speed up Windows 7

While Windows 7 generally performs well, over time, the system can slow down and require some care to get it back up to speed. The OS also contains certain features that users can take advantage of to improve overall performance. Here, we outline 10 steps business users can take to enhance the performance of your Windows 7 system.

2. Use multiple monitors with Windows 7’s Remote Desktop Connection

Windows 7 allows users to connect to a remote computer and utilize the local system’s multiple monitors. Here is a step by step advice on how to configure and operate multiple monitors using Windows 7’s Remote Desktop Connection, as well as how to connect to and from Windows versions that do not support this feature.

3. Quick Tips: Flush the ARP cache in Windows 7

The Address Resolution Protocol (ARP) cache is an important part of IP networking on any OS, as it links Ethernet addressing to hardware addressing. Newly mapped addresses are saved in an ARP cache, which is usually fine, but can sometimes cause issues with internet connections and web page loading times. Here, are the necessary steps to clear the ARP cache, and how to manage it going forward.

4. 10+ Windows 7 services you may not need

While every version of Windows includes a core set of system services, business users can disable some that are not necessary in order to improve performance and security. In this article, we highlight 13 services that users can disable if they so choose on Windows 7 systems that will likely not have any impact on business operations, including IP Helper, offline files, and Network Access Protection.

5. 10 Windows 7 commands every administrator should know

IT staff who troubleshoot Windows 7 problems often have to dive into the command line. Here, are 10 fundamental Windows 7 commands that are useful for IT administrators, including System File Checker, File Signature Verification, and Driverquery.

6. Modifying the Windows 7 boot loader with the Boot Configuration Data Editor tool

In Windows Vista and later versions of Windows, the bootloader was moved from boot.ini to a utility called BCDEdit. This article walks users through how to modify the boot config data using this tool.

7. Change and customize Windows 7’s Logon screen wallpaper

Changing and customizing the Windows 7 Logon screen wallpaper is easy once you know the steps, as Microsoft built the ability to change the wallpaper right into the OS, as opposed to needing any third-party software. Here, we offer a tutorial on doing so.

8. Change the Processor Affinity setting in Windows 7 to gain a performance edge

Most applications have been designed for multi-core processors, and work with an OS to distribute their operations evenly across cores to enhance performance. However, you can sometimes achieve better overall performance from certain applications by configuring them to run on different processor cores, which Windows 7 allows via the Processor Affinity setting. In this article, we explain two ways to change the Processor Affinity setting in Windows 7.

9. Use Windows 7 Event Viewer to track down issues that cause slower boot times

Experiencing a slow Windows 7 boot time? You can use Windows 7’s Event View to investigate the source of the problem. The Event Viewer includes a category of event logs called Applications and Services Logs, which track key elements of the OS. Here, we explain how it is possible to find out how long it took to boot up your system every time, since the day Windows 7 was first installed, along with instances where boot time slowed down, all through these logs.

10. Tag your files for easier searches in Windows 7

This article, walks users through how to tag files to make them searchable via the Search filters built into Windows Explorer’s Search box in Windows 7. It’s possible to do this easily from many applications while saving a file. The ability to more easily find files is a boon for business users who want to enhance their productivity.

Have questions?

Get answers from Microsofts Cloud Solutions Partner!
Call us at: 856-745-9990 or visit: https://southjerseytechies.net/

South Jersey Techies, LL C is a full Managed Web and Technology Services Company providing IT Services, Website Design ServicesServer SupportNetwork ConsultingInternet PhonesCloud Solutions Provider and much more. Contact for More Information.

To read this article in its entirety click here.

Windows 7 Remote Desktop Connection

In Windows 7 you can connect to a remote computer and take full advantage of your local system’s multiple monitors. Here’s how.

If you’re using multiple monitors on your system setup and you regularly connect to other systems via Remote Desktop, you know how frustrating it is to go from a multiple-monitor display to a single-monitor display for your remote connection. If so, you’ll definitely want to learn how you can take advantage of multiple monitors in Microsoft Windows 7’s Remote Desktop Connection.

However, before going any further it is important to understand right off the bat that multiple-monitors support in Windows 7’s Remote Desktop is available only on Windows 7 Ultimate and Windows 7 Enterprise. (It is also available in Windows Server 2008 R2.) Furthermore, both the local and remote systems must be running one of the supported versions. For example, Windows 7 Ultimate is running on the local and Windows 7 Enterprise is running on the remote.

As long as you have the proper configuration, Windows 7 provides you with real multiple-monitor support as opposed to the monitor-spanning feature that was introduced in the previous version of Remote Desktop Connection. This means that in Windows 7 you can use this feature to connect to a remote computer and take full advantage of your local system’s multiple monitors on your remote system.

In this edition of the Windows Desktop Report, we’ll describe Windows 7’s Remote Desktop support for multiple monitors and show you how to configure it for connecting to other Windows 7 systems. we’ll also show you how to use Remote Desktop’s monitor-spanning feature when connecting to, and from, Windows versions that do not support the multiple-monitors feature.

What’s the difference?

Before we get started, let’s take a moment to discuss the different types of Remote Desktop monitor configurations you can have when using a system with multiple monitors. In the standard type of connection, Remote Desktop displays the remote system in a window on one monitor. In a connection configured with the monitor-spanning feature, Remote Desktop displays the remote system in a window on one monitor but allows you to drag or span that window across multiple monitors. In a connection configured with the multiple-monitors feature, Remote Desktop makes the remote system behave as if it were physically connected to multiple monitors. Each of these configurations is illustrated in Figure A.

Figure A

There are three types of configurations you can use when using Remote Desktop on a system with multiple monitors.

Configuring a multiple-monitors connection

If you have the proper setup, configuring Windows 7’s Remote Desktop multiple-monitor feature is easy. To begin, Launch Remote Desktop Connection and select the system you want to connect to with multiple-monitor support from the Computer drop-down list. Then, click the Options button to expand the Remote Desktop Connection window so that you can see all the tabs. Next, choose the Display tab and select the Use All My Monitors for the Remote Session check box, as shown in Figure B. To complete the procedure, return to the General tab and click the Save button.

Figure B

Selecting the Use All My Monitors for the Remote Session check box is all that is needed to enable the multiple-monitor feature.

When you connect to the remote system, the remote system’s monitor will instantly fill your multiple monitors, just as if it were physically connected to the monitors.

Configuring a monitor-spanning connection

As mentioned, in a connection configured with the monitor-spanning feature, Remote Desktop allows you to drag or span the window across multiple monitors. However, there are a couple of caveats. First your multiple monitors must have the same screen resolution. Second, the monitors must be aligned, or positioned, side-by-side. Third, the combined screen resolution of your multiple monitors must be under 4096 x 2048.

To launch Remote Desktop Connection with monitor-spanning support, just click the Start button and type the following command in the Start Search box. (Alternatively, you can open a Command Prompt window and type the same command.)

Mstsc /span

When you do, you’ll see the standard Remote Desktop Connection dialog box, and you can launch the connection as you normally would. As soon as you make a connection, you’ll immediately see the desktop of the remote system spread across your multiple monitors. If you need to have access to both the local and remote desktops, you can reduce the size of the remote system’s desktop to only one monitor by clicking the Restore Down button on the Remote Desktop window. As a shortcut, you can also use the keystroke: [Ctrl][Alt][Break].

Once the window is on one monitor, you use click and drag to resize the window to completely cover a single monitor. Keep in mind that when you reduce the size of a spanned remote widow, it will display both horizontal and vertical scroll bars, as shown in Figure C, that you’ll have to use to see the entire screen. However, you can instantly span the window by clicking the Maximize button.

Figure C

When you resize the remote desktop’s spanned window, you’ll have to use scroll bars to view the entire screen.

Creating a shortcut

Of course, using a command line to launch your Remote Desktop connection isn’t the most convenient way to use the monitor-spanning feature. Chances are that you already have a Remote Desktop Connection RDP file saved on your desktop. If so, you can create a standard Windows shortcut that will incorporate both the special command line and your RDP file.

To begin, right-click anywhere on the desktop and then select New | Shortcut from the context menu. When you see the Create Shortcut wizard, just type mstsc /span and the path to the RDP file in the text box, as shown in Figure D. Be sure that you enclose the path to the RDP file in double quotes if the path has spaces in it. To continue, click Next and give the shortcut an appropriate name, such as Saturn – Remote Spanning, and then click Finish.

Figure D

You can create a standard Windows shortcut that will incorporate both the special command line and your RDP file.

You can now use this shortcut to launch your remote desktop connection and span the Remote Desktop window across all the available space on your multiple monitors. Of course, the spanned desktop won’t exactly behave like a multiple-monitor setup when you open multiple windows. As such you’ll have to use a little creative click-and-drag resizing to reposition the windows on the spanned desktop.

Have questions?

Get answers from Microsofts Cloud Solutions Partner!
Call us at: 856-745-9990 or visit: https://southjerseytechies.net/

South Jersey Techies, LL C is a full Managed Web and Technology Services Company providing IT Services, Website Design ServicesServer SupportNetwork ConsultingInternet PhonesCloud Solutions Provider and much more. Contact for More Information.

To read this article in its entirety click here.http://www.techrepublic.com/blog/windows-and-office/use-multiple-monitors-with-windows-7s-remote-desktop-connection/

Quick Tips: Flush the ARP cache in Windows 7

Here’s how to clear the Address Resolution Protocol cache and how to manage that cache with a few command switches.

The Address Resolution Protocol (ARP) cache is a crucial component of IP networking on any operating system. What ARP does is link Ethernet addressing (IP addressing) to hardware addressing (MAC addressing). Without this system, a machine could not communicate to the outside world as one addressing scheme could not communicate with the other.

The ARP Cache is a collection of ARP entries (mostly dynamic) that are created when a hostname is resolved to an IP address and then an IP address is resolved to a MAC address (so the computer can effectively communicate with the IP address).

When this happens, the PC will store that newly mapped address in the ARP cache, and it will stay there until the ARP cache entry timeout expires. This isn’t usually a problem, but sometimes a bad ARP entry can cause issues with Internet connections and Web page loading. When this occurs, one step that can be taken toward resolution is to clear the ARP cache. Yes, this means the ARP cache has to be rebuilt, which means a little more work for the PC, but that cache will rebuild fairly quickly.

Clearing the ARP cache is done completely through the command line, so stretch out those fingers and get ready to type. After we show you how to clear the ARP cache, we will show you how to manage that cache with a few command switches.

Flush the cache

Step 1: Open the command prompt

Click Start and then type “cmd” (no quotes) in the search dialog box, but don’t hit Enter yet. Right-click the cmd.exe icon and select Run as Administrator (Figure A). After answering the UAC, the terminal window will open offering up the command prompt.

Figure A

If the icon is already pinned in the Start menu, entering cmd is not necessary.

Step 2: Run the commands

The first command to run is

arp -a

This command will display all your ARP entries (Figure B). Naturally the -a option is not the only option available. The arp command also allows for the following switches:

-d Delete an IP address (arp -d 192.168.100.10)
-d -a Delete all entries in the ARP table
-s Add an entry to the ARP table (arp -s ADDRESS MAC_ADDRESS – Where ADDRESS is the address to be added and MAC_ADDRESS is the MAC address of the machine)

Figure B

Here you see the arp cache for two different interfaces on a single machine.

To flush the entire cache, issue the following command:

netsh interface ip delete arpcache

The above command will flush the entire ARP cache on your system. Now as soon as network connections are made, the ARP cache will begin to repopulate.

Verify the flush

Once you have flushed the ARP cache, make sure to issue the command arp -a to see if the cache has, in fact, been flushed. If it does not flush, it could be the system is a victim of a Windows bug caused when Routing and Remote Services is enabled. This is a simple bug to fix:

1.           Click Start | Control Panel.

2.           Click Administrative Tools.

3.           Click Computer Management.

4.           Double-click Services and Applications.

5.           Double-click Services.

6.           Scroll down to Routing and Remote Services.

7.           Double-click Routing and Remote Services.

8.           Set the Startup Type to Disable.

9.           Make sure the service is stopped.

Now try flushing the ARP cache again. It should work this time.

Troubleshooting

It is also possible to troubleshoot network connections using the ARP cache. For example, it is important to look out for invalid ARP entries that go to a MAC address of 00-00-00-00-00-00. If one such entry shows up, make sure to delete it from the cache using the -d switch. Say you have an ARP entry that looks like:

224.0.0.24           00-00-00-00-00-00 static

In order to delete this entry, use the arp command like so:

arp -d 224.0.0.24

And that invalid entry will be gone.

Final thoughts

There are so many ways to troubleshoot networking connections. Flushing the ARP cache is just one of those methods that is rarely thought of, but when all else fails this might be the last-gasp effort that makes you the hero of the day.

Have questions?

Get answers from Microsofts Cloud Solutions Partner!
Call us at: 856-745-9990 or visit: https://southjerseytechies.net/

South Jersey Techies, LL C is a full Managed Web and Technology Services Company providing IT Services, Website Design ServicesServer SupportNetwork ConsultingInternet PhonesCloud Solutions Provider and much more. Contact for More Information.

To read this article in its entirety click here.

The best new features coming to Microsoft’s latest OS: Windows 10

Windows10

Microsoft continues to build out Windows 10 – with a bumper crop of new features announced at its Build conference last week.

These enhancements will be pushed to to Windows 10 users over the coming months, with many arriving in summer when the OS will get a major upgrade dubbed the Windows 10 Anniversary Edition.

Here are the key upgrades heading to Windows 10.

The write stuff

ink-SJTechies

Using a digital pen to write and scribble on the screen of Windows 10 PCs and tablets will get easier.

In a boost to devices that support such pens, such as the Microsoft’s Surface tablet, the OS’ new Windows Ink feature will allow users to jot down notes on the screen without unlocking the device.

Windows Ink will also allow users to write messages on sticky notes and, if appropriate, have them automatically translated into calendar appointments and reminders.

Support for Windows Ink in Microsoft Office, Maps, the Edge browser and other apps will allow users to draw, write and annotate using their pen. Windows Ink will make using the pen in Office more satisfying than it currently is, for example tidying up highlighted marks on documents so they neatly align with text.

Windows 10 will also gain the Ink Workspace, a hub for launching apps that support writing and sketching using the Surface Pen.

Ink everywhere

win10-inking-SJTechies

Support for drawing, writing and annotating using digital pens will likely come to many apps.

Microsoft says that support for Microsoft Ink will be easily added to Universal Windows Platform apps, requiring just two lines of XAML code.

Digital ruler

win10-ruler-SJTechies

It sounds simple, but the new on-screen ruler should prove to be a useful addition for those who want to draw straight lines using a digital pen.

Smarter Cortana

cortana-SJTechies

The attraction of a virtual assistant is the simplicity with which they allow you to carry out tasks.

To ease the process of using Windows 10’s Cortana, the voice-controlled assistant will no longer require you to log into Windows, with users able to make a note, play music or set a reminder from the lock screen.

Cortana will also become more proactive and make suggestions based on a user’s past behaviour – offering to order lunch or to arrange transportation.

More apps will also be able to use Cortana to automatically complete tasks for users or to carry out actions based on context, such as the user’s current location or time of day.

Windows Hello comes to apps and the web

hello-SJTechies

Windows 10 already lets you log into the OS using your face.

The anniversary edition will extend this biometric log-in to Windows apps and websites via Microsoft Edge. As with the OS, users will be able to authenticate their identity using a facial, iris or fingerprint scan.

Another new feature will allow users to unlock a PC running Windows 10 Enterprise Edition by tapping a Windows Hello-enabled phone, although Microsoft has said the feature will only be available on “select premium phones”.

Android app notifications on Windows 10

android-SJTechies

In future, notifications on Android devices will be able to show on Windows 10 PCs.

Any notification popping up on the Android notification panel can, via the Cortana Android app, also appear as a notification on a linked Windows 10 desktop.

Microsoft demoed the ability at its recent Build conference for developers.

Browser extensions

extensions-SJTechies

Microsoft’s Edge browser will soon gain support for extensions.

Extensions are small programs that can be downloaded to add new functionality to a browser, and are already found in Chrome, Firefox and other browsers today.

Support for extensions has already been added to Edge for those testing pre-release builds of Windows 10 under the Insider program.

The first extensions to be supported by Edge are Microsoft Translator, an extension that automatically translates pages in over 50 different languages, an extension to augment mouse gestures support, and a preview version of the Reddit Enhancement Suite.

Microsoft promises more extensions will be added later this year, including AdBlock, LastPass and Evernote.

Pinned browser tabs

pinned-tabs-SJTechies

Microsoft is also adding to Edge the ability to pin your favorite sites and web apps so they always have a tab open in the browser.

Updated Maps app

maps-app-pc-SJTechies

The Maps app has several new features, as well as UI and performance improvements.

Additions include one-tap access to search and directions, the ability to view multiple searches and directions at the same time, labels for search results on the map and turn-by-turn directions read by Cortana.

The improved app is available now to those testing Windows 10 under the Insider program.

Access Linux command-line tools in Windows

bash-win10-SJTechies

More one for developers, Microsoft is also bringing the ability to run the Bash shell to Windows.

The Bash shell is a command line interpreter that is available on many different Linux distributions, as well as Mac OS X.

The shell includes a host of tools that allow power users to carry out and orchestrate complex chains of commands.

Bash will be available via a Universal Windows Platform app, which will provide an image of the Linux distribution Ubuntu and run on the Windows 10 desktop.

Users will be able to use the Bash shell to download and install programs from the command line, as they do from inside Ubuntu. Microsoft says Ubuntu software will run as fast in the Windows app as it does natively, thanks to a software subsystem for handling Linux system calls.

Microsoft has described the app as offering a developer toolset. While it has access to the files on the Windows PC, the app only provides access to a command line — not a graphical desktop — and reportedly has limits on what it can be used for, such as not being able to run a server.

Have questions?

Get answers from Microsofts Cloud Solutions Partner!
Call us at: 856-745-9990 or visit: https://southjerseytechies.net/

South Jersey Techies, LL C is a full Managed Web and Technology Services Company providing IT Services, Website Design ServicesServer SupportNetwork ConsultingInternet PhonesCloud Solutions Provider and much more. Contact for More Information.

To read this article in its entirety click here.

Use Windows 7 Event Viewer to track down issues that cause slower boot times

Here’s how to use some of the new features in Windows 7’s Event Viewer to investigate a slow boot time.

Overview

Windows 7’s Event Viewer includes a new category of event logs called Applications and Services Logs, which includes a whole host of subcategories that track key elements of the operating system. The majority of these subcategories contain an event log type called Operational that is designed to track events that can be used for analyzing and diagnosing problems. (Other event log types that can be found in these subcategories are Admin, Analytic, and Debug; however, describing them is beyond the scope of this article.)

Now, within the operating system section is a subcategory titled Diagnostic-Performance with an Operational log that contains a set of a Task Category called Boot Performance Monitoring. The Event IDs in this category are 100 through 110. By investigating all the Event ID 100 events, you will be able to find out exactly how long it took to boot up your system every time since the day you installed Windows 7. By investigating all the Event ID 101 thru 110 events, you will be able to identify all instances where boot time slowed down.

Getting started

You can find and launch Event Viewer by opening the Control Panel, accessing the System and Security category, selecting the Administrative Tools item, and double-clicking the Event Viewer icon. However, you can also simply click the Start button, type Event in the Start Search box, and press Enter once Event Viewer appears and the top of the results display.

Creating a Custom View

Once you have Event Viewer up and running, you can, of course, drill down through the Applications and Services Logs and locate the Diagnostic-Performance Operational log and begin manually looking through the events recorded in the log. However, you can save yourself time and energy by taking advantage of the new Custom View feature, which is essentially a filter that you can create and save.

To do so, pull down the Action menu and select the Create Custom View command. When you see the Create Custom View dialog box, leave the Logged option set at the default value of Any Time and select all the Event level check boxes. Next, select the By Log option button, if it is not already selected, and click the dropdown arrow. Then, drill down through the tree following the path: Applications and Services Logs | Microsoft | Windows | Diagnostics-Performance. When you open the Diagnostics-Performance branch, select the Operational check box, as shown in Figure A.

Figure A

When you get to the Diagnostics-Performance branch, select the Operational check box.

To continue, type 100 in the Includes/Excludes Event IDs box, as shown in Figure B, and then click OK.

Figure B

Event ID 100 records how long it takes to boot up your system.

When you see the Save Filter to Custom View dialog box, enter a name, as shown in Figure C, and click OK.

Figure C

To save the filter as a Custom View, simply provide an appropriate name, such as Boot Time.

You’ll now repeat these steps and create another Custom View, and this time, you’ll type 101-110 in the Includes/Excludes Event IDs box and name it Boot Degradation.

Investigating Boot Time

To investigate your Windows 7 system’s boot time, select Boot Time in the Custom Views tree and then sort the Date and Time column in ascending order. When you do, you’ll see a complete history of every time you have booted your system since the day you installed Windows 7. In Figure D, you can see that we have hidden the Console Tree and the Action Pane to focus on the events.

Figure D

By sorting the Date and Time column in ascending order, you’ll see a complete history of every time you have booted your system since the day you installed Windows 7.

As you can see, the first recorded Boot Time on my sample system was 67479 milliseconds in October 2009. Dividing by 1,000 tells me that it took around 67 seconds to boot up. Of course, this was the first time, and a lot was going on right after installation. For example, drivers were being installed, startup programs were being initialized, and the SuperFetch cache was being built. By December 2009 the average boot time was around 37 seconds.

In any case, by using the Boot Time Custom View, you can scroll through every boot time recorded on your system. Of course, keep in mind that there will be normal occurrences that may lengthen the boot time, such as when updates, drivers, and software is installed.

Now, if you click the Details tab, you’ll see the entire boot process broken down in an incredible amount of detail, as shown in Figure E. (You can find more information about the boot process in the “Windows On/Off Transition Performance Analysis” white paper.) However, for the purposes of tracking the boot time, we can focus on just three of the values listed on the Details tab.

Figure E

The Details tab contains an incredible amount of detail on the boot time.

MainPathBootTime

MainPathBootTime represents the amount of time that elapses between the time the animated Windows logo first appears on the screen and the time that the desktop appears. Keep in mind that even though the system is usable at this point, Windows is still working in the background loading low-priority tasks.

BootPostBootTime

BootPostBootTime represents the amount of time that elapses between the time that the desktop appears and the time that you can actually begin using the system.

BootTime

Of course, BootTime is the same value that on the General tab is called Boot Duration. This number is the sum of MainPathBootTime and BootPostBootTime. Something that we didn’t tell you before is that Microsoft indicates that your actual boot time is about 10 seconds less that the recorded BootTime. The reason is that it usually takes about 10 seconds for the system to reach an 80-percent idle measurement at which time the BootPostBootTime measurement is recorded.

Investigating Boot Degradation

To investigate instances that cause Windows 7 system’s boot time to slow down, select Boot Degradation in the Custom Views tree and then sort Event ID column in ascending order. Each Event ID, 101 through 110, represents a different type of situation that causes degradation of the boot time.

While there are ten different Event IDs here, not all of them occur on all systems and under all circumstances. As such, I’ll focus on the most common ones that we have encountered and explain some possible solutions.

Event ID 101

Event ID 101 indicates that an application took longer than usual to start up. This is typically the result of an update of some sort. As you can see in Figure F, the AVG Resident Shield Service took longer than usual to start up right after an update to the virus database. If you look at the details, you can see that it took about 15 seconds for the application to load (Total Time), and that is about 9 seconds longer than it normally takes (Degradation Time).

Figure F

Event ID 101 indicates that an application took longer than usual to start up.

An occasional degradation is pretty normal; however, if you find that a particular application is being reported on a regular basis or has a large degradation time, chances are that there is a problem of some sort. As such, you may want to look for an updated version, uninstall and reinstall the application, uninstall and stop using the application, or maybe find an alternative.

(In the case of my friend’s Windows 7 system, there were several applications that were identified by Event ID 101 as the cause of his system slowdown. Uninstalling them was the solution, and he is currently seeking alternatives.)

Event ID 102

Event ID 102 indicates that a driver took longer to initialize. Again, this could be the result of an update. However, if it occurs regularly for a certain driver or has a large degradation time, you should definitely look in to a newer version of the driver. If a new version is not available, you should uninstall and reinstall the driver.

Event ID 103

Event ID 103 indicates that a service took longer than expected to start up, as shown in Figure G.

Figure G

Event ID 103 indicates that a service took longer than expected to start up.

Services can occasionally take longer to start up, but they shouldn’t do so on a regular basis. If you encounter a service that is regularly having problems, you can go to the Services tool and experiment with changing the Startup type to Automatic (Delayed Start) or Manual.

Event ID 106

Event ID 106 indicates that a background optimization operation took longer to complete. On all the Windows 7 systems that we investigated, this event identified the BackgroundPrefetchTime as the culprit, as shown in Figure H. Since the Prefetch cache is a work in progress, this should not really represent a problem.

Figure H

Event ID 106 indicates that a background optimization operation took longer to complete.

If you encounter regular or long degradation times related to Prefetch, you may want to investigate clearing this cache and allowing the operating system to rebuild it from scratch. However bear in mind that doing so can be tricky and instructions on doing so are beyond the scope of this article.

Event ID 109

Event ID 109 indicates that a device took longer to initialize. Again, if this is happening occasionally, there shouldn’t be anything to worry about. But if it is occurring regularly, you should make sure that you regularly back up your hard disk and begin investigating replacing the device in question.

Have questions?

Get answers from Microsofts Cloud Solutions Partner!
Call us at: 856-745-9990 or visit: https://southjerseytechies.net/

South Jersey Techies, LL C is a full Managed Web and Technology Services Company providing IT Services, Website Design ServicesServer SupportNetwork ConsultingInternet PhonesCloud Solutions Provider and much more. Contact for More Information.

To read this article in its entirety click here.

Modifying the Windows 7 boot loader with the Boot Configuration Data Editor tool

In Windows Vista and later versions of Windows, the bootloader was moved from boot.ini to a utility called BCDEdit. Here’s how to modify the boot config data with the new tool.

Sometimes dual-booting a system is a handy way to test new software, a new operating system, or an application that needs to be run in a specific version of Windows. Other reasons to dual-boot might include replication of a client environment.

Windows handles dual-booting by using boot.ini to display a menu of bootable choices or partitions found on the current system. In Windows Vista and later versions of Windows, the bootloader was moved from boot.ini to a utility called BCDEdit.

Recently, we decided we could make better use of some disk space that we had set aside to create a bootable VHD for Windows Server 2008 R2. There was no data other than the OS installation contained within the file because we had used it only to prepare a blog post about booting from Virtual Hard Disks. To free up the space, we deleted the VHD.

Note: Always make sure to back up any data that you want to keep before deleting or modifying partitions on VHDs. Your changes could make the partition unbootable.

Once we had the VHD removed, we thought Windows would be smart enough to clean up the boot loader, but we were not so lucky. We had Windows 7 set as the primary OS, so we were not without a system.

We started looking around for boot.ini and was directed toward the Boot Configuration Data Editor (BCDEdit) as the utility to use when editing boot loader information in Windows 7 (and in Vista too).

To begin, open the Start menu, select All Programs, and then choose Accessories. Right-click on Command Prompt and select Run As Administrator. Once in the command window, type bcdedit. This will return the current running configuration of your boot loader, showing any and all items that can boot on this system.

In this example, we decided to remove the entry for my Windows 2008 R2 installation, as we wouldn’t need it for the time being. To remove an entry, you will need to know the Boot Loader Identifier (found in curly braces in Figure A).

Figure A

we copied the whole list into Notepad and then selected and copied just the ID, braces included.

Removing an entry from the Boot Loader

One simple command got the Windows Server 2008 R2 entry out of the boot loader. At the command prompt, enter the following:

Bcdedit /delete {boot loader identifier}

Press Enter, and the Boot Configuration Data Editor (BCDEdit) will remove the entry for the ID you specified and display a message when finished. When Windows starts, the only choice available in the boot menu should be the current Windows installation.

Warning: Be careful when editing the boot configuration data. If you mistakenly remove the current instance of Windows, you may render your computer unbootable.

Have questions?

Get answers from Microsofts Cloud Solutions Partner!
Call us at: 856-745-9990 or visit: https://southjerseytechies.net/

South Jersey Techies, LL C is a full Managed Web and Technology Services Company providing IT Services, Website Design ServicesServer SupportNetwork ConsultingInternet PhonesCloud Solutions Provider and much more. Contact for More Information.

To read this article in its entirety click here.

What did Microsoft get right in 2016?

2016 was a very good year for Microsoft in terms of decision making. Here is a  list of five things the company got right.

Since its inception way back in the ancient epoch known as the 1970s, Microsoft has often been ridiculed for making mistakes. Whether it was for bad business strategies, poor products, or unscrupulous practices, Microsoft seemed to bring out the passionate ire in many people.

But what often gets overlooked is what Microsoft does right each year. And by just about any measurement, 2016 was a remarkable year for the company. Under the leadership of Satya Nadella, Microsoft has changed its business strategy to reflect what it describes as a mobile-first, cloud-first business world. And in 2016, that strategy began show results.

Here, in no particular order, are five things Microsoft got right in 2016.

1. Windows 10 Anniversary Update

To mark the one-year anniversary of Windows 10, Microsoft released a large patch it dubbed the Windows 10 Anniversary Update. Okay, so Microsoft is not very clever in naming things. But the patch itself was well received. It included new security measures, new program features, Microsoft Edge browser extensions, and advanced support for digital pens, among many other enhancements. If you were already using Windows 10, the Anniversary Update was a must.

2. Surface Studio

While not its primary business, Microsoft has been developing some noteworthy pieces of hardware the past few years and in 2016, the company generated a large amount of buzz with the release of the Surface Studio. This elegant computer combines the best of the desktop, laptop, and tablet to create a unique and innovative platform perfect for artists, designers, and other creative people. With data visualization becoming ever more important, Microsoft may have invented the perfect tool for the big data generation.

3. Microsoft Office 365

I have been wondering aloud if it is a bit too much, but there can be no doubt that with the dozens of program and feature updates released in 2016, Microsoft Office 365 is the alpha and omega of productivity software. Rather than trying to name all of the new features, it would be best to concentrate on the underlying theme: collaboration. Whether it is Yammer, Skype for Business, or the intelligent cloud, Microsoft is concentrating on features necessary for success in a collaborative environment.

4. LinkedIn

In 2016, Microsoft made several acquisitions of both companies and their technologies. Perhaps the most high-profile of these acquisitions was LinkedIn. Despite all of its efforts to create a collaboration platform with Office 365, the one thing Microsoft needed was a social networking component. LinkedIn gives the company a jump start toward establishing a social networking presence that can compete with the likes of Twitter and Facebook. It will be interesting to see what Microsoft does with this acquisition.

5. IoT, AI, and machine learning

While we may live in a mobile-first, cloud-first world right now, the future may very well revolve around the Internet of Things (IoT), artificial intelligence, and machine learning. To its credit, Microsoft sees the potential of these technologies and has taken steps to get ahead of the curve. In terms of recent history, getting ahead of the curve is not something Microsoft has done very well, so it is difficult to know where the research will lead, but it should prove to be worth watching closely.

Despite what some people may tell you, Microsoft does do some things right. In fact, for the most part, the company does more things right than it does wrong. In 2016, Microsoft did many things right and consumers and businesses have been the beneficiaries. Let’s hope Microsoft can continue the trend in 2017.

Have questions?

Get answers from Microsofts Cloud Solutions Partner!
Call us at: 856-745-9990 or visit: https://southjerseytechies.net/

South Jersey Techies, LL C is a full Managed Web and Technology Services Company providing IT Services, Website Design ServicesServer SupportNetwork ConsultingInternet PhonesCloud Solutions Provider and much more. Contact for More Information.

To read this article in its entirety click here.

The end is near: Say goodbye to the Windows 10 free upgrade

The deadline for a free Windows 10 upgrade is right around the corner. Find out what happens after the offer expires.

Windows 10-July29

Don’t look now, but July 29, 2016, is coming up fast. That is the one-year anniversary of the release of Windows 10, which means the ability to upgrade to the new operating system for FREE will soon expire. (If you are interested, you can take a look at the official countdown here.)

In a January 21, 2015, Windows Experience blog post titled The next generation of Windows: Windows 10, we learned that Windows 10 would be a free upgrade. Author Terry Myerson said:

Today was a monumental day for us on the Windows team because we shared our desire to redefine the relationship we have with you—our customers. We announced that a free upgrade for Windows 10 will be made available to customers running Windows 7, Windows 8.1, and Windows Phone 8.1 who upgrade in the first year after launch.

A little over six months later, on July 28, 2015, Myerson penned another Windows Experience blog post, titled Windows 10 Free Upgrade Available in 190 Countries Today, in which he reiterated the free upgrade policy:

From the beginning, Windows 10 has been unique—built with feedback from five million Windows Insiders, delivered as a service with ongoing innovations and security updates, and offered as a free upgrade to genuine Windows 7, Windows 8.1 and Windows Phone 8.1 customers.

If you’ve been reading articles by Woody Leonhard or Paul Thurrott in recent months, you know that Microsoft has been upping its game with the Get Windows 10, or GWX, program it built into Windows 7 and Windows 8.1. It really wants every Windows user everywhere to be running Windows 10.

Any holdouts—Windows 7 or Windows 8.1 users who have been sticking to their guns so far—have only a few more weeks to go before losing their chance to get Windows 10 for free.

In a recent Windows Experience blog post titled Windows 10 Now on 300 Million Active Devices – Free Upgrade Offer to End Soon, Yusuf Mehdi, the corporate vice president of Microsoft’s Windows and Devices Group, said:

…we want to remind you that if you haven’t taken advantage of the free upgrade offer, now is the time. The free upgrade offer to Windows 10 was a first for Microsoft, helping people upgrade faster than ever before. And time is running out. The free upgrade offer will end on July 29 and we want to make sure you don’t miss out. After July 29th, you’ll be able to continue to get Windows 10 on a new device, or purchase a full version of Windows 10 Home for $119.

What will Windows 10 cost after July 29?

As Mehdi pointed out in his post, you will be able to purchase a full version of Windows 10 Home for $119.

But how much will Windows 10 Pro cost?

Well, if you head over to the Microsoft Store right now, you’ll find that you can purchase both Windows 10 Home and Windows 10 Pro as a download or on a USB flash drive. Windows 10 Pro will cost you $199.99. And moving past the July 29 deadline for the free upgrade, it’s a pretty safe bet that prices will remain the same—especially since they’re the same price points that the full versions of Windows 8.1 Home and Pro sold for when that operating system was new.

Will there be upgrade versions of Windows 10 after July 29?

Since Microsoft provided free upgrades for a full year, I wonder if there will be upgrade packages for Windows 7 and Windows 8.1 users who decide to upgrade to Windows 10 after July 29. I suppose that it’s possible, but then again, maybe not. When Microsoft introduced Windows 8.1 packages, it offered only the full versions—there were no upgrade versions of Windows 8.1. With that in mind, it’s easy to speculate that this may also be the case with Windows 10.

Have questions?

Get answers from Microsofts Cloud Solutions Partner!
Call us at: 856-745-9990 or visit: https://southjerseytechies.net/

South Jersey Techies, LL C is a full Managed Web and Technology Services Company providing IT Services, Website Design ServicesServer SupportNetwork ConsultingInternet PhonesCloud Solutions Provider and much more. Contact for More Information.

Yammer is on the way to Office 365: Are you ready?

Microsoft is activating Yammer for every Office 365 subscription. But is this one collaboration tool too many?

On February 2, 2016, Kirk Koenigsbauer announced in the official Microsoft Office 365 blog that Yammer is now being activated for every eligible Office 365 subscription. In a nutshell, that means Yammer is going to be another app on the Office 365 app list unless an admin specifically turns off access. Your enterprise should plan accordingly.

Yammer

For those of you unfamiliar with the product, Yammer bills itself as an enterprise internal social network. It mixes the typical chat messenger application with collaboration tools available in Office 365.

Similar to the Delve tool we looked at last week, Yammer can serve as the central hub for team collaboration. From within a Yammer discussion, teams can set up meeting appointments using Outlook, switch to a full-fledged Skype for Business video meeting, and access OneDrive for Business to create collaborative documents.

The initial rollout of Yammer took place on February 2, 2016; the rest of the rollout will take place in stages. The next release is March 1, 2016, and the last is April 1, 2016. According to the blog post, the first wave is for “Office 365 customers with a business subscription who purchased fewer than 150 licenses that includes Yammer and who have zero or one custom domains for Yammer.”

The second wave is for “Office 365 customers with a business subscription who purchased fewer than 5,000 licenses that includes Yammer.” Customers with an education subscription are not included.

The final wave is for “remaining customers with a business subscription and all customers with an education subscription.” For subscribers who have never had a Yammer account, the rollout will take place last, in April. Alas, that is the wave I’ll have to wait for.

Collaboration

Yammer is the latest, and perhaps the last, major teamwork collaboration app to be added to Office 365. In Microsoft’s vision of a mobile-first, cloud-first enterprise, teams collaborate across distances using shared documents, video conferencing, and applications that tie it all together in one virtual location.

YammerForOffice365

With the addition of Yammer, Microsoft is offering several tools teams can use to manage and organize their collaboration activities. Teams can use Yammer, Delve, Groups, Sites, SharePoint, and OneNote to manage their shared conversations and documents across the enterprise. One of those tools should be able to satisfy even the most persnickety of teams.

Bottom line

But then again, that may be where we run into problems. One could argue that there are too many collaboration tools available in Microsoft Office 365. While all these wonderful choices may seem good at first glance, it is possible that subscribers may become overwhelmed.

Microsoft’s idea that teams can choose the best tool for them or for the project they are working on sounds all well and good, but it does still require someone to make an important initial decision. For some people, making a decision that will affect a project from start to finish can be a daunting task.

In the long run, it may be beneficial for organizations to establish guidelines for when each of the collaboration tools works best. They may even decide to block some of the tools from use altogether in favor of a recommended best practice.

Having myriad collaboration tools is generally a good thing, but it might help move things along if the enterprise establishes some well thought out guidelines.

Have questions?

Get answers from Microsofts Cloud Solutions Partner!
Call us at: 856-745-9990 or visit: https://southjerseytechies.net/

South Jersey Techies, LL C is a full Managed Web and Technology Services Company providing IT Services, Website Design ServicesServer SupportNetwork ConsultingInternet PhonesCloud Solutions Provider and much more. Contact for More Information.

CALL US NOW!