Back to Top

Tech, Web, Cloud & Cabling Services

Author Archives: Website Admin

11 Ergonomic Gadgets Your Body Will Love

If you spend most of your day at a desk, any one of these tech tools will make your work station more comfortable and give your body some much-needed relief.

Ergonomics – they do a body good
Ergonomic-Gadgets

Do you work long hours on your computer? If so, we know the feeling and have identified a list of gadgets that you can use at your workstation, and which offer the necessary support and comfort as you work. While some may require making some adjustments or take some getting used to, your body will grow to love any of these devices — in the form of reduced aches and pain.

Kensington SmartFit Conform Back Rest
Kensington-Smartfit-back-rest

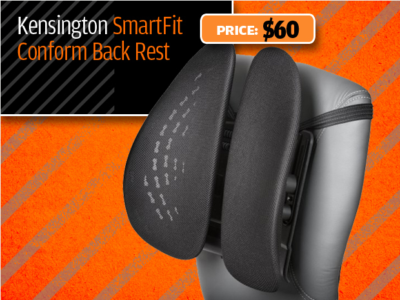
If you don’t have an ergonomic chair, the Kensington SmartFit Conform Back Rest lets you convert a plain office chair into one. The attachment fits onto most chairs with a back, and delivers support for your spine and lumbar using two ventilated back panels resting on four independent springs. The fit can be slightly adjusted for support that is highly comfortable, while the fabric itself can be removed for washing.

Price: $60

[ Find it on Amazon ]

Microsoft Sculpt Ergonomic Keyboard
Microsoft-Ergonomic-Keyboard

The Microsoft Sculpt Ergonomic Keyboard sets a new standard for the support and comfort of your wrist for those who type a lot at work. The split keyboard layout and arc shape of this wireless keyboard helps keep hands and arms in a relaxed position to significantly reduce the risk of repetitive stress injuries. The numeric keypad comes as a separate device so right-handers can hold their mouse at a more accessible angle. Though the keyboard does take some getting used to, you’re soon be wondering why you ever settled for the cramped layout of a normal keyboard.

Price: $81

[ Find it on Amazon ]

Microsoft Natural Ergonomic Keyboard 4000
Microsoft-Ergonomic-Keyboard-4000

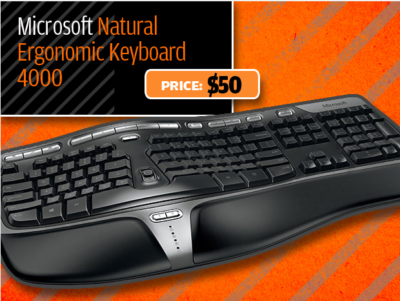
The Microsoft Natural Ergonomic Keyboard 4000 adopts a similar split keyboard layout and arc shape of the Sculpt Ergonomic keyboard, though in a more conventional wired keyboard design. In addition, it comes with additional multimedia buttons that can be customized to quickly access files, launch web pages and create hot keys shortcuts to get things done faster. A dedicated slider located in the middle of the Natural Ergonomic Keyboard 4000 also makes it easy to zoom in and out.

Price: $50

[ Find it on Amazon ]

Logitech MX Master
Logitech-MX-Master

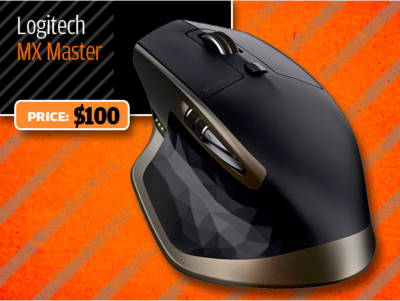
The Logitech MX Master is a wireless desktop mouse that offers a sculpted design meant to support your hand and wrist in a comfortable and natural position. Aside from the usual plethora of technologies such as dual Bluetooth and RF wireless modes and support for pairing with up to three devices, the MX Master also comes with a couple of additional capabilities that should reduce wrist fatigue. For example, a speed-adaptive scroll wheel makes scrolling through long documents easier than ever with its ability to automatically shift between normal “click-to-click” scrolling to hyper fast scroll, while a thumb wheel offers side-to-side scrolling.

Price: $100

[ Find it on Amazon ]

Kensington Expert Mouse Wireless Trackball
Kensington-Trackball

Users who find that a normal mouse just doesn’t cut it for them will appreciate the use of a trackball-based solution such as the Kensington Expert Mouse Wireless Trackball. The giant trackball help keeps wrist and hand movement is kept to a minimum, and uses optical tracking technology for smooth control. Notably, the Expert Mouse Wireless Trackball works just as well for right-handed and left-handed users, while a scroll ring positioned around the trackball also makes it easy to scroll up and down lengthy documents or Web pages.

Price: $100

[ Find it on Amazon ]

Microsoft Sculpt Ergonomic Mouse
Microsoft-Ergonomic-Mouse

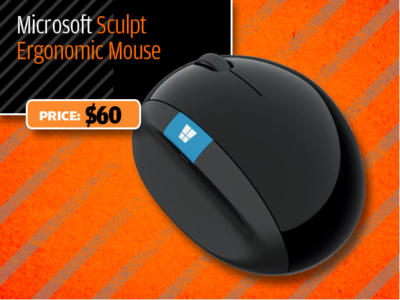
Shaped almost like a slightly squashed softball, the Microsoft Sculpt Ergonomic Mousewas created to offer a more natural hand, wrist and forearm posture. While its ergonomic design may take get some getting used to, the Sculpt Ergonomic Mouse is arguably more like a normal mouse than some of the other vertical mouse designs on the market. A thumb scoop is positioned to help maintain the correct hand and wrist position, while the scroll wheel supports four ways scrolling: Left, right, front and back.

Price: $60

[ Find it on Amazon ]

Swiftpoint GT Mouse
Swiftpoint-GT-Mouse

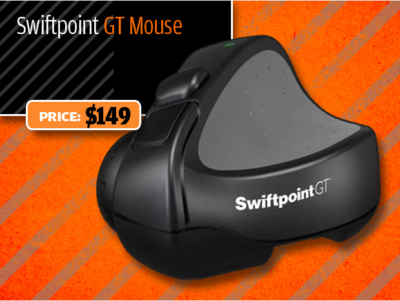
The Swiftpoint GT mouse is a compact, travel-friendly mouse designed to reduce fatigue caused by your normal portable mouse. The Swiftpoint GT’s pen-like grip is more natural than the claw grip that is necessary for many of the travel mouse out there, yet is small enough to be used on your laptop next to the touchpad. Moreover, it has a touch surface that enables a full range of touch gestures such as swiping, flicking and zooming. You can also easily “park” the Swiftpoint GT on your laptop when moving between meetings with its included magnetic clip.

Price: $149

[ Find it on Amazon ]

Kensington SmartFit Mouse Pad
Kensington-Smartfit-Mouse-Pad

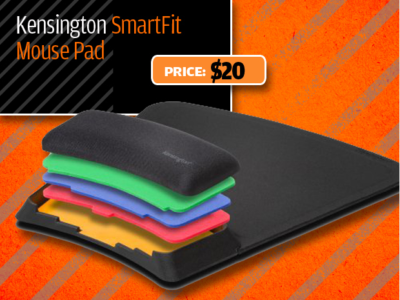
The Kensington SmartFit Mouse Pad is created to combat improper positioning of one’s wrist when using a mouse. It comes with a soft gel support to relief pressure points on the wrist, and stands out from your run-of-the-mill mousepad by how its height can be adjusted with the use of removable inserts. A nonskid base adds stability, while an anti-microbial surface to resist strains and odors to set the SmartFit Mouse Pad further apart from the rest.

Price: $20

[ Find it on Amazon ]

Ergotron WorkFit-P, Sit-Stand Workstation
Ergotron-Workstation

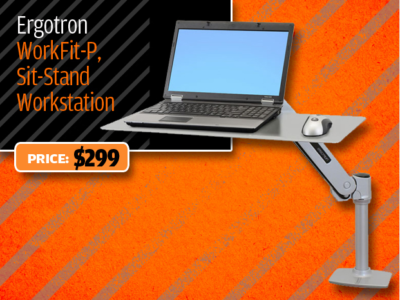
Laptop users looking to get off their butts in the office can consider the Ergotron WorkFit-P, Sit-Stand Workstation, an elegant height-adjustable laptop stand. Made of solid-aluminum construction, the WorkFit-P works like a standard monitor arm in how it can be quickly adjusted various positions – including for use while standing. The large surface has more than adequate space for a laptop and external mouse, and can also serve as an adjustable tray for writing or drawing with a graphics tablet.

Price: $299

[ Find it on Amazon ]

HiRise for MacBook
HiRise-MacBook

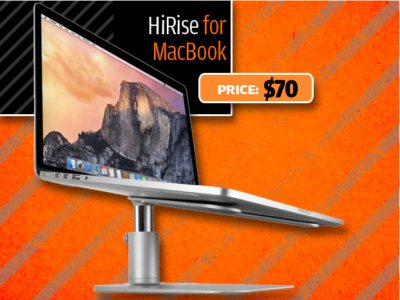
While its name suggests that it can only be used for a MacBook, the HiRise for MacBook is a height-adjustable stand that works just as well for other laptops. The beautiful brushed metal design aside, the stand lifts your laptop up to a half foot off the desk, bringing it to a more optimal height for your overstrained eyes. You will need a separate keyboard and mouse to work with your machine, but laptop’ keyboard and trackpad were never great for ergonomics anyway.

Price: $70

[ Find it on Amazon ]

Ergotron MX Mini Desk Mount Arm
MX-Mini-Desk-Mount-Arm

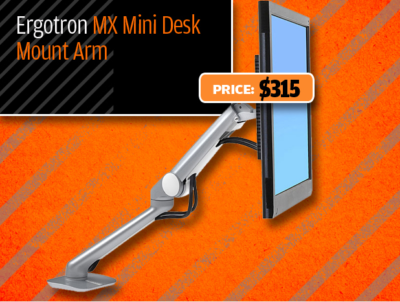
The Ergotron MX Mini Desk Mount Arm is a monitor arm that offers a slim profile without giving up on the expansive height adjustment range of full-fledged monitor arms, including full tilt, pan and rotation capability. This means you can set the ideal height and angle for optimal individual comfort, and adjust it as necessary to avoid the morning or mid-afternoon glare. The MX Mini Desk Mount Arm works with lightweight LCD monitors of up to 24-inches, as well as tablets such as the Apple’s iPad and Microsoft’s Surface.

Price: $315

[ Find it on Amazon ]

Have questions?

Get answers from Microsofts Cloud Solutions Partner!
Call us at: 856-745-9990 or visit: https://southjerseytechies.net/

South Jersey Techies, LL C is a full Managed Web and Technology Services Company providing IT Services, Website Design ServicesServer SupportNetwork ConsultingInternet PhonesCloud Solutions Provider and much more. Contact for More Information.

To read this article in its entirety click here.

10+ Windows 7 services you may not need

If you evaluate your organization’s need for certain Windows 7 services, you may find that a number of them can be safely disabled.

Every version of Windows has shipped with a core set of system services that must run so that the system can perform basic operations. However, your organization may not necessarily need to have all the services running, and disabling unnecessary services can enhance performance and security. We’ve put together a list of 13 services you can disable on your Windows 7 systems that will probably not negatively affect your business operations at all.

Before you take drastic action, such as disabling a service on every PC in your organization, make sure that the service you’re disabling is not actually in use. This article makes a couple of broad assumptions: that your company doesn’t need to share Windows Media files and doesn’t use Windows 7’s HomeGroup features.

This is not a definitive list of services that can be disabled; these are just some obvious ones. Read carefully and make sure you test changes before deploying them across your organization.

1: IP Helper

Windows description: Provides tunnel connectivity using IPv6 transition technologies (6to4, ISATAP, Port Proxy, and Teredo) and IP-HTTPS. If this service is stopped, the computer will not have the enhanced connectivity benefits that these technologies offer. Why this can be disabled:Many organizations haven’t even started testing IPv6, much less fully deployed it. As indicated in the service description, the IP Helper service is leveraged in IPv4-to-IPv6 transitions.

2: Offline Files

Windows description: The Offline Files service performs maintenance activities on the Offline Files cache, responds to user logon and logoff events, implements the internals of the public API, and dispatches interesting events to those interested in Offline Files activities and changes in cache state. Why this can be disabled: If your organization doesn’t use the Offline Files feature found in both Windows client and server products, this service can be safely disabled. Obviously, if you are synchronizing files across the network, you shouldn’t disable this service.

3: Network Access Protection Agent

Windows description: The Network Access Protection (NAP) agent service collects and manages health information for client computers on a network. Information collected by the NAP agent is used to make sure that the client computer has the required software and settings. If a client computer is not compliant with health policy, it can be provided with restricted network access until its configuration is updated. Depending on the configuration of health policy, client computers might be automatically updated so that users quickly regain full network access without having to manually update their computer. Why this can be disabled: If you’re not doing network-based remediation or if you’re doing remediation with a third-party tool that doesn’t leverage the NAP client, this service can be disabled.

4: Parental Controls

Windows description: This service is a stub for Windows Parental Control functionality that existed in Vista. It is provided for backward compatibility only. Why this can be disabled:Corporate networks rarely used Vista’s Parental Control functionality. Further, this is a legacy service from Windows Vista.

5: Smart Card

Windows description: Manages access to smart cards read by this computer. If this service is stopped, this computer will be unable to read smart cards. If this service is disabled, any services that explicitly depend on it will fail to start. Why this can be disabled: If your organization does not use smart cards for authentication purposes, you can safely disable this service.

6: Smart Card Removal Policy

Windows description: Allows the system to be configured to lock the user desktop upon smart card removal. Why this can be disabled: If your organization does not use smart cards for authentication purposes, you can safely disable this service.

7: Windows Media Center Receiver Service

Windows description: Windows Media Center Service for TV and FM broadcast reception. Why this can be disabled: In most corporate environments, TV and FM broadcast reception on desktop computers is not considered a “business critical” item that needs support, and it’s often not allowed anyway. You can disable this service to save some resources.

8: Windows Media Center Scheduler Service

Windows description: Starts and stops recording of TV programs within Windows Media Center.Why this can be disabled: Likewise, there’s no need to record TV programs in a corporate environment.

9: Windows Media Player Network Sharing Service

Windows description: Shares Windows Media Player libraries to other networked players and media devices using Universal Plug and Play. Why this can be disabled: On a corporate network, Windows Media Player doesn’t have nearly the place it might have on a home network. Disabling this service will have no impact on business activities.

10: Fax

Windows description: Enables you to send and receive faxes, utilizing fax resources available on this computer or on the network. Why this can be disabled: If your organization is not using a network-based faxing service, disabling this service will have no business impact.

11: HomeGroup Listener

Windows description: Makes local computer changes associated with configuration and maintenance of the homegroup-joined computer. If this service is stopped or disabled, your computer will not work properly in a homegroup and your homegroup might not work properly. It is recommended that you keep this service running. Why this can be disabled: It’s highly unlikely that a business organization — except a very small one — is using HomeGroups as a way to share resources on a network. It’s almost always safe to disable this service in a business setting.

12: HomeGroup Provider

Windows description: Performs networking tasks associated with configuration and maintenance of homegroups. If this service is stopped or disabled, your computer will be unable to detect other homegroups and your homegroup might not work properly. It is recommended that you keep this service running. Why this can be disabled: As noted above: Only very small organizations are likely to use HomeGroups to share resources on a network, so it’s almost always safe to disable this service in a business setting.

13: Tablet PC Input Service

Windows description: Enables Tablet PC pen and ink functionality. Why this can be disabled: The vast majority of PCs that are deployed to users do not have hardware that can leverage tablet-like capability. This service simply uses system resources with no possible benefit.

Have questions?

Get answers from Microsofts Cloud Solutions Partner!
Call us at: 856-745-9990 or visit: https://southjerseytechies.net/

South Jersey Techies, LL C is a full Managed Web and Technology Services Company providing IT Services, Website Design ServicesServer SupportNetwork ConsultingInternet PhonesCloud Solutions Provider and much more. Contact for More Information.

To read this article in its entirety click here.

10 Word Defaults You Can Customize

Takeaway: Change a few key default settings in Word and you won’t have to make the same tweaks over and over.

Word does a good job of assuming how the average user works, but some of Word’s default settings can be annoying and inefficient. Some users don’t know they can permanently change these settings, so they continue to reset them for each new document or just struggle along. Users should consider resetting the following defaults to work more productively. Of course, there are more defaults to set.

1: Line spacing

The default line spacing setting in Word 2007 and 2010 is 1.15, not 1, as it is in 2003. Microsoft believes 1.15 is more readable online. If you’re not generating Web content, adjust the style(s) you use in Word’s template (Normal.dotx), as follows:

  1. Click the Home tab.
  2. Right-click Normal in the Styles Quick gallery and choose Modify.
  3. Choose Paragraph from the Format list.
  4. In the Spacing section, change the At setting from 1.15 to 1, as shown in Figure A.
  5. Click OK.
  6. Check the New Documents Based On This Template option.
  7. Click OK.

Figure A


This change will adjust all Word styles based on Normal, so be sure that’s what you want.

2: Smart quotes

If you generate Web content or other published material, you probably have to undo Word’s smart quotes in favor of straight quotes. You can do so quickly enough by pressing [Ctrl]+Z, but that becomes tedious after a while and you might forget. If you use straight quotes more than smart quotes, disable smart quotes as follows:

  1. Click the File menu and choose Options under Help. In Word 2007, click the Office button and click Word Options. In Word 2003, choose Auto Correct Options from the Tools menu and skip to step 4.
  2. Choose Proofing in the left pane.
  3. Click AutoCorrect Options in the AutoCorrect Options section.
  4. Click the AutoFormat As You Type tab.
  5. Deselect the Straight Quotes With Smart Quotes option in the Replace As You Type section, shown in Figure B.
  6. Click OK.

Figure B


Disable smart quotes for all new documents.

3: Paste special

Word’s paste special feature retains the source formatting. If you’re pasting from foreign sources, you probably reformat it once it’s in your Word document. If you do this a lot, change the Paste Special default as follows:

  1. Click the File tab and choose Options. In Word 2007, click the Office button and then click Word Options.
  2. Select Advanced in the left pane.
  3. In the Cut, Copy, and Paste section, choose Use Destination Styles from the Pasting Between Documents When Style Definitions Conflict drop-down.
  4. Choose Keep Text Only from the Pasting From Other Programs drop-down, as shown in Figure C.
  5. Click OK.

Figure C


Several paste settings make this a flexible feature; choose the setting that’s most efficient for you.

This feature is significantly different in Word 2003. From the Tools menu, choose Options, and click the Edit tab. In the Cut And Paste section, click the Settings button to display the options shown in Figure D.

Figure D


Word 2003 is more specific, but it allows some control.

4: File Location

Word saves your documents in My Documents. If you find yourself resetting the save location a lot, reset the default as follows:

  1. Click the File tab and choose Options. In Word 2007, click the Office button and then click the Word Options button. In Word 2003, choose Options from the Tools menu.
  2. Select Save in the left pane. In Word 2003, click the File Locations tab.
  3. Specify the new folder in the Default File Location field shown in Figure E. Or click Browse and locate it that way. In Word 2003, highlight the Documents item and click Modify. Use the Modify Location dialog to specify the new folder and click OK.
  4. Click OK.

Figure E


Word will save documents to the specified folder instead of My Documents.

5: Spacing between paragraphs

When you press [Enter], Word increases the line spacing to add a bit more white space between paragraphs. This extra space isn’t the same as a blank line, so you can’t delete it by pressing Backspace. To eliminate this extra spacing, do the following:

  1. Click the Home tab. In Word 2003, select Paragraph from the Format menu.
  2. Click the Paragraph group’s dialog launcher (the small arrow in the lower-right corner). In Word 2003, click the Indents And Spacing tab.
  3. Check the Don’t Add Space Between Paragraphs Of The Same Style option.
  4. Click Set As Default, as shown in Figure F. (Not available in Word 2003, but you can change this format for the current document.)
  5. Click OK.

Figure F


Eliminate the additional white space between paragraphs.

6: Mini toolbar

When you select text, Word displays the mini toolbar, which hosts several formatting options. Even though it’s dimmed, it still annoys some users. You can press [Esc] to hide it or you can permanently disable it, as follows:

  1. Click the File menu and choose Options. In Word 2007, click the Office button and then click Word Options.
  2. Choose General in the left pane (if necessary).
  3. In the User Interface Options section, uncheck the Show Mini Toolbar On Selection option, shown in Figure G.
  4. Click OK.

Figure G

Uncheck this option to disable the mini toolbar.

7: Drawing canvas

Word’s drawing canvas is a distinct layer for drawing. Objects placed in a canvas have an absolute position and remain together as a group. Most users find the canvas layer difficult to work with and frankly, most users don’t need it. If you’re still using Word 2003, disable the canvas layer as follows:

  1. From the Tools menu, choose Options.
  2. Click the General tab.
  3. Uncheck Automatically Create Drawing Canvas When Inserting AutoShapes in the General Options section.
  4. Click OK.
  5. Word 2007 and 2010 disables the canvas layer by default. If you happen to be working with the drawing canvas enabled, disable it as follows:
  6. Click the File menu and then choose Options. In Word 2007, click the Office button and then click Word Options.
  7. In the left pane, choose Advanced.
  8. In the Editing section, uncheck the Automatically Create Drawing Canvas When Inserting AutoShapes option, shown in Figure H.
  9. Click OK.

Figure H

The drawing canvas is annoying enough that Microsoft finally disabled it by default in the Ribbon versions.

8: Normal.dotx

Word bases new documents on Normal.dotx, but the template’s settings might not fit your needs. If you have just a few changes, customize Normal.dotx. A common customization is to change the font and size. To make the change at the template level, do the following:

  1. Open a new document and click the Home tab.
  2. Click the Font group’s dialog launcher (the arrow in the bottom-right corner). In Word 2003, choose Font from the Format menu.
  3. Make the necessary font changes. For instance, you might choose Arial, 12.
  4. Before closing the dialog, click the Set As Default button. In Word 2003, click Default.
  5. In the resulting confirmation dialog, select the option to set the default for all documents based on the Normal template, as shown in Figure I.
  6. Click OK twice.

Figure I


Make a font change at the template level.

Other template customizations you might want to make include margins and styles. Use a custom template, rather than Normal.dotx, to meet requirements that are more complex.

9: Word selection

When you select part of a word and then part of the next, Word selects the whole word for you — whether you meant to or not. To disable this selection option, do the following:

  1. Click the File tab and choose Options. In Word 2007, click the Office button and then click Word Options. In Word 2003, choose Options from the Tools menu.
  2. Choose Advanced in the left pane. In Word 2003, click the Edit tab.
  3. In the Editing Options section, deselect the When Selecting, Automatically Select Entire Word option, as shown in Figure J.
  4. Click OK.

Figure J

Ridding yourself of this annoying selection behavior is easy.

10: Spelling, grammar, and formatting

Word identifies misspelled words, grammatical errors, and formatting inconsistencies, as you type:

  • A red line indicates a word not found in the dictionary (possibly misspelled).
  • A green line indicates a possible grammatical error.
  • A wavy blue line indicates an inconsistent format.

I recommend that you get used to the display and not disable these features — they’re a helpful indication that something might be wrong. On the other hand, if you find them distracting, you candisable them. To disable the red and green lines, do the following:

  1. Click the File tab and then choose Options. In Word 2007, click the Office button and then click Word Options. In Word 2003, choose Options from the Tools menu.
  2. Select Proofing in the left pane. In Word 2003, click the Spelling & Grammar tab.
  3. In the When Correcting Grammar and Spelling In Word section, uncheck the first three options: Check Spelling As You Type, Use Contextual Spelling, and Mark Grammar Errors As You Type, as shown in Figure K. (There’s no contextual spelling option in Word 2003.)
  4. Click OK.

Figure K

You can disable Word’s spelling and grammar indicators.

To rid documents of the wavy blue line, do the following:

  1. Click the File tab and then choose Options. In Word 2007, click the Office button and then click Word Options. In Word 2003, choose Options from the Tools menu.
  2. Select Advanced in the left Pane. In Word 2003, click the Edit tab.
  3. In the Editing Options section, uncheck the Mark Formatting Inconsistencies option under Keep Track Of Formatting. In Word 2003, deselect the Mark Formatting Inconsistencies check box in the Editing Options section.
  4. Click OK

Even the most competent users make an occasional error and these features identify potential problems. Adjusting to them will probably serve most users better than turning them off.

To View Full Article Click Here

10 Windows 8 Keyboard Shortcuts

10 Windows 8 Keyboard Shortcuts You Need to Remember! 

Takeaway: There are 100+ keyboard shortcuts available for Microsoft Windows 8, but there are several you’ll want to remember because you’ll use them often.

In April 2012, Greg Shultz created a free cheat sheet of 100 Windows 8 keyboard shortcuts. That download contained just about every keyboard shortcut you could imagine. Those shortcuts are still valid of course, but if you are like me you can only remember a few Windows 8 shortcuts at a time, so you want to remember the ones that will be most useful.

So, while I highly recommend that you take advantage of the free PDF download listing of 100 Windows 8 keyboard shortcuts, I also recommend that you commit the following 10 Windows 8 keyboard shortcuts to memory, because you are going to need to access these features often and, for efficiency’s sake, it’s best to have them at the ready.

Windows 8 Specific Keyboard Shortcuts

Keystroke

Function

Switch between Metro Start screen and the last accessed application
 + C Access the charms bar
 + Tab Access the Metro Taskbar
 + I Access the Settings charm
 + K Access the Devices charm
 + Q Access the Apps Search screen
 + F Access the Files Search screen
 + W Access the Settings Search screen
 + X Access the Windows Tools Menu
 + E Open Computer

To View Full Article Click Here

10 Ways to Survive a System Outage

Fact: Something is broken – you need to get to work.

toolbox1.  Stay calm.

Remaining calm is the best strategy to surviving a system outage and keeping your focus on the current task.  Also, remaining calm will produce less emotional and techinical errors in a workplace.  

2.  Notify all users.

Proactively preparing for a system outage would include creating a Notification Plan based on different scenarios.  Using company e-mail, instant messaging, have a Co-Worker announce the outage or put a sign up saying “System is down.  Working on it now!”.

3.  Recruit a “buffer” to answer any questions.

After the initial notification, users will have many questions.  It would be ideal to recruit someone who is available to answers those questions, especially ETA questions.

4.  Be polite and understanding.

Remember to be polite and understanding when it comes to upset users.  In Step 1, keeping your focus on the current task to avoid making errors, also try to avoid “play-by-play” status updates.

5.  Documentation.

Always document each step of the recovery process.  Start with the initial problem or outage, followed by what you find, what commands you used, what errors you received and all attempts to fix the outage.  Lastly, document the steps that resolved the outage.

6.  Present the facts.

During the resolution process and the aftermath, always remain honest and present the facts.  If you caused the problem or outage, do not try to cover it up because it will complicate the process of resolving the outage.

7. Take your time.

Although, time is of the essense when system is down, take your time while troubleshooting.  If you are not sure what will resolve the problem, taking your time and implementing different solutions at a steady pace will allow you to narrow down the exact problem and resolution.

8.  Call Support.

Having product support is an essential tool for IT departments.  Calling support and submitting a ticket may consist of being on hold, waiting for a call back and sometimes an onsite visit can be a smart business decision.

9.  Stay positive.

Staying positive and continue building a knowledge of system events will prepare you for problem situations.  Having strong work relationships with co-workers will be useful for emergency situations.

10.  Be Prepared.

To be prepared for every system problem is almost impossible.  Continue building a knowledge of your environment is the strongest way to prepare for problem situations, previously mentioned in Step 9.


10 ways to speed up Windows 7

You don’t have to live with a Windows 7 machine that’s becoming unbearably slow. Here are 10 basic steps that will optimize system performance.

With Windows 7, Microsoft did a really good job making the system perform well. However, over time, Windows 7 systems can slow down and need some care and feeding to regain their former glory. Further, some Windows 7 features can be leveraged to improve overall system performance. In this article, we will outline 10 steps you can take to boost the performance of your Windows 7 systems.

1: Disable unnecessary services

Not every system service that is running on a stock Windows 7 machine is necessary. A number of services can either be disabled or modified to run only when needed. Once you make these changes, the service no longer has to consume system resources and the system no longer has to spend time starting the service.

2: Reduce the number of startup items

Windows 7 systems eventually begin to suffer under the weight of software that is installed in the normal course of business. Many software titles install more than is necessary and include helper applications designed solely to make the software start up more quickly or facilitate other communication (e.g., iTunes helper). And new software installations might add a permanent presence to the system tray, even if it’s not absolutely necessary for the system to function (Steam games, for example).

You could go through your system tool by tool and remove the offending software, but you might want to keep the underlying tool around and just prevent the helper from loading. This and more can be accomplished through the use of MSconfig, a tool that has long been a part of Windows. MSconfig allows you to selectively disable startup items and take other steps toward improving overall system performance.

To use MSconfig, go to Start and in the search box, type MSconfig. From the Startup tab (Figure A), you can disable items. Just be careful about what you choose.

Figure A

Disable items to improve overall system performance.

3: Remove the bloatware installed by vendors

Microsoft’s OEMs sometimes actively work against the Redmond behemoth and sully the company’s name. Nowhere is this more evident than in the case of what has become known as “bloatware.” In the never-ending race to the bottom of the PC market, lower cost PCs have had their profit margins bolstered by OEMs through the inclusion of mostly junk software – short-term trials and the like — that does nothing but add a few dollars of profit while bringing performance to a crawl. Frankly, this is one of the reasons that I believe that Microsoft’s Surface announcement, in which Microsoft noted that it would make its own device, is brilliant. The company needs to start with a clean slate in some ways (no pun intended).

If your PC shipped with a bunch of stuff you’ll never use, get rid of that software. Generally, you can go to Start | Control Panel | Programs And Features (Figure B) and remove software you no longer plan to use. If the software adds items to the startup process, getting rid of it will make the PC start faster and, ultimately, perform better overall.

Figure B

Use Programs And Features to remove unwanted software.

4: Keep viruses and spyware off your system

If you’re running Windows, you need to be running an anti-malware program to keep viruses and spyware off your system. Nothing will ruin good performance like a boatload of spyware. Our personal favorite (and free!) tool for combating malware is Microsoft Security Essentials. In my experience, it’s been successful in catching bad stuff while not significantly degrading system performance itself.

5: Check your memory

How much RAM do you have? Is your system consuming all or most of your RAM? Does the system page out to disk? If so, you’re suffering a massive performance hit, which can be solved by adding more memory to your PC.

6: Go solid state

Solid state is all the rage these days, and with good reason. It’s fast! More and more laptops and even desktops are moving to the technology because of the performance benefits. Solid state disks use memory cells from which data can be read very quickly, as opposed to the relatively plodding nature of rotational storage. By moving to SSD, you can give your Windows 7 system renewed life — and give yourself a whole new user experience.

7: Ensure that power settings favor performance

This one is easy! When you’re plugged in, configure Windows 7’s power plans to favor performance over power savings. When you choose to use Windows 7′ high performance power plan, you might increase the computer’s performance in some (but not all) circumstances. It really depends on the kind of work you’re doing and how often you allow the computer to sit idle.

To change power plans, go to Start | Control Panel | Power Options and choose your power plan settings (Figure C).

Figure C

Go to Power Options to choose Windows 7 power plan settings.

8: Keep your system defragmented (unless you’ve followed item 6)

If you’re using a traditional spinning disk in your Windows 7 system, you can keep your system operating at peak efficiency by periodically defragmenting the hard drive. If, however, you’ve opted to go with SSD-based storage, don’t do this. First, you won’t get any performance benefit and second, you’ll significantly reduce the life of that expensive SSD.

Disk defragmentation is scheduled to take place once per week, but you can change this by going to Start | Accessories | System Tools | Disk Defragmenter (Figure D). In addition to changing the schedule, you can run an on-demand defrag from here. You can also run a defrag from the command line instead of from a GUI.

Figure D

You can schedule a defrag in the Disk Defragmenter dialog box.

9: Disable or tune search indexing

Windows 7’s search is good, but it can also affect system performance. If you really need to run a tool at full tilt, you can disable indexing altogether. Or you can tune the indexer to meet your specific needs, possibly reducing its overall impact on system performance.

10: Use ReadyBoost

Perhaps you don’t want to jump into the solid-state game right away but would like some of the benefit that can be had from flash-based storage. Using nothing more than a USB stick, you can do so through a Windows 7 feature known as ReadyBoost. (Note that if you’re already using an SSD as your system drive, ReadyBoost won’t be available, since there would be no performance gain.)

ReadyBoost allows the system to make use of one of these speedy storage devices as a cache, improving overall performance of the system. The flash storage device that you choose to use for ReadyBoost should meet the following specifications set by Microsoft:

  • Capacity of at least 256 MB, with at least 64 kilobytes (KB) of free space
  • At least a 2.5 MB/sec throughput for 4-KB random reads
  • At least a 1.75 MB/sec throughput for 1MB random writes

Have questions?

Get answers from Microsofts Cloud Solutions Partner!
Call us at: 856-745-9990 or visit: https://southjerseytechies.net/

South Jersey Techies, LL C is a full Managed Web and Technology Services Company providing IT Services, Website Design ServicesServer SupportNetwork ConsultingInternet PhonesCloud Solutions Provider and much more. Contact for More Information.

To read this article in its entirety click here.


10 Windows 7 Commands Admins Need

The command line is often the best place to resolve Windows 7 desktop problems. These basic commands will help speed your troubleshooting tasks.

PC troubleshooting is becoming less common in larger organizations, but consultants and techs in smaller shops still have to get their hands dirty identifying and fixing desktop problems. Oftentimes, troubleshooting Windows 7 means delving into the command line. Here are 10 fundamental Windows 7 commands you might find helpful.

1: System File Checker

Malicious software will often attempt to replace core system files with modified versions in an effort to take control of the system. The System File Checker can be used to verify the integrity of the Windows system files. If any of the files are found to be missing or corrupt, they will be replaced. You can run the System File Checker by using this command:

sfc /scannow

2: File Signature Verification

One way to verify the integrity of a system is to make sure that all the system files are digitally signed. You can accomplish this with the File Signature Verification tool. This tool is launched from the command line but uses a GUI interface. It will tell you which system files are signed and which aren’t. As a rule, all the system files should be digitally signed, although some hardware vendors don’t sign driver files. The command used to launch the File Signature Verification tool is:

sigverif

3: Driverquery

Incorrect device drivers can lead to any number of system problems. If you want to see which drivers are installed on a Windows 7 system, you can do so by running the driverquery tool. This simple command-line tool provides information about each driver that is being used. The command is:

driverquery

If you need a bit more information, you can append the -v switch. Another option is to append the -si switch, which causes the tool to display signature information for the drivers. Here’s how they look:

driverquery -v
driverquery -si

4: Nslookup

The nslookup tool can help you to verify that DNS name resolution is working correctly. When you run nslookup against a host name, the tool will show you how the name was resolved, as well as which DNS server was used during the lookup. This tool can be extremely helpful when troubleshooting problems related to legacy DNS records that still exist but that are no longer correct.

To use this tool, just enter the nslookup command, followed by the name of the host you want to resolve. For example:

nslookup dc1.contoso.com

5: Ping

Ping is probably the simplest of all diagnostic commands. It’s used to verify basic TCP/IP connectivity to a network host. To use it, simply enter the command, followed by the name or IP address of the host you want to test. For example:

ping 192.168.1.1

Keep in mind that this command will work only if Internet Control Message Protocol (ICMP) traffic is allowed to pass between the two machines. If at any point a firewall is blocking ICMP traffic, the ping will fail.

6: Pathping

Ping does a good job of telling you whether two machines can communicate with one another over TCP/IP, but if a ping does fail, you won’t receive any information regarding the nature of the failure. This is where the pathping utility comes in.

Pathping is designed for environments in which one or more routers exist between hosts. It sends a series of packets to each router that’s in the path to the destination host in an effort to determine whether the router is performing slowly or dropping packets. At its simplest, the syntax for pathping is identical to that of the ping command (although there are some optional switches you can use). The command looks like this:

pathping 192.168.1.1

7: Ipconfig

The ipconfig command is used to view or modify a computer’s IP addresses. For example, if you wanted to view a Windows 7 system’s full IP configuration, you could use the following command:

ipconfig /all

Assuming that the system has acquired its IP address from a DHCP server, you can use the ipconfig command to release and then renew the IP address. Doing so involves using the following commands:

ipconfig /release
ipconfig /renew

Another handy thing you can do with ipconfig is flush the DNS resolver cache. This can be helpful when a system is resolving DNS addresses incorrectly. You can flush the DNS cache by using this command:

ipconfig /flushdns

8: Repair-bde

If a drive that is encrypted with BitLocker has problems, you can sometimes recover the data using a utility called repair-bde. To use this command, you will need a destination drive to which the recovered data can be written, as well as your BitLocker recovery key or recovery password. The basic syntax for this command is:

repair-bde <source> <destination> -rk | rp <source>

You must specify the source drive, the destination drive, and either the rk (recovery key) or the rp (recovery password) switch, along with the path to the recovery key or the recovery password. Here are two examples of how to use this utility:

repair-bde c: d: -rk e:\recovery.bek
repair-bde c: d: -rp 111111-111111-111111-111111-111111-111111

9: Tasklist

The tasklist command is designed to provide information about the tasks that are running on a Windows 7 system. At its most basic, you can enter the following command:

tasklist

The tasklist command has numerous optional switches, but there are a couple I want to mention. One is the -m switch, which causes tasklist to display all the DLL modules associated with a task. The other is the -svc switch, which lists the services that support each task. Here’s how they look:

tasklist -m
tasklist -svc

10: Taskkill

The taskkill command terminates a task, either by name (which is referred to as the image name) or by process ID. The syntax for this command is simple. You must follow the taskkill command with -pid (process ID) or -im (image name) and the name or process ID of the task that you want to terminate. Here are two examples of how this command works:

taskkill -pid 4104
taskkill -im iexplore.exe

Have questions?

Get answers from Microsofts Cloud Solutions Partner!
Call us at: 856-745-9990 or visit: https://southjerseytechies.net/

South Jersey Techies, LL C is a full Managed Web and Technology Services Company providing IT Services, Website Design ServicesServer SupportNetwork ConsultingInternet PhonesCloud Solutions Provider and much more. Contact for More Information.

To read this article in its entirety click here.

10 Ways to Make Outlook Faster

Takeaway: Does Outlook’s pokey performance have you gnashing your teeth with frustration? Try these simple fixes to give it a kick in the pants.

If you’ve used Microsoft Outlook for a while, you know that it can slow down… way down. In fact, when not looked after, Outlook can become nearly useless. Fortunately, there are several things you can do to make Outlook not only usable, but significantly improved. And none of these techniques requires a single configuration change to your Exchange server (IMAP or POP3).

Of course, some of these suggestions might seem to have a bit more “‘duh” factor than others. But you never know what level of skills you’re dealing with, so we’ll cover all the bases. In the end, you should have a much faster Outlook experience.

1: Update Windows

Many people don’t realize that with Windows updates, the updates for Microsoft Office are also “hidden.” But it’s not just the Office updates that can help speed up Outlook. Make sure you allow the updates to happen. Why? There are times when Microsoft might update Exchange. In some cases, those updates can either break or cause problems with the communication between Outlook and Exchange. Or Microsoft might issue a patch to the application to resolve a speed issue or security hole.

2: Download Complete Items

When you connect Microsoft Outlook with either IMAP or POP3, you should have Outlook set up to download the complete message (instead of just the header). If you do this, Outlook won’t have to sync with the server every time you click on a new item (as it will already be in the data file.) How you do this will depend upon which version of Outlook you’re using. But basically, you’re looking for the setting Download Complete Item Including Attachments.

3: Archive your Inbox

I can’t tell you how many times I see clients with thousands upon thousands (and in some cases tens of thousands) of emails in their Inbox. This can cause serious issues, especially when using PST files. Instead of just letting those Inbox folders grow to outrageous proportions, set up auto archiving so that your Inbox retains only a portion of those emails. I like to tell clients to keep the current and previous months’ email in the Inbox and archive everything else. When you archive, you effectively create a new data file, so Outlook doesn’t have to strain against the weight of an oversize PST or OST file

4: Use Cached Exchange Mode

If you use Cached Exchange Mode in Outlook, you effectively take the data file from the server (PST) and cache it on your local machine (OST). This can go a long way toward speeding up your Outlook experience because Outlook doesn’t have to read its data file across a network. Instead, all it has to do is read the locally stored data file. This option (obviously) is available only when connecting Outlook with an Exchange server.

5: Compact your PST File

When the Outlook PST file gets out of hand, a built-in tool can keep the size of that file under control. One of the issues is that even when you delete email from your Inbox, the size of the PST file may remain the same. If you’re using Outlook 2010, you can go to Account Settings | Data Files and select the data file to be compacted. Once you’ve selected the file click Settings | Advanced | Outlook Data File Settings and click Compact Now. Depending on the size of your data file, this process can take some time.

6: Repair your PST File

Scanpst is often my go-to tool when Outlook is acting off kilter. It will scan through your data file and look for data inconsistencies and errors. Here’s the thing about Scanpst — it’s not always the easiest tool to find. Do yourself a favor and search through your C drive to locate the Scanpst.exe file. Make note of its location (usually within the Office installation folder). But be forewarned: This tool can cause PST files to become unusable. Make sure you back up that data file before you start the repair tool. Fortunately, should Scanpst find errors, it will prompt you to make a backup before it attempts to fix the errors.

7: Cut down on the published and shared calendars

Yes, it’s easy to publish and share your calendars with others. The problem is, the more you do it, the more drag you’re putting on Outlook. The more data Outlook has to share and pull down from the Internet, the slower it will perform. Sure, it’s fine to have one or two shared calendars (and even more if you have a lightning-fast data pipe). Just know that the more data you have to push and pull, the slower your connection will be.

8: Disable RSS

By default, Microsoft Outlook will sync RSS feeds from Internet Explorer to the RSS reader in Outlook. If you have a lot of RSS feeds bookmarked in Internet Explorer, that syncing could easily bring Outlook to a crawl. Disable this feature (if you don’t use Outlook as an RSS reader) from within Outlook 2010 by going to Options | Advanced and then unchecking both options under RSS Feeds.

9: Disable add-ins

How many times have you installed some program only to find it installed something else behind your back? This can happen to Outlook as well as Internet Explorer. Sometimes those add-ins can cause major Outlook slowdowns. To find out what add-ins you have installed in Outlook 2010, go to Options | Add-ins. Select COM Add-ins from the drop-down and click the Go button. The resultant window will list all add-ins available to Outlook. Search through this list and uncheck any that might seem suspect.

10: Fix ShoreTel Windows 7 Integration

If you use the ShoreTel Communicator, you might notice some issues when trying to open and use Outlook. The problem lies in an incompatibility issue between ShoreTel and Windows 7. The fix is simple. Open up the Task Manager and look for a process called Agent.exe. Right-click that entry and click Properties |Compatibility. Choose the Run This Program In Compatibility Mode For option and then select Windows XP (Service Pack 3).

Other Tricks?

There’s no reason why anyone should have to struggle with a bogged down Outlook that will have you pulling your hair out strand by strand. These tips should help you enjoy a much speedier and reliable Outlook experience.

What other methods have you found for improving Outlook performance? Share your suggestions with fellow TechRepublic members.

Top 10 Cybersecurity Tips from the FCC

Cybersecurity is of paramount importance in today’s digital age as it plays a crucial role in safeguarding sensitive information, ensuring the privacy of individuals, and maintaining the integrity of critical systems and infrastructure. The Federal Communications Commission (FCC) in the United States recognizes the significance of cybersecurity and has provided recommendations and guidelines to help individuals, businesses, and organizations protect themselves from cyber threats. Here are some key points highlighting the importance of cybersecurity along with recommendations from the FCC:


  • Train employees in security principles – Establish basic security practices and policies for employees, such as requiring strong passwords, and establish appropriate Internet use guidelines that detail penalties for violating company cybersecurity policies. Establish rules of behavior describing how to handle and protect customer information and other vital data. We offer Security Awareness Training as an option for continuous security training for staff.
  • Protect information, computers, and networks from cyber attacks – Keep clean machines: having the latest security software, web browser, and operating system are the best defenses against viruses, malware, and other online threats. Set antivirus software to run a scan after each update. Install other key software updates as soon as they are available. We offer Managed Services & Support as an option for preventing cyber-attacks.
  • Provide firewall security for your Internet connection – A firewall is a set of related programs that prevent outsiders from accessing data on a private network. Make sure the operating system’s firewall is enabled or install free firewall software available online. If employees work from home, ensure that their home system(s) are protected by a firewall. We offer a Managed Network Services & Support as an option for firewall security.
  • Create a mobile device action plan – Mobile devices can create significant security and management challenges, especially if they hold confidential information or can access the corporate network. Require users to password-protect their devices, encrypt their data, and install security apps to prevent criminals from stealing information while the phone is on public networks. Be sure to set reporting procedures for lost or stolen equipment. We offer Mobile Device Management as an option for a mobile device action plan.
  • Make backup copies of important business data and information – Regularly backup the data on all computers. Critical data includes word processing documents, electronic spreadsheets, databases, financial files, human resources files, and accounts receivable/payable files. Backup data automatically if possible, or at least weekly and store the copies either offsite or in the cloud. We offer various Backup & Recovery Solutions as an option for business continuity & disaster.
  • Control physical access to your computers and create user accounts for each employee – Prevent access or use of business computers by unauthorized individuals. Laptops can be particularly easy targets for theft or can be lost, so lock them up when unattended. Make sure a separate user account is created for each employee and require strong passwords. Administrative privileges should only be given to trusted IT staff and key personnel. We offer Multi-Form Authentication Solutions as an option for computer login security.
  • Secure your Wi-Fi networks – If you have a Wi-Fi network for your workplace, make sure it is secure, encrypted, and hidden. To hide your Wi-Fi network, set up your wireless access point or router, so it does not broadcast the network name, known as the Service Set Identifier (SSID). Password protect access to the router. We offer Managed Network Services & Support is an option for Wi-Fi security.
  • Employ best practices on payment cards – Work with banks or processors to ensure the most trusted and validated tools and anti-fraud services are being used. You may also have additional security obligations pursuant to agreements with your bank or processor. Isolate payment systems from other, less secure programs and don’t use the same computer to process payments and surf the Internet. Risk Intelligence is an option we offer to identify potential vulnerabilities.
  • Limit employee access to data and information, limit authority to install software – Do not provide any one employee with access to all data systems. Employees should only be given access to the specific data systems that they need for their jobs, and should not be able to install any software without permission. We offer Network & Security Assessments that can scan data repositories for user permissions, security and much more.
  • Passwords & authentication – Require employees to use unique passwords and change passwords every three months. Consider implementing multi-factor authentication that requires additional information beyond a password to gain entry. Check with your vendors that handle sensitive data to see if they offer multi-factor authentication for your account. We offer Cloud Security Assessments which are used to ensure proper password & security practices are in place.

Download the 10 Tips Below

SJT-QR-CyberSecurity-10 Tips

If you have any questions, please email us at support@sjtechies.com or call us at (856) 745-9990.

Top 10 Things to Love About Google Plus

Takeaway: Google+ includes several attention-grabbing items — like Circles, Google Takeout, and Sparks — but there are some great subtle features you should know about as well.

Have you heard about all the nifty things the new Google Plus social network can do? Of course you have. But have you dug around to see what’s really good beyond the headline items? Well we have, and we’ve brought back some small yet superb details to crow about.

1: Automatic photo uploading from your phone

At first, the Android app for Google+ seems like a nice way to check activity, post about how awesome it is to skip work for a ball game, and so on. But head into the app’s settings, enable Instant Upload, and the way you use your phone, and Google+, changes entirely. Everything you shoot is almost instantaneously synced to a private album in Google+. From there, it’s just one click to sharing the photo, but you’ll want to type out a sentence. Even if you don’t share your stuff, Google+ is basically freeing you from the need to find a cord, fire up a program, and monkey around with your phone storage — everything you shoot is in Google+, too. But you decide whether to put it out there.

2: Unlimited photo storage (pretty much) in Picasa

To make Google+ a place where people want to share their photos, among many, many competitors, Google had to pull out the big guns. In this case, those guns are server storage, something Google has more of than anybody else, by a good long shot. Google can offer almost unlimited photo storage in Picasa, so that photos smaller than 2048 by 2048 in pixels and videos less than 15 minutes long don’t “count” against your storage space. Shoot and shoot and share and shoot again, and Google just keeps smiling at your feeble attempts to take up space.

3: Quick, easy, undo-able photo editing, with I’m Feeling Lucky

Photo presentation in Google+ is a nice, content-forward experience, with a black backdrop and easy sharing or deletion. Even nicer is that Google threw a few of the most helpful photo filters and editing tools in there, too. Click the Actions button just underneath a photo, and you’ll get rotation tools — and more important, Edit Photo. A right-hand sidebar pops up with some Instagram-like filters: cross-process, Orton, and black-and-white. There’s auto-color and auto-contrast and the ever-helpful I’m Feeling Lucky button, which helps non-photo-nerds by applying the most common light and color corrections to your shots.

4: Profiles for better Google search results

Sensing some need to let actual people have a say over the machine math that produces search results, Google previously offered Google Profiles as a dedicated spot where you, the person, could have a say and show up in searches. But like the best advice about vegetables and tax receipts, Profiles weren’t widely adopted by the general user. As Google+ gains users, it’s making the Profile an essential tool in connecting to others and discovering interests, which in turn is causing users to more accurately and fully fill out their Profile. It’s a sweet syrup that helps us swallow the bitter bill of self-promotion, with the healthy result of having a say in what Google says about us.

5: Keyboard shortcuts, both built-in and add-on

Like most Google products, Google+ has a good built-in list of keyboard shortcuts that let you run through stream items, start a new post, and generally navigate the social realm without reaching for your mouse or moving your fingers onto the trackpad. If you want even more no-pointer-needed functionality, try the Google+ Manager for Firefox or Goo Plus Manager in Chrome.

6: Simultaneous YouTube video watching for groups

The group video chat Hangouts inside Google+ have received lots of attention and rave reviews, and for good reason. Hangouts are like group Skype chats, just with Google helping on the server side and with a more polite single-focus video window. But the part that gets less play is how everyone in the Hangout can see the same YouTube video at once, watching it in real time and commenting on specific moments (in text by default, but by voice if you’d like). That’s handy for training, presentation critiques, and other moments when you can’t all be around the same screen.

7: Drag-and-drop sharing

Technically, yes, you can grab links from other Web pages and drop them into Facebook or Twitter for sharing. But Google+ lets you snag photos, links, YouTube videos, and other items and just drag them into the sharing panel. You can even drag Web items into the Share box on that black Google toolbar we mentioned above for truly lazy content making.

8: The universal Google toolbar

Once you’ve activated Google+, nearly every Google Web service shows a kind of universal toolbar, black and seemingly bolted to the top of your viewing window. It provides universal notifications about new Google+ happenings in a little red number square, quick posting to your Google+ stream, and a quick click to see your profile. But it also somewhat normalizes the links to other Google services you’ll see (Gmail, Calendar, Documents, etc.) and provides a consistent feeling to Google’s Web services, a win/win for both the search giant and its most dedicated users.

9: Handy chat client to unburden Gmail

Google+ has the same kind of built-in Gmail/AIM chat window in its lower-left corner that Gmail offers. Gmail, which now does far more than it was originally built for (including free phone calls), could use some help lightening its loading time and memory bulk. So consider keeping Gmail for email and opening Google+ when you are available to be social.

10: Post-publish editing… Enough said

Inspiration comes a lot faster than clean, conscientious copy. On most social networks, that’s just too bad. Twitter and Facebook don’t let you clean up your words or remove photos — you have to delete your post entirely and destroy the comment or reply chain. Google+ provides a little arrow in the upper-right corner of all your posts that drops down to offer editing — as well as comment striking, turning off comments, and yes, post deletion if things really went the wrong way.

CALL US NOW!