Back to Top

Tech, Web, Cloud & Cabling Services

How to Get Windows 10 for Free

A new notification prompts Windows 7 and 8.1 users to reserve an upgrade to the upcoming OS, due to debut July 29.

Microsoft is now pushing Windows 10 via a notice suggesting you reserve a copy. On Monday, the software giant announced thatWindows 10 will officially roll out July 29. That means it will be available on any PCs you purchase as of that date — and as a free upgrade to your existing Windows 7 or 8.1 tablet or PC.

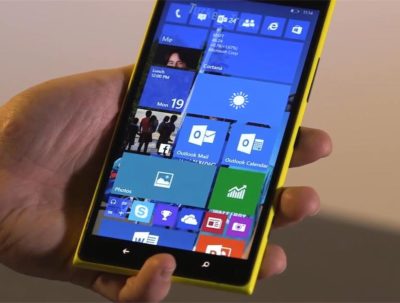
Microsoft has a lot riding on Windows 10. The new OS has the task of erasing the bad experiences people had with the touchscreen-focused Windows 8, which ultimately failed to catch fire among PC users. Windows 10 comes packed with new features, such as a redesigned Start menu, the Cortana voice assistant and a new browser called Edge, all designed to win over jaded Windows users. The new OS will also offer a more unified experience among PCs, tablets and smartphones as a way to convince consumers to go the Windows route for all their devices. As such, the company wants to make sure that current device owners know they can now get in line to pick up Windows 10.So how can you now reserve your free copy of Windows 10?

Windows 10 Free Upgrade

You can now reserve your free copy of Windows 10, if you meet the necessary requirements.

First, you must be running Windows 7 Service Pack 1 or Windows 8.1, and you must have installed a March the Windows update dubbed KB3035583, according to blog site VentureBeat. That update will already be on your PC as long as you have Automated Updates enabled.

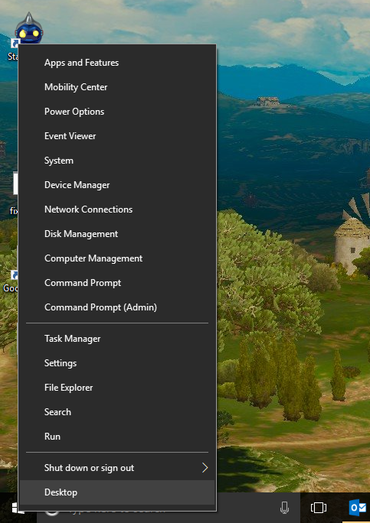
Peek at your Windows system tray in the lower right corner, and you should see a new icon displaying the Windows logo. Hover over it, and the popup messages says: “Get Windows 10.”

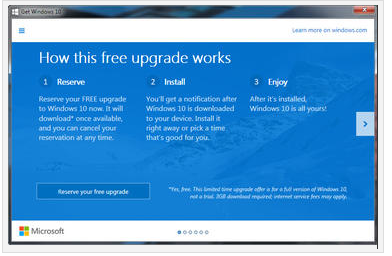
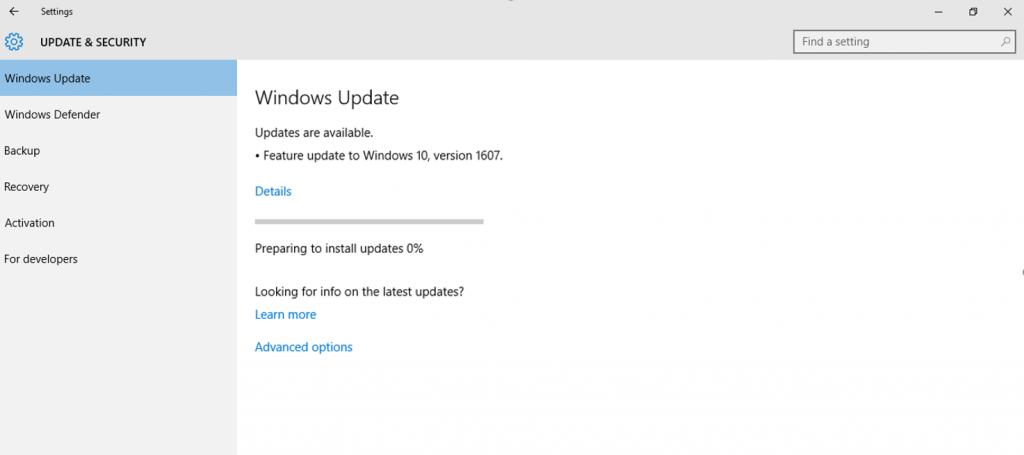
Click that icon, and up pops a window that explains how the free upgrade works. Once it’s available, Windows 10 will automatically download onto your PC. You’ll receive a notification after the download is complete so that you can choose an appropriate time to install it.

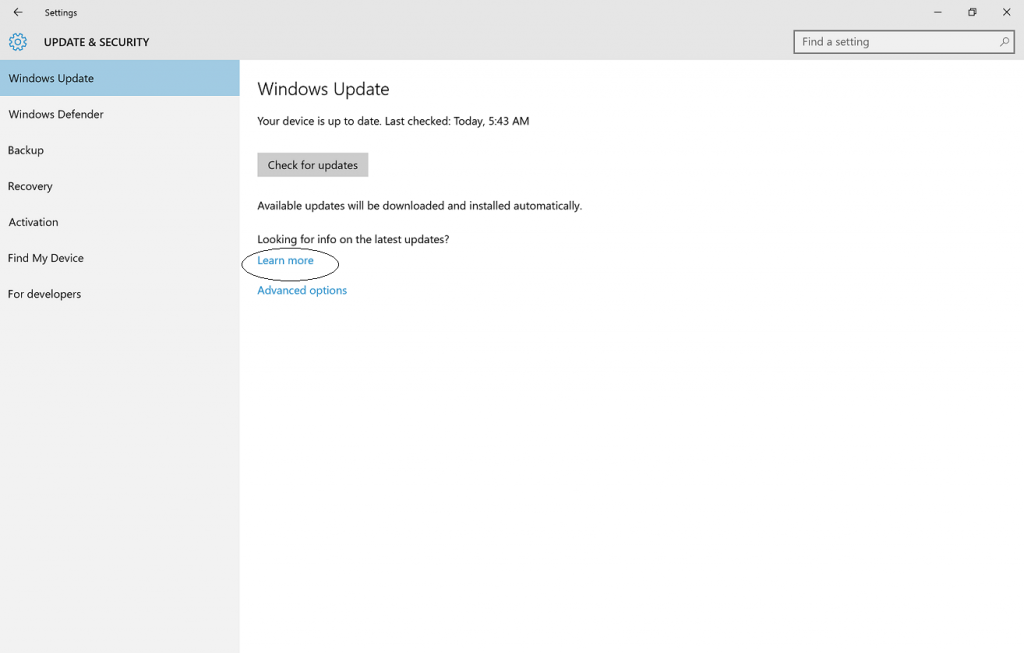
You can scroll through the various screens of the Get Windows 10 window to read more about the new OS.

When you’re done, simply click the button to reserve your free upgrade.

The reservation screen asks for your email address so you can receive the notification. Enter your email address and click the Send confirmation button. You can now close the Get Windows 10 window.

Should you change your mind and wish to cancel the reservation, just click the Get Windows 10 icon again.

Click the three horizontal lines in the upper left corner to display the menu and click the link for View confirmation.

Then click the link to Cancel reservation and click the button for Cancel reservation to confirm your choice.

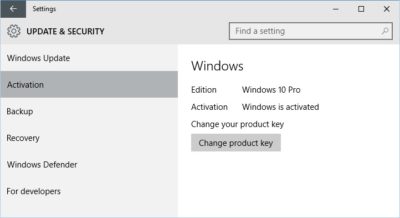
Windows 10 is a free upgrade. The upgrade offers the full version of Windows 10, not simply a trial or limited version. It also ensures that you can run Windows 10 on your specific device for free “for the supported lifetime of your device,” according to Microsoft.

But there are some caveats. The free upgrade applies only to Windows 7 SP1 and Windows 8.1. So if you haven’t upgraded Windows 7 to SP1 or Windows 8 to 8.1, you’ll have to perform those tasks first. Also, you have one year from July 29 to upgrade your PC to Windows 10 for free. After that year is up, you’ll have to purchase Windows 10 yourself.

Those of you running Windows RT or RT 8.1 are out of luck. Microsoft has excluded Windows RT and RT 8.1 from the free upgrade offer.

And what will Windows 10 cost you if the miss the free upgrade window? On Monday, Microsoft revealed the various prices. Windows Home will retail for $119. Windows 10 Pro wil sell for price of $199. And the Windows 10 Pro Pack, which lets you upgrade from Windows 10 Home to Windows 10 Pro, will cost you $99.

Have questions?

Our Upgrade Assistants and IT business team is here to help.
Call us at: 856-745-9990 or visit: https://southjerseytechies.net/

South Jersey Techies, LLC is a full Managed Web and Technology Services Company providing IT Services, Website Design ServicesServer SupportNetwork ConsultingInternet PhonesCloud Solutions Provider and much more. Contact for More Information.

To read this article in its entirety click here.

Migrate Facebook Data to Google+

You may not be ready to ditch Facebook for good, but now that you’ve had a chance to kick the tires on Google+, you might be ready to make it your go-to social network. The problem: You’ve built up a lot of friends, photos, videos, and other data on Facebook over the years, and you don’t want to simply lose all that data. Here’s how to migrate it all from Facebook to Google+.

Photo remixed from an original by Shutterstock.

When Google+ came out, it’s success was very much up in the air (remember Google Buzz?). However, it seems a lot of people have already thrown themselves into Google+ full force—Facebook may have 750 million users, but Google+ has already crossed the 20 million user milestone in only 30 days. If you’re ready to give it a shot as your main network, here’s what you need to do.

Migrate Your Friends

A social network is nothing without a group of friends with whom to talk, so the first thing you’ll want to do is migrate your friends. Not everyone you know is going to be on Google+ yet, but it’s a good idea to make sure you don’t leave anybody out—and you can always send those other late adopters an invite to encourage them.

The easiest way to migrate your Facebook friends is to import them through a Yahoo email address. I know that sounds awful, but hear me out: While a few people have created browser extensions and other migration methods, Facebook shuts them down pretty quickly, since they don’t like non-partners pulling friend data. In addition, the non-Yahoo methods usually add your Facebook friends to Google Contacts, which you probably don’t want. You may not have a Yahoo account, but that’s what makes this method great—no need to fill up your main address book with Facebook junk. Plus, it really does only take a few minutes.

To do this, head to mail.yahoo.com and click the Create New Account button (if you already have a Yahoo or Flickr account, you can skip this step). Once you’ve created an account, sign in and head to the Contacts tab. Click on “Import Contacts” and choose the Facebook option. You should now see all your Facebook friends in your Yahoo address book.

Lastly, head to Google+ and go to the Circles tab. Click “Find and Invite” and click the Yahoo button. It’ll add all your Yahoo Contacts (or Facebook Friends, in this case), to the Find and Invite page and you can add your Facebook friends to your circles. I, for one, was shocked at how many of my friends were already using Google+ without me knowing.

Migrate Your Photos

Migrating your photos is ridiculously easy with the previously mentioned Move Your Photos Chrome extension. Install it, click on its icon in the extension bar, and log in to your Facebook account. Select the photos you want to transfer and click the upload button at the very bottom of the page. You’ll see the progress in the lower right-hand corner. Don’t log out while it works, just let it do its thing.

When it’s done, you’ll see those albums in Google+. By default, they won’t be public, and you can adjust each album’s privacy settings by going into them and clicking on the “Edit” link under “Visible To”.

If you don’t want to use Chrome, you can grab a similar extension for Firefox, but you have to transfer albums one by one. If you have Chrome installed, I recommend using the Chrome extension just this once because it’s much faster.

Migrate Your Videos

The only way to migrate your videos, unfortunately, is to download the entirety of your Facebook data and re-upload them. To do this, head to Account > Account Settings, and scroll down to “Download Your Information”. Hit the “learn more” link and hit he Download button. It will take awhile to gather your info, but you’ll receive an email when it’s done, and you can download a ZIP file full of your photos, videos, and profile information.

Strangely, when I did this, one of my two videos was missing from the “videos” folder in the ZIP file. However, I was still able to download that video from Facebook by installing the Video Download Helper extension for Firefox, navigating to the video you want to download, playing it, and clicking the arrow next to Download Helper’s icon in the add-on bar.

Once you’ve wrangled all the videos you want to move to Google+, you’ll just have to upload them one by one. Head into Google+, click on your profile, and go to “Videos”. Hit the “Upload New Videos” link and re-upload your videos to your Google+ profile.

Update and View Both Networks at Once

Now that all your data’s been migrated, you can enjoy using Google+ as your main social network. However, chances are you still have a few friends on Facebook you want to keep up with. The best way to do this is with the Start Google Plus extension for both Chrome and Firefox. Once you install it, you’ll see a Facebook and Twitter icon in the upper right-hand corner, which you can click on to connect your other accounts. Once your Facebook account’s been linked, every status update you make on Google+ will have the option of posting to Facebook as well, just by clicking on the Facebook icon. It’ll take with it any links, pictures, or other data that the status contains.

Start Google Plus will also plug your Facebook feed into your Google+ feed, so you don’t even need to check Facebook anymore. Just check your Google+ feed, and it’ll show you all of Facebook’s news feed as well, with links to comment if you so desire.

If you prefer to not use an extension, you can also update your status on both networks at once using Facebook’s “Upload via Email” feature. Just head to Facebook’s mobile page, copy your Upload via Email email address, and add it to its own “Facebook” circle on Google+. From now on, when you update your status on Google+, you can just include your Facebook circle to send that status to Facebook as well. This method isn’t perfect, however: it’ll only work with statuses of up to 50 characters, and it doesn’t work with photos. However, it does work over mobile, which is nice, and without any extensions.

It’s also worth mentioning the previously mentioned Google+Facebook extension. While it’s a much easier way to update both statuses at once, it’s been hit by a bit of controversy, which you can read more about over at our post and on this Reddit thread. The company has responded to accusations of malware injection, and it seems more accidental than something that was actually of malicious intent, but we still recommending you use this at your own risk. The “update by email” method is still the safest, but this is a possibility as well. With other extensions out there like Start Google Plus, there’s really no reason to take the risk.


There isn’t a foolproof, one-step way to migrate your data, but this should help make the process quite a bit easier for you Google+ fans out there. Got any of your own migration tips to share? Let us know in the comments.


You can contact Whitson Gordon, the author of this post, at whitson@lifehacker.com. You can also find him on Twitter, Facebook, and lurking around our #tips page.


Install & Activate Windows 10 Easily

windowsproductkey

Summary

Microsoft recently announced the first major update to Windows 10 which includes numerous improvements for end users and businesses. One of the welcome improvements is the compliance check when qualifying for the Windows 10 upgrade. Previously, Windows 7, Windows 8.0 and Windows 8.1 users needed to have either of those versions Windows installed and activated in order to qualify for the free upgrade offer. For persons who needed to perform a clean install of Windows 10 from the outset, it was a two step process of first validating the machine through the upgrade routine, ensure the Windows 10 Upgrade was activated, then proceed to perform a Reset. With the latest November Update (1511), users no longer have to go through this process. In this article, we take a look at how to install and activate Windows 10 using your Windows 7 or Windows 8 product key.

Details

For the purposes of this article, We are using a Windows 7 license to perform clean install using Windows 10.

Please note: The copy of Windows 10 you download must correspond with the edition of Windows you are licensed for:

  • Windows 7 Starter, Home Basic, Home Premium, Windows 8.0 Core, Windows 8.1 Core must use a Windows 10 Home ISO
  • Windows 7 Professional, Windows 7 Ultimate, Windows 8.0 Pro, Windows 8.1 Pro must use a Windows 10 Pro ISO
  • If you are using Windows 7 Enterprise, Windows 8.0 Enterprise, Windows 8.1 Enterprise editions you won’t be able to use the free upgrade offer.

Review complete instructions how to download the Windows 10 ISO in the following article:

How to download official Windows 10 ISO files

Review instructions here how to start a clean install if you desire, if you want to perform an upgrade, clickhere.

Have your Windows 7 or 8/8.1 product key ready. If you purchased a retail license, you can find the product key within the product box. The Windows 7 product key is normally found on an orange sticker attached to a pamphlet inside the box. The Windows 8/8.1 product key is found on a small business size card. See examples below. Please note, you can also use your OEM product key too if Windows came preinstalled on your computer.

Retail:

retail

Windows 8/8.1

windows-8

If your computer came preinstalled with an OEM version of Windows 7, look for the Certificate of Authenticity sticker attached to the chassis of your computer. Normally this can be at the side or top of the system unit. For laptops, look at the bottom of the chassis or inside the battery or memory compartment. It looks like the following:

productkey

If you are running an OEM preinstalled Windows 8/8.1 license, Windows 10 setup should automatically detect the product key and install it automatically.

With Windows 8, Microsoft had changed from stickers that have the product key that the user has to type in when installing the operating system to new BIOS embedded product keys. The idea is that by eliminating the sticker, you eliminate one of the easier ways for nefarious users to get a legitimate product key. Eliminating the product key sticker also removes any worry that the sticker might get damaged while at the same time eliminating the long and irritating process of typing in various letters and numbers when installing the operating system.

If the user has to reinstall the operating system on a machine that came with Windows 8, the installation process automatically grabs the software product key from the motherboard BIOS with no input from the user. This means that those familiar Windows product key stickers will no longer appear on the Windows 8 computers.

If you have lost your Windows product key, Microsoft recommends you purchase a new one. 

http://windows.microsoft.com/en-gb/windows/where-find-windows-product-key#where-find-windows-product-key=windows-7

You might be lucky by contacting Microsoft Support who might be sympathetic to your situation:
http://support2.microsoft.com/kb/326246/en-us

Contact the Microsoft store:
US: http://www.store.microsoft.com/Help/Contact-Us
1-877-696-77861-877-696-7786 FREE
Canada: https://www.microsoftstore.ca/shop/en-CA/Contact-Us

Microsoft Support Contact Information:
http://support.microsoft.com/contactus/?ws=support

General Microsoft contact site: http://support.microsoft.com/contactus#tab0

If you are prompted to enter a product key during Windows 10 setup (November Update aka 1511) from within a running version of Windows, your Windows 7 or Windows 8/8.1 product key will not work. Instead, you should activate your Windows 7 or Windows 8/8.1 first, then re-run Windows 10 setup. You will not be prompted to enter a product key.

windows10productkey

During Setup: If you are prompted to enter a product key when you boot from the Windows 10 setup installation media, click the option ‘I don’t have a product key’. Select the appropriate edition you are licensed for.

Windows 7 Starter, Home Basic, Home Premium, Windows 8.0 Core, Windows 8.1 Core will install Windows 10 Home ISO

  • Windows 7 Professional, Windows 7 Ultimate, Windows 8.0 Pro, Windows 8.1 Pro will installWindows 10 Pro ISO

setup

  • Out of Box Experience, if you are prompted for a product key, Click Do this Later.Complete the installationReview instructions how to activateHow to troubleshoot Product Activation in Windows 10windowstroubleshoot
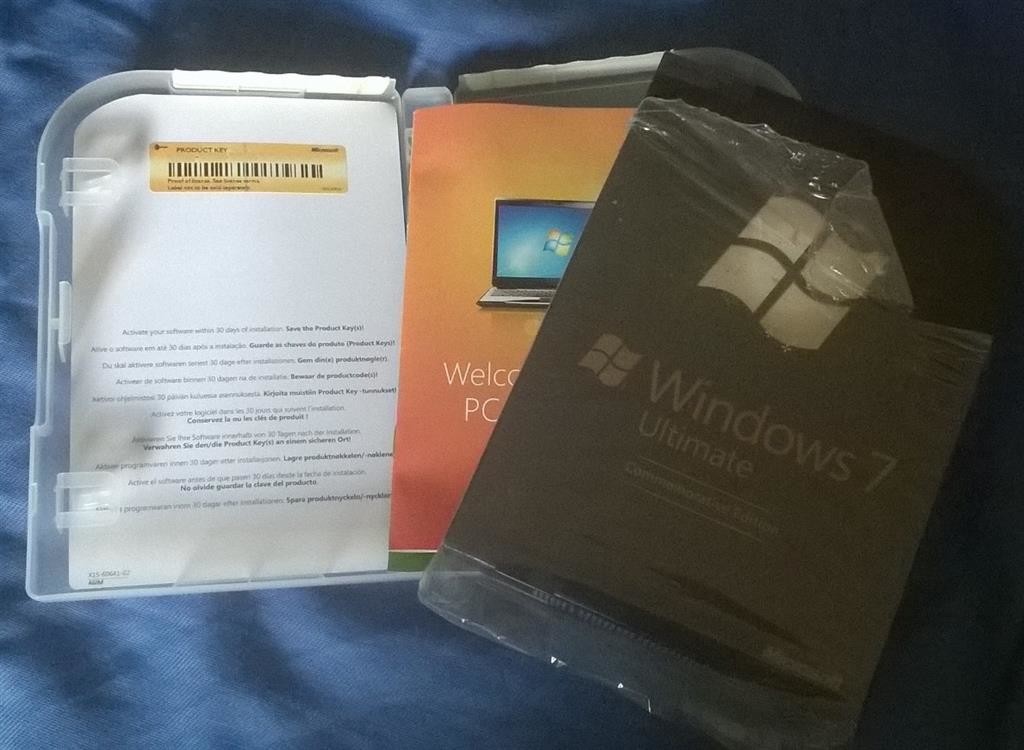
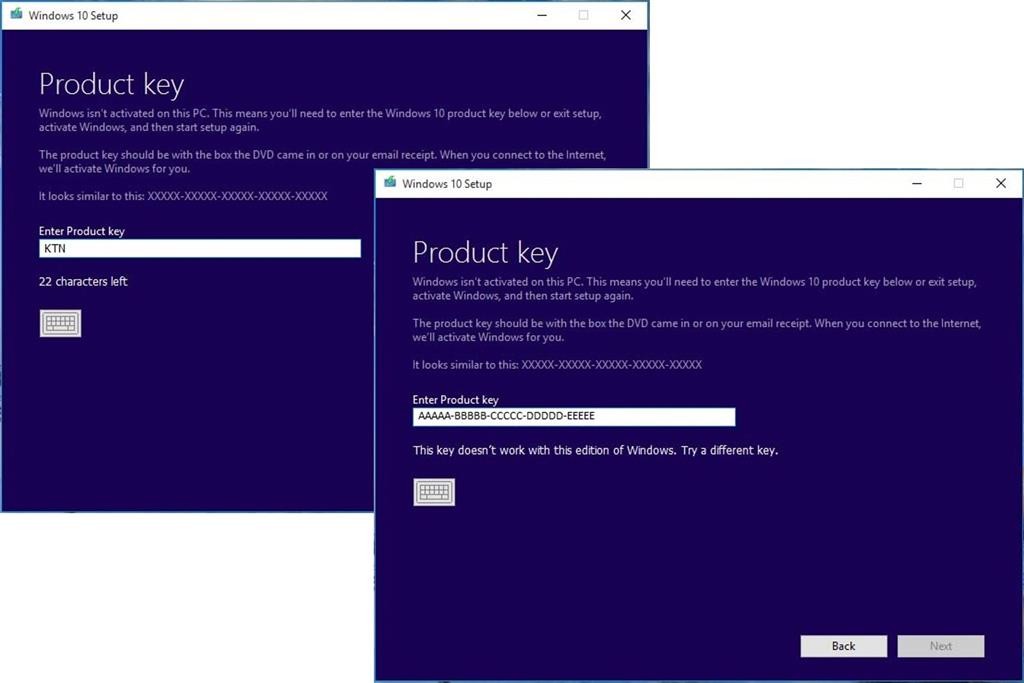
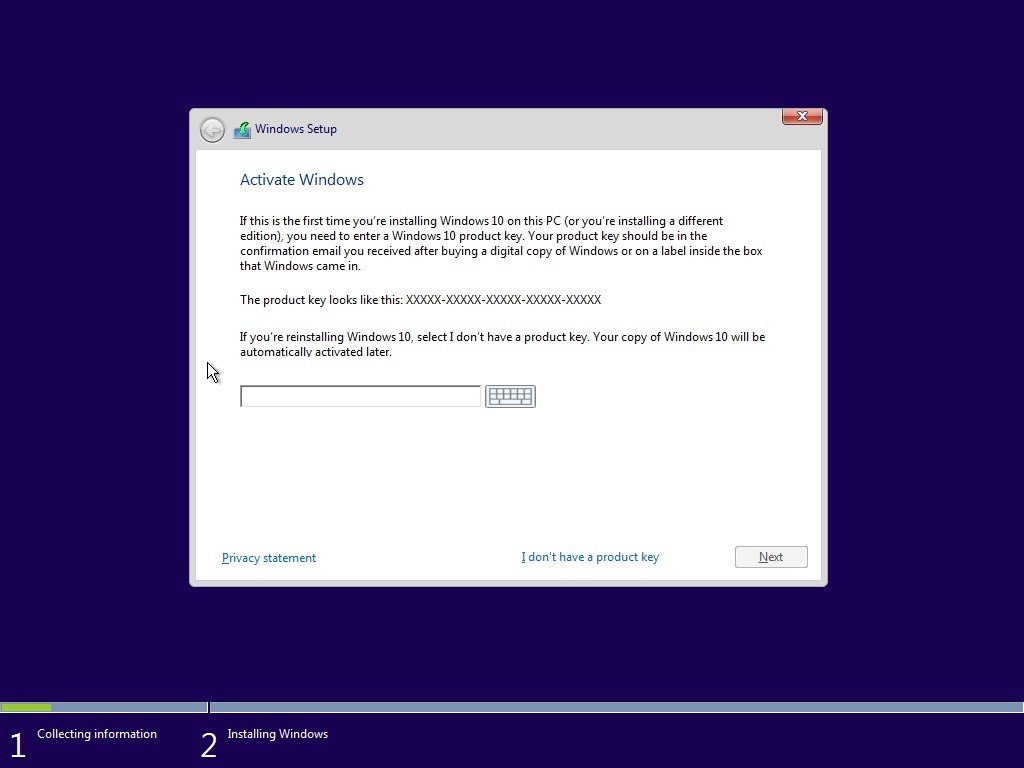
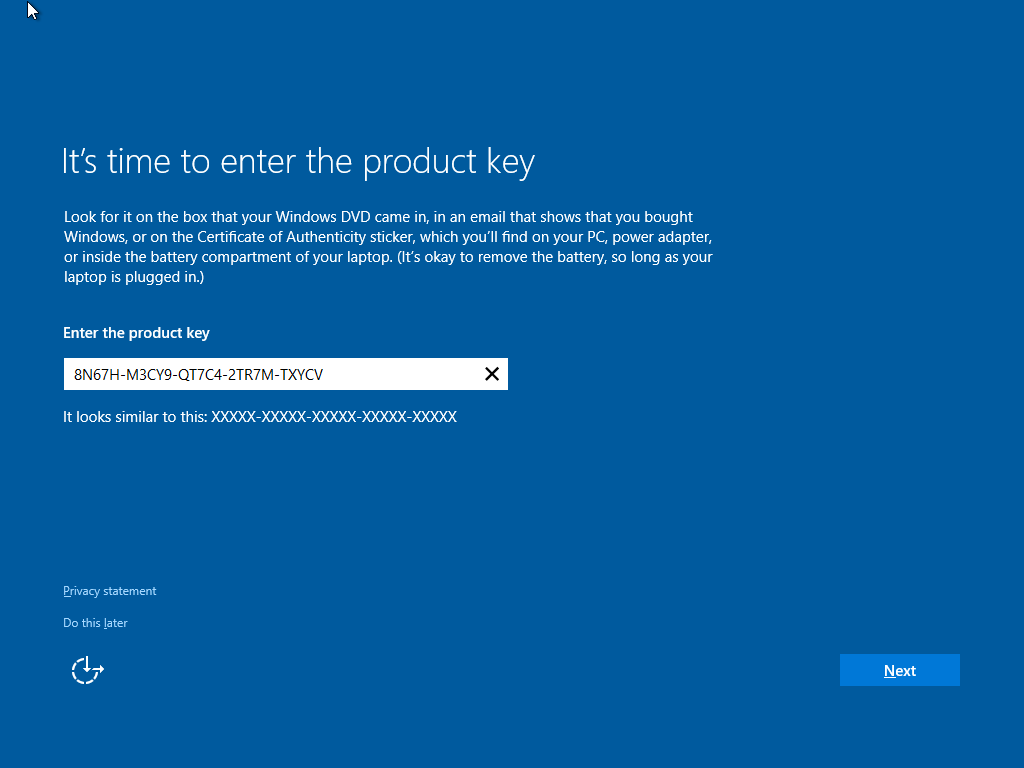
Suppose you decide to reinstall Windows 7 or Windows 8?You can reinstall or restore a system image of your previous version of Windows and continue using it, this will not affect the validity of the license.If you continue to experience problems entering your product key:

    Click Start > Settings (press Windows key + i) > Update & security > Activation then click Change product key

    windowsupdatekey

    OR

    Press Windows key + X

    Click Command Prompt (Admin)

    At the command prompt, type the following commands:

    slmgr.vbs -ipk xxxx-xxxx-xxxx-xxxx (allows you to replace the current product key with the specified)

    xxxx-xxxx-xxxx-xxxx – represents your product key

    Hit Enter on your keyboard

    Exit the command prompt

    Restart your computer

    Wait a while and it should activate, if not, give it a few days.

Have questions?

Get answers from Microsofts Cloud Solutions Partner!
Call us at: 856-745-9990 or visit: https://southjerseytechies.net/

South Jersey Techies, LL C is a full Managed Web and Technology Services Company providing IT Services, Website Design ServicesServer SupportNetwork ConsultingInternet PhonesCloud Solutions Provider and much more. Contact for More Information.

To read this article in its entirety click here.

Windows 10 Anniversary Update Guide

windows10anniversary

Update 8/16/16: The Windows 10 Anniversary Update has begun rolling out for Windows 10 Mobile. The Anniversary Update includes additional features and improvements for your Windows 10 phone. To manually check for the update, on Start, swipe over to the All apps list, then select Settings > Update & security > Phone update > Check for updates. Note that availability may vary by manufacturer, model, country or region, mobile operator or service provider, hardware limitations and other factors.

The Windows 10 Anniversary Update has begun rolling out for customers around the world*. The Windows 10 Anniversary Update is full of new features and innovations that bring Windows Ink and Cortana** to life; a faster, more accessible and more power-efficient Microsoft Edge browser; advanced security features; new gaming experiences and more. The Windows 10 Anniversary Update will start rolling out to Windows 10 Mobile phones in the coming weeks.

The Windows 10 Anniversary Update is being rolled out to Windows 10 PCs across the world in phases starting with the newer machines first. You don’t have to do anything to get the Windows 10 Anniversary Update, it will roll out automatically to you through Windows Update if you’ve chosen to have updates installed automatically on your device. However, if you don’t want to wait for the update to roll out to you, you can manually get the update yourself on your personal PC. If you’re using a Windows 10 PC at work, you will need to check with your IT administrator for details on your organization’s specific plans to update.

Here are a couple ways you can manually get the Windows 10 Anniversary Update

Go to Settings > Updates & Security > Windows Update

settings

1. In Windows Update simply click Check for Updates.

checkfor-updates

2. The Anniversary Update will appear as, Feature update to Windows 10, version 1607. Click update and the update will begin downloading and installing.

updateinstalling

Another way to get the Windows 10 Anniversary Update will be by clicking “Learn more” just below the “Looking for info on the latest updates? In Windows Update.

learnmore

From there you’ll be taken to a support page on Microsoft.com that will allow you to download the ISO file to your PC.

We hope you enjoy the Windows 10 Anniversary Update!

*Windows 10 Anniversary Update will be available in all countries where Windows 10 is available.
**Cortana available in select markets

Have questions?

Get answers from Microsoft’s Cloud Solutions Partner!
Call us at: 856-745-9990 or visit: https://southjerseytechies.net/

South Jersey Techies, LL C is a full Managed Web and Technology Services Company providing IT ServicesWebsite Design ServicesServer SupportNetwork ConsultingInternet PhonesCloud Solutions Provider and much more. Contact for More Information.

To read this article in its entirety click here.

Access Control Panel in Windows 10

Microsoft is phasing out the traditional Control Panel with the Windows 10 Creators Update, but with a few tweaks you can still access it. Mark Kaelin explains how.

Microsoft has been slowly and methodically rolling out the Windows 10 Creators Update to customers throughout 2017. If you are one of the lucky ones to receive the update already, you have likely noticed more than a few changes to how Windows 10 looks and works. Some of the changes are good, some are a little annoying.

One of the changes Microsoft implemented in the Windows 10 Creators Update that I don’t like is the removal of the traditional Control Panel from the Win+X menu—that’s the menu you see displayed when you right-click the Start button from the Desktop interface (Figure A). Microsoft is migrating the interface for configuring the operating system to the new Settings screen, but some of us, especially IT pros who have been doing this for a long time, prefer the old Control Panel interface.

Figure A

Fortunately, the old Control Panel is still available; it is just lurking in the background. We can bring it back to the forefront with a few clicks, tweaks, and tricks, and this tutorial will show you how they work.

First, what you can’t do

The commands for the Win+X menu are located in this file folder, as shown in Figure B:

C:\Users\USERNAME\AppData\Local|Microsoft\Windows\WinX

Figure B

But you can’t just add a shortcut to the Control Panel executable to one of those Group folders and expect to see it show up in the Win+X menu. The special links within the Win+X menu system are protected with a special hash calculation, which greatly complicates any attempt to edit its contents.

To add the Control Panel back to the Win+X menu you will have to use a link with the hash already included. In general, that means acquiring a link from a version of Windows that is not the Creators Update. It is possible with the help of a third-party app, but it is complicated, convoluted, and not really necessary.

If you want to go through the process, you can check out this website for the details. But before you do, I have some simple solutions that might work better for you.

Now, what you can and should do

For those of us who want to keep things simple, here are a couple of ways to access the traditional Control Panel in Microsoft Windows 10 Creators Update.

1. Search for it

Figure C

If you just want to access the control panel occasionally and not add more icons to your desktop, the simplest way to access the Control Panel is by typing control panel in the Cortana search box. Control Panel should be the first entry in the search results (Figure C). You can left-click the link to start the app or right-click it and add the link to the Start Menu or to your Taskbar for easy future access.

Adding the Control Panel to the Start Menu is handy if you are using a touch screen interface. Adding it to the Taskbar works well if you find yourself accessing configuration settings on a regular basis.

2. Add to Desktop

Figure D

There are two ways to add the Control Panel to your Desktop. The first way is fairly obvious: Right-click an empty area on your Desktop and create a new shortcut that points to the Control Panel executable located here:

C:\Windows\System32

But you can also add the Control Panel icon to your Desktop through the Personalization screen. Right-click the Start button to open the Win+X menu and click the Settings menu item. Click the Personalization icon to open the next screen and drill down to the Themes screen. Scroll down until you see the Desktop Icon Settings item under the Related Settings area and click it. A dialog box will pop open and you can check the Control Panel radio button to add that link to your Desktop (Figure D). Click OK and the icon will be added as a primary system link on your Desktop.

Have questions?

Get answers from Microsofts Cloud Solutions Partner!
Call us at: 856-745-9990 or visit: https://southjerseytechies.net/

South Jersey Techies, LL C is a full Managed Web and Technology Services Company providing IT Services, Website Design ServicesServer SupportNetwork ConsultingInternet PhonesCloud Solutions Provider and much more. Contact for More Information.

To read this article in its entirety click here.

Access Office 365 Compliance Manager

As more consumers grow disenchanted with Apple, Microsoft has taken the opportunity to cash in on the growing popularity of Surface devices.

Microsoft claims that more people are switching to Surface devices from Macs than ever before. That’s a concept that would have been hard to picture when Microsoft first released the Microsoft Surface RT and Surface Pro in 2012 and 2013, respectively. The Surface RT suffered from a watered-down version of the new — and generally disliked — Windows 8 operating system and, while the Surface Pro featured the full desktop version, it came with hardware limitations and a high price tag.

In a sea of clam shell notebooks, all vying to be thinner and lighter than the last, the Surface clumsily debuted as a confusing mashup of a tablet and a laptop. And people didn’t like it. RT users complained of the limited functionality and never-ending bugs, while Surface Pro users were forced to pay a high price just to avoid Windows RT. In fact, the Surface RT did so poorly that Microsoft had to take a $900 million dollar write-down after drastically cutting the price of the device.

The backlash even made some question whether or not we were witnessing the end of Microsoft. It might seem dramatic now in 2016, but in 2013, people really missed the Start menu. Instead, Microsoft listened to consumers’ complaints to find a balance between the company’s vision and what consumers wanted. And it worked — Microsoft has regained credibility and popularity by creating new products that didn’t simply mimic or improve upon what was already out there.

Apple’s identity crisis

For a company once targeting modern, creative professionals, it’s hard to tell who Apple makes products for anymore. Apple’s devices now feel tailored to a low-tech crowd, or people who like new tech, but just aren’t that interested in specs. They want a reliable, easy-to-use device that just works. But where does that leave the original fan base of creative workers who need high-performance and cutting edge features? Apple hasn’t left this industry with many options — and at this point, you can get more for your money in graphics and performance on a Surface Book than a Macbook Pro. Plus, with the newly announced Microsoft Studio, there is finally a strong alternative to the iMac — with a touch display, no less.

Apple’s compromise is the MacBook Pro with Touch Bar, which features a dynamic touch bar replacing the row of function keys on the keyboard. The display changes depending on settings and the app you’re using; it’s a cool feature, and certainly useful, but it’s a confusing message. If the iPad Pro is competing with hybrid notebooks like the Surface Pro 4, but Apple doesn’t think people want touch-displays on a notebook, then does that make the iPad Pro a giant iPad?

Microsoft is focused on touch-based input — in fact, you’d be hard-pressed to find even a mid-ranged PC that doesn’t at least offer the option of an upgrade to a touch display. The two companies have taken different stances, but in siding with touch, Microsoft has more to offer in each of its devices. If you want a notebook that can sometimes be a tablet, or a tablet that can sometimes be a notebook, you can purchase just one device instead of two.

Microsoft has focused on developing a family of Surface devices that can suit a wide range of users. It starts with the lower-end Surface 3, which is a great device for anyone who just wants a computer to surf the web and use basic apps. The Surface Pro 4 acts as a step up in size and hardware, with configurations for anyone from light users to those who need more performance. And now, with the Surface Book and Surface Studio, even those who need the highest end configurations for heavy-duty video or image editing have an option.

The Surface in pop culture

Remember when Windows users were the boring, out of touch, suit-wearing nerds in commercials, and a Mac user was the hipster CEO of a startup — that guy in 2006 who wore hoodies and scootered to all his meetings? That landscape has changed a lot since then, and now Microsoft is the one calling out Apple on selling outdated hardware and falling behind the curve.

Microsoft has clearly made a push to get the Surface in front of consumers anyway possible — CNN commentators used the devices in this year’s debates, but it was later discovered they were using them to hide their iPads. Hulu’s The Mindy Project also features Mindy Kaling’s character using a Surface Book, with one very obvious instance of product marketing, where she very purposefully ejects the display from the keyboard. And what New Englander can forget when the Surface Pro 4 made headlines after Patriot’s coach, Bill Belichick, became so frustrated with the technology that he spiked it onto the field.

These might not be the most positive representations of the brand, but the visibility of the device seems to be working. In places where it used to be a sea of aluminum notebooks, featuring the familiar, backlit Apple logo, we’re starting to see some diversity.

Just as it wasn’t the end of Microsoft in 2013, it’s now Apple’s chance to step out of the spotlight and make some changes. But there’s nothing like a little healthy competition to help spark new, creative designs and that’s exactly what motivated Microsoft to step back, refocus and come back strong.

Have questions?

Get answers from Microsofts Cloud Solutions Partner!
Call us at: 856-745-9990 or visit: https://southjerseytechies.net/

South Jersey Techies, LL C is a full Managed Web and Technology Services Company providing IT Services, Website Design ServicesServer SupportNetwork ConsultingInternet PhonesCloud Solutions Provider and much more. Contact for More Information.

To read this article in its entirety click here.

How do I open an additional mailbox?

Description

This FAQ describes the steps you have to follow to open a second mailbox in Outlook. Before following the procedure, be sure you have the sufficient rights to see the e-mails in the additional mailbox. The additional mailbox must exist on an exchange server where you have access to.

Solution

1. Start Outlook (icon on the system tray).

or  Start > All Programs > Microsoft Office > Microsoft Office Outlook 2007.

2. Open the properties of the “Microsoft Exchange Server” Service. Tools > Account Settings … (The “E-mail Accounts Wizard” pop-up window appears).

3. Select ‘Microsoft Exchange‘ and press ‘Change…

4. On the ‘Microsoft Exchange Server Settings‘ tab, select ‘More Settings …

5. On the ‘Microsoft Exchange Server‘, add the additional mailbox select the ‘Advanced‘ tab.

In the section ‘Mailboxes‘, select ‘Add‘ (The “Add mailbox” pop-up window appears).
Fill in (part of) the name of the user who’s mailbox you want to open.
(If more then one name exist, a ‘Check Name‘ window appears from which you can choose the correct name.

6. Once the correct name is found, the name is listed in the list ‘Open these additional mailboxes’.

7. Click ‘OK‘, ‘Next‘ and ‘Finish‘ to close all windows.

8. The additional mailbox can be accessed through the ‘Folder List’.

Enable ‘Folder List’ view through View > Navigation Pane (ALT+F1).

To View Entire Article Click Here

Hosted Exchange Email: Quick Setup

Hosted ExchangeArm your business for success!
Let us show you how simple,
quick & affordable it can be.


With the unbeatable combination of Microsoft Exchange®, Microsoft SharePoint®, Microsoft Outlook® 2010 and Outlook 2011 for Mac, you can now:


  • Manage email and share contacts and calendars across your entire organization–and across PCs and Macs.
  • Schedule meetings and synchronize tasks in an instant by easily viewing and comparing availability of coworkers across multiple calendars.
  • Stay on top of vital information–from home, or on the road, or virtually anywhere else—via Outlook Web Access or any Windows-enabled mobile device.
  • Use Microsoft SharePoint® as a shared environment for project collaboration, and to manage and backup essential business information.
  • Streamline search functions to reclaim the big part your day that is now spent just tracking down information.
  • Protect your business from junk mail, viruses and phishing websites – with our 100% data protection guarantee.
  • Organize your day automatically with the To-Do Bar that displays your flagged emails and tasks.
  • Far more powerful than POP email, Microsoft’s corporate-class email (MAPI protocol) not only lets your users access and share critical information from any web browser, it also allows you to establish public folders and centrally set and manage the rules for your company’s email.
  • Keep your business ahead of the curve–and the competition: with our hosted packages, updates are automatic, so you always have the most advanced Microsoft Exchange® and Microsoft SharePoint® capabilities.
  • Gain peace of mind, because it’s all managed and supported for you 24X7 at a low monthly cost.

Two Types of Plans:

Individual Plan

Group Plans

CALL NOW:  (856) 745-9990

Win10 Available Starting July 29

billionphotos-1856284

From today, Windows users will be able to reserve their upgrade to the new operating system, which has seen its icons revamped by Microsoft.

Microsoft’s next operating system will be available for PCs and tablets from 29th July – with existing Windows users able to reserve their upgrade from today.

Windows 10 will be available both on new PCs and as a free upgrade for those running Windows 7 and 8.1. Owners of these operating systems will see a Windows icon in their taskbar that will allow them to “reserve” their upgrade. The 3GB file can be downloaded from 29th July.

The free upgrade will be available until July next year and those choosing to switch to Windows 10 can cancel their reservations at “at any time”, according to Microsoft.

While Windows 7 Enterprise, Windows 8/8.1 Enterprise and Windows RT/RT 8.1 releases can’t be upgraded in this way, Microsoft has said that “Active Software Assurance customers in volume licensing” will be able to “upgrade to Windows 10 enterprise offerings outside of this offer”. Microsoft are yet to clarify when users of Enterprise versions of Windows will be able to move to Windows 10 Enterprise.

Microsoft is betting Windows 10 will win over users with its ability to run on a variety of platforms, allowing users to use the same cloud services and software as they swap between fixed and mobile computers.

“We designed Windows 10 to run our broadest device family ever, including Windows PCs, Windows tablets, Windows phones, Windows for the Internet of Things, Microsoft Surface Hub, Xbox One and Microsoft HoloLens-all working together to empower you to do great things,” said Terry Myerson, VP of Microsoft’s operating systems group in a blog post.

Features such as Continuum mode will detect when mobile Windows 10 devices are docked with a mouse, keyboard and monitor and reorient the UI to suit – for example switching from tap-friendly tiles to smaller icons suited to a mouse pointer – whileUniversal Apps will tailor their interface to the device they are being used on.

Myerson is keen to stress that “Windows 10 brings back the Start menu” familiar to Windows 7 users, following the backlash against Windows 8’s fullscreen Start menu.

Microsoft is also hoping users will take to Cortana, the built-in virtual assistant that users can talk to in order to set appointments, search for information and answer rudimentary queries, and which should become more capable as it learns more about you.

Windows 10 will include the free anti-malware software Windows Defender, which will have free updates for the lifetime of the OS, as well as its new faster and more capable Edge web browser.

While the operating system will launch on PCs and tablets in July, it is expected tolaunch on phones, small tablets, Xbox, and Hololens at unspecified later dates.

Microsoft said it had refined the OS using feedback from more than four million Windows Insiders testing early builds of the OS.

The firm revealed a new, or at least slightly tweaked, look for Windows 10, in its latest Build 10130, which has just been made available via the Windows Insider programme.

The update overhauls the rather plain icons present in earlier builds and replaces them with what Microsoft describes as “more modern and lightweight” alternatives. The revamp means that app icons will also be more consistent between desktop and mobile in apps such as Word and Excel.

While the new icons may not look vastly different, Microsoft said extensive work had gone into the redesign.

“Between the legacy aero-style icons and new app icons, several thousand icons were designed and redesigned. We explored Swiss graphic design, Dutch product design, and modern architecture (among other design fields and styles) to inform and inspire the design process. The icon evolution will continue as we push more consistency and better functionality,” according to a blog post.

Other improvements in the latest build include the ability to customise the Start menu, a new look for Jump Lists on the Taskbar, new swipe shortcuts for Tablet mode, the addition of a Favorites pane and other features to the Edge browser, Taskbar settings for Virtual Desktops, a Cortana keyboard shortcut, Print to PDF feature and fullscreen playback for the Movies & TV app.

Have questions?

Our small business team is here to help.
Call us at: 856-745-9990

South Jersey Techies, LLC is a full Managed Web and Technology Services Company providing IT Services, Website Design ServicesServer SupportNetwork ConsultingInternet PhonesCloud Solutions Provider and much more. Contact for More Information.

South Jersey’s New Area Code Explained


“A New South Jersey area code is being introduced to the (609) area code region and it will affect dialing procedures”, Julia Marnin, Cherry Hill Courier-Post

The new area code (640) is being introduced to the (609) area code region in South Jersey and it will affect how local residents dial calls.

The new dialing procedures will be in effect on August 18th.

New phone lines will begin to be issued the area code (640) on September 17th.

CALL US NOW!