After performing an in-place upgrade on a Windows machine, you will find a WINDOWS.OLD folder in the root of C:. This folder will have a backup of your old program files, appdata and Windows folder… just in case you need to revert back or recover something that might have been lost during the upgrade. When you try to delete it though you are told you don’t have permissions. Just a small point here, it is generally not recommended to do in-place upgrades on servers. In fact there are some products (e.g. Exchange, ConfigMgr) that explicitly state they do not support upgrading the Operating System. There is of course a difference between “what works” and “what is supported”, but we do suggest where possible you do a clean Server install and migrate your application to the new server. Anyway, let’s assume you’ve understand all the risks and have done a successful in-place upgrade, you now find the old WINDOWS.OLD folder of several GB in size sitting there. If all is well, then you might as well just delete it.

SOLUTION
On Desktop OS version, you can just use the disk cleanup tool to remove it, but that is not available (by default) on Servers, so there are a couple of approaches.
Command line tools to take ownership and delete the folder. Make sure to “run as administrator”
How can I delete the windows.old from an upgraded Windows Server?
For a client OS that’s upgraded, the Disk Cleanup utility can be used to delete the very large windows.old folder containing the old OS. This isn’t available on a server OS without installing the Desktop Experience feature.
To delete, it is necessary to take ownership of the folder, give administrators full control, then delete. This can be done with the commands below:
- takeown /F c:\Windows.old\* /R /A /D Y
- cacls c:\Windows.old\*.* /T /grant administrators:F
- rmdir /S /Q c:\Windows.old
Or you can add the “Desktop” features to provide the Disk Cleanup tool:
Step By Step Guide to Enabling “Disk Cleanup Utility”
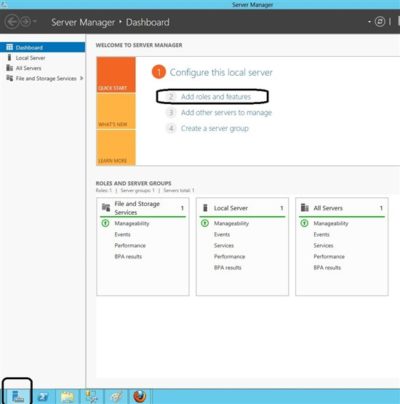
1. Open The Roles and Features Wizard
To open the roes and feauture wizard. Lauch the “server manager” by pressing the Windows key
and clicking on the server manage please see Screenshot as shown.

Personally, the command line option is less messy and saves having to add features to your server that don’t really need to be there.
2. Click on Add role and Feature
Click on add role and feture to launch the add role and feature wizard.
3. Choose installation Type
Choose rolebase or feature based installation to install to local machine.
4. Click Next all the way to features
Click “next” all the way to features. Locate “User Interface and Infrastructure”. Click on “Desktop Experience”
and install additional required feature.
5. Proceed with the installation and Reboot
Make it sure that you reboot the system
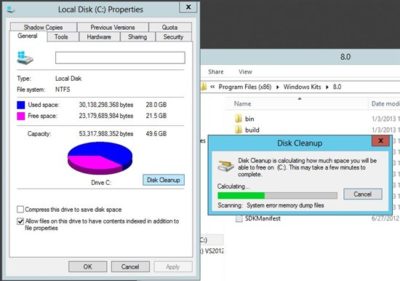
6. Verify that the Utility is indeed installed
Ready to run diskcleanup. See screen shot below.

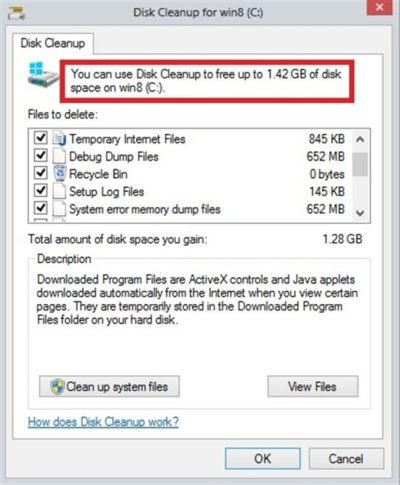
Disk Cleanup in Action
Below is a sample snapshot of disk cleanup in action.


